- Joined
- Feb 25, 2021
- Messages
- 3,165
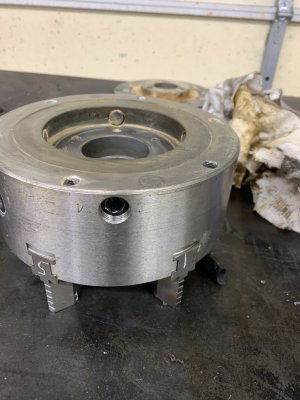
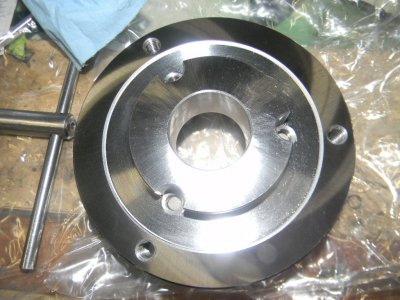
As I've already posted, I went to an auction earlier this week, and picked up three six jaw chucks (two 8" Buck, and one 6" Bison). All three of these are of the set-tru variety. Of course none of them came with the backplates I need, D1-6 for two of the lathes, and a D1-3 for the smallest. New Bison/Buck set-tru backplates would rival the cost of all three chucks for one backplate, so I went with a Shars set-tru style backplate. I have no doubt that it's not at the same quality as the name brand backplates. For one thing the Buck backplate is steel, whereas the Shars model is cast-iron. Buck rates their 8" 6-jaw at 3000 RPM. But a cast iron backplate would make me nervous at those RPM. Of course the used chuck may be of different specs than a current chuck, any factory markings with such information are long gone.
The first target for the 6-jaw is my Monarch 12CK lathe. It is a worthy machine, but at 77 years old it does have some limitations. One of which is a maximum RPM (after some modifications) of about 1000RPM. More within the range that is comfortable with a Chinese cast iron backplate.
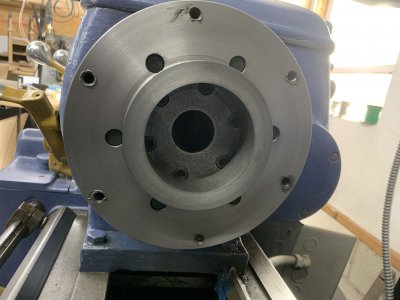
First step was to clean up the spindle mount on the lathe. Wipe it off, blow it out, repeat. I lightly stoned it smooth, did the same for the backlate mounting face, and put the backplate on the lathe. First thing I noticed was the camlock studs dragged going in/out on the spindle. So they got stoned too. I put an indicator on the face of the backplate. 0.009" runout! yikes. Shars claims it is "Finished Machined" in the title, but the fine print says The back plate is fully machined but still need secondary operation to fit with... The inner shoulder that the set-tru registers on was also visibly out of center. I didn't put and indicator on it since I new that needed to be turned down.
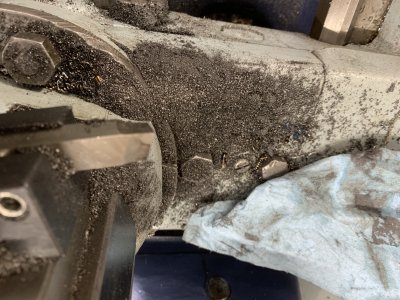
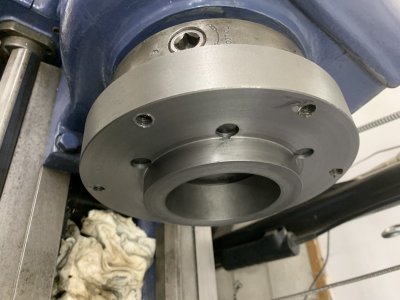
Being cast iron, and where I wanted minimal skim cuts, this was an ideal (in my mind) job for a HSS tool. Took a few minutes to grind up something that would cut into the corner and get both faces. Used the diamond lapping machine to finish honing it. Unfortunately the picture focused on the resulting mess not on the HSS tool I wasn't too particular about exact angles, cast iron just isn't that challenging. Just applied oil liberally while cutting.
Having squared up the backplate, I decided I really should service the chuck before putting it on. So I took it apart, thoroughly cleaned the old grease and chips out of it, lightly greased it and reassembled. The front and back of the chuck are held together with 6 SHCS bolts near the center hub. By loosening those up to be slightly proud, I was able to stand the chuck on its side and lightly tap each in turn to get the halves to separate. Best approach I could figure, if anyone has a better procedure I'd be interested.
I wish I would have gotten a picture of how set-tru adjustments on the back of the chuck. I'll grab a picture tomorrow of that angle on one of the other chucks.
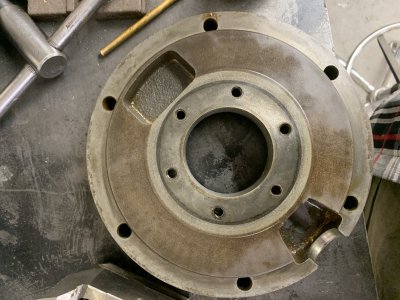
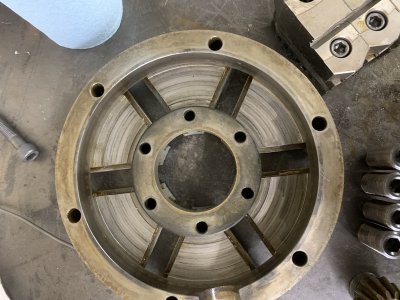
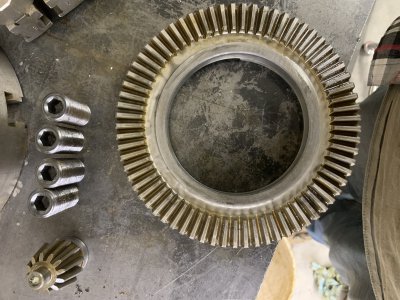
The innards of the chuck looked good, scroll sat tight in the back part. Looks like a few chips had left scours in the front, trapped in the scroll threads? Picture looks worse than a fingernail indicates (note there are two minor shoulders in there too). Jaw bases (2-piece jaws) fit snuggly in their tracks.
Getting the chuck mounted on the backplate and trued up took some tinkering. Note that the shoulder of the backplate needs to be turned a few thousandths smaller than the chuck recess. This gives some clearance to center up the chuck. I had to take the chuck off and shave the shoulder once to get the appropriate fit.
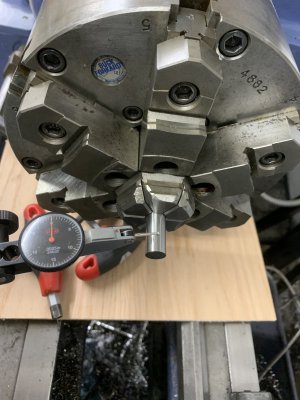
I set up a dowel pin and indicator to center up the chuck. Centering up the chuck is really counter-intuitive after working with a 4-jaw, as you need to tighten on the lows and loosen on the high side. You're working 4 setscrews to center the chuck on the backplate, and 6 SHCSs to tighten up the chuck onto the backplate. I think a torque wrench, and slowly stepping up the torque on those SHCSs betweem centering with the 4 setscrews, will be my procedure for next time.
I was using a .0005" indicator. Got it centered to the point where I couldn't detect any needle movement beyond the slight deflection from friction when starting/stopping. Of course, it was either Stephan Gotteswinter or Robin Renzetti who said if you can't see any movement, you're not using a fine enough indicator. Reality is the bearings (when cold) on this old lathe will deflect about .0004 if I use a light lift with a hoist on the chuck. So I'm calling it centered.
I'd upload a video but my internet connectivity makes that painful.
Cleaning up the lathe of all the cast iron shavings took a while
The first target for the 6-jaw is my Monarch 12CK lathe. It is a worthy machine, but at 77 years old it does have some limitations. One of which is a maximum RPM (after some modifications) of about 1000RPM. More within the range that is comfortable with a Chinese cast iron backplate.
First step was to clean up the spindle mount on the lathe. Wipe it off, blow it out, repeat. I lightly stoned it smooth, did the same for the backlate mounting face, and put the backplate on the lathe. First thing I noticed was the camlock studs dragged going in/out on the spindle. So they got stoned too. I put an indicator on the face of the backplate. 0.009" runout! yikes. Shars claims it is "Finished Machined" in the title, but the fine print says The back plate is fully machined but still need secondary operation to fit with... The inner shoulder that the set-tru registers on was also visibly out of center. I didn't put and indicator on it since I new that needed to be turned down.
Being cast iron, and where I wanted minimal skim cuts, this was an ideal (in my mind) job for a HSS tool. Took a few minutes to grind up something that would cut into the corner and get both faces. Used the diamond lapping machine to finish honing it. Unfortunately the picture focused on the resulting mess not on the HSS tool


Having squared up the backplate, I decided I really should service the chuck before putting it on. So I took it apart, thoroughly cleaned the old grease and chips out of it, lightly greased it and reassembled. The front and back of the chuck are held together with 6 SHCS bolts near the center hub. By loosening those up to be slightly proud, I was able to stand the chuck on its side and lightly tap each in turn to get the halves to separate. Best approach I could figure, if anyone has a better procedure I'd be interested.
I wish I would have gotten a picture of how set-tru adjustments on the back of the chuck. I'll grab a picture tomorrow of that angle on one of the other chucks.


The innards of the chuck looked good, scroll sat tight in the back part. Looks like a few chips had left scours in the front, trapped in the scroll threads? Picture looks worse than a fingernail indicates (note there are two minor shoulders in there too). Jaw bases (2-piece jaws) fit snuggly in their tracks.
Getting the chuck mounted on the backplate and trued up took some tinkering. Note that the shoulder of the backplate needs to be turned a few thousandths smaller than the chuck recess. This gives some clearance to center up the chuck. I had to take the chuck off and shave the shoulder once to get the appropriate fit.
I set up a dowel pin and indicator to center up the chuck. Centering up the chuck is really counter-intuitive after working with a 4-jaw, as you need to tighten on the lows and loosen on the high side. You're working 4 setscrews to center the chuck on the backplate, and 6 SHCSs to tighten up the chuck onto the backplate. I think a torque wrench, and slowly stepping up the torque on those SHCSs betweem centering with the 4 setscrews, will be my procedure for next time.
I was using a .0005" indicator. Got it centered to the point where I couldn't detect any needle movement beyond the slight deflection from friction when starting/stopping. Of course, it was either Stephan Gotteswinter or Robin Renzetti who said if you can't see any movement, you're not using a fine enough indicator. Reality is the bearings (when cold) on this old lathe will deflect about .0004 if I use a light lift with a hoist on the chuck. So I'm calling it centered.
I'd upload a video but my internet connectivity makes that painful.

Cleaning up the lathe of all the cast iron shavings took a while
Last edited:


