40:1 dividing head plates - hole numbers?

I would not trust the average NC mill to produce a spacing device that needs to be accurate to minutes of arc when used on a dividing head, rotary table or spacer.
This is what jig borers are for.
 
And the 40:1 reduction in the head reduces the errors by the same factor. Now you are talking seconds of arc error. Or make a second round of plates with your first plates and the error is reduced 40X again.
 
It may also increase the error 40 times (-:
Registration errors in printing machinery come to mind, if you are printing 1000 labels per minute and are off by .001" that is 1" per minute error, this would place the picture of the missing person on the corner of the milk carton in short time.
 
We are not discussing printing presses. we are discussing a dividing head. So lets just stick to that and leave out the whataboutisms.
if there is an error in the position of one of the holes in the plate the 40:1 gear reduction in the worm gears reduces error of rotation of the spindle by 40 X.
Make a plate with 1 degree error in a plate.
Put the plate on the dividing head
Make a new plate. 1 degree error in the plate makes .025degree (1.5 minutes) error in new plate.
Now make a third plate if you really care. error is now .025/40=.00125 degree (.075 minutes) or 4.5 seconds of arc error.
This is a case where the tool can improve the accuracy of its self.
 
I am in the middle of making a 40:1 indexer and started exploring home made plates and just off hand it seems the 49 hole row would be approximately 3..9" in diameter allowing each hole to take up 0.25" in the circle. Not having seen or handled a plate it would seem a little conjested. Anyway it is an interesting exercise and I am considering 6.25" diameter plates. Thanks to Norton Dommi I may have the number of holes per row and number of plates already determined.
Ray
 
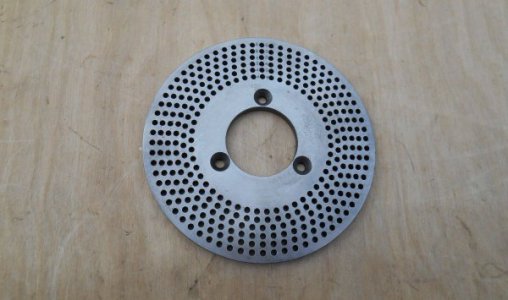
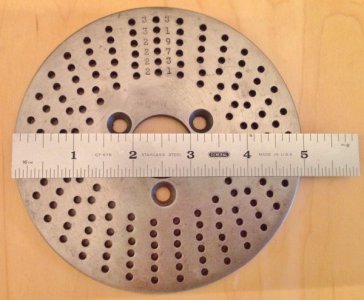
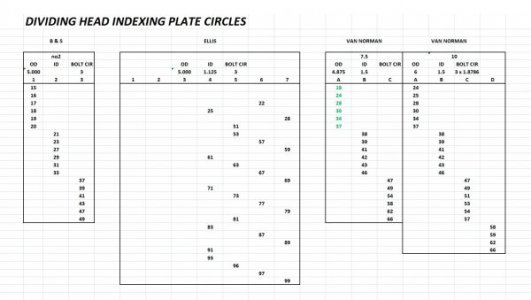
I am not familiar with what plates the Carroll came with. There is something to be said for going with stock parts. But at the end of the day, for most dividing heads, only the center hole & the mount bolt circle matter. It also helps accuracy to have the plunger pin & hole size closely matched. Here is a chart of a few different sets & pics of some plates.

INDEX PLATES.jpg

Van Norman 7 1/2 plate 'C'
INDEX PLATE 47-66 1.5 ID a.jpg

Brown & Sharpe plate '2'
20170610 1-125 ID 21-23-27-29-31-33 b.jpg
 
Last edited:
At the end of the day if you have a ROTAB for practical purposes you only need the existing scales. I had to make a plate with 125 holes. Some Mysterium cleaned up on the shaper , turned on the lathe and centered on the ROTAB with a spacer underneath and away you go.
I found a link to a good 4 part video on this which I think is worth watching even as a refresher. As Asm109 has mentioned accuracy increases if you make a second set of plates but careful work will make an accurate set probably as good as what comes with most tables.
 
...
This is a case where the tool can improve the accuracy of its self.

That depends. If the holes are all placed independently, then that's correct. If, otoh, there's any cumulative error in the holes, then you don't get any improvement.

Say the holes are consistently out of place by 0.01°. For a distance of 40 holes, that accumulates to 0.40°, and then you gear that down by 40:1, and you're back where you started with 0.01° error.

That's why you can't just do to same approximation over and over again and make the plates more accurate. An approximation in the dividing ratio creates a consistent error, which simply replicates itself on each iteration. Otherwise I could use a 40 hole circle as an approximation to a 39 hole circle, and it would magically transform itself into a 39 hole circle after multiple replications.

You do get the 40:1 improvement when going from a cnc plate, but that's a one time deal, and it doesn't work if, for example, the plate was cnc'ed in incremental polar mode, where the error accumulates from one hole to the next.

Sent from my Pixel XL using Tapatalk
 
Back
Top