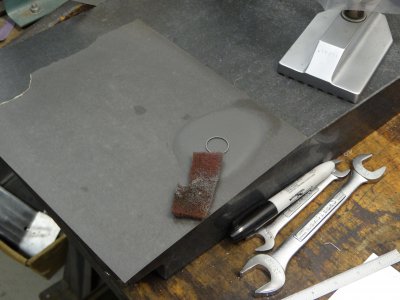
Cleaning A Surface PLate

Black Coffee. and before I get flamed - try it. Carl the tool maker at my first job had me do it on the three we had in the tool room.
It started the first week when he jokingly had me fetch a large mug of coffee. I thought it was for him but when I returned with the java
he handed me some white rags and showed me.
Also any sort of large temperature variance in the shop and a larger surface plate takes a long time to adjust, they don't like swings in temp.

_Dan
 
(and optical flats for that matter) for years. Never seen a problem yet. And pretty sure my optical flats were better than most any surface plate.

Cheers Phil

Hmm Phil, you make optical flats?
 
Searched on YouTube yesterday. There was a video on cleaning the surface plate From Standard Tools (or some such) he recommended Ammonia and just ammonia.

Hmmmm?:makingdecision:
 
I worked many years in a precision grinding shop. I used a surface plate every day of my life while there. We used Arm and Hammer baking soda with water. It's non abrasive and cleans the plate quickly, them rinse with damp soft cloth. This was recommended by the folks who resurfaced our plates every several years.
 
The day I have to inspect by a few millionths it's no longer a hobby. Mine also serves on occasion as a nice flat lapping surface. Example some cast iron piston rings I am making.piston rings 022.JPG

piston rings 022.JPG
 
Last edited:
Hmm Phil, you make optical flats?

Nope Charles, we used them at a previous workplace to check the flatness of our lapping plates and surfacing plates.
Before each use we would wipe them down with, usually just metho, and a special lint free cloth. it is imperative that the surface is clean and dry with absolutely NO oil, fingerprints etc to affect the reading. I cant see how the manufacturers could recommend cleaning an optical flat with a high evaporative rate liquid, if the use of such a product could cause errors. The heat transfer from handling them is supposed to induce errors though. We always used them in a clean room with temp/humidity controls.
However I am humbled that you may have thought I had the ability to produce optical flats ;)

Cheers Phil
 
The heat transfer from handling them is supposed to induce errors though. We always used them in a clean room with temp/humidity controls.
However I am humbled that you may have thought I had the ability to produce optical flats ;)

Cheers Phil

It does, markedly.
Next time your down we will get the ronchi/foucault tester out and you can see how much a lightly placed finger raises the surface as well as see the heat waves coming from said finger.
Such precision from a home made device cobbled together from scrap and two ultra cheap chinese micrometers.
 
In the sixties my brother was a trainee in a company producing weighing and packiging machinery.
Him and a couple of others were discussing working to a 0.001 mm tolerance.
The old german foreman then told them what a 0.001 mm was:
You crap into your hands, wring them together, wash them thoroughly, and what you still smell after that, now thats a 0.001 mm.

:lmao:
 
Back
Top