- Joined
- Feb 2, 2013
- Messages
- 3,957
i have had an interesting week.
i had need to loosen a few things that didn't wanna let go.
rather than tryin' to work harder, i did my best to work smarter.
Case 1- Large Stainless Nut-
2" wrench needed...
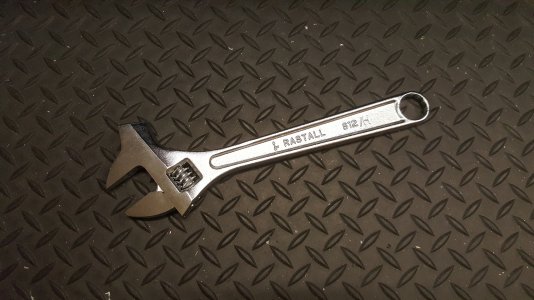
i didn't have a 2" wrench, but i do have a HF 15" Cresent Hammer* (adjustable wrench) that opens up to 2"
(*better hammer than wrench)
i didn't have enough mustard to move the nut (in a confined space) by just shoulder and wrench alone.
pipe was an obvious choice, but i didn't have any 1-1/2" ID Pipe to fit the handle of the HF cresent hammer
square steel tube was available but it would have been cumbersome to utilize.
so, i did the best thing i could come up with in 5 minutes of intense scrutiny and poor planning
i took a 28" long hunk of 3/4" square hot rolled unknownium bar and drilled 2 size X (.397") clearance holes on the center line.
i transfer punched the holes to the HF wrench and drilled and tapped the holes to 3/8-16TPI
i inserted a couple washers between the wrench and the newly formed handle and installed some 1-1/4" bolts
here's a couple shots
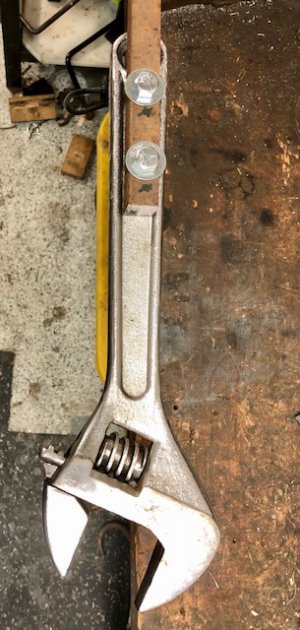
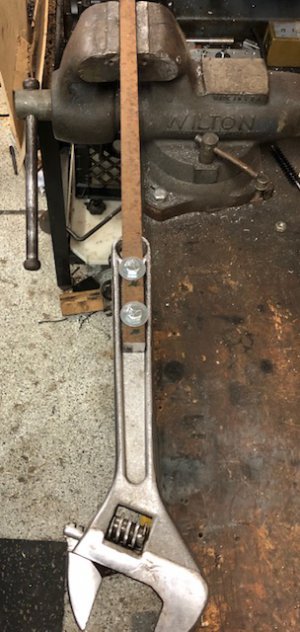
the extension was a bit over 23" and worked like a charm without much added bulk.
the best part is that it comes off !
Case 2- Stuck Stainless
i had 2 stainless steel parts frozen together by (all i can assume is) product and cleaning solutions
the assembly didn't want to come apart by gentle means
i didn't want to replace, discolor, or weaken the main part, so high heat was out of the question
i didn't want to mar the main part, the secondary part is considered a consumable part and doesn't need to be reused
(i made it a personal challenge to extract the shaft, without marring it too)
here are the particulars ...
the shaft is 3/4" OD and the main part is 1-1/2"OD
my immediate thought was to hold the 1-1/2" part and try to turn the 3/4" shaft out due to the size and awkwardness of the assembly
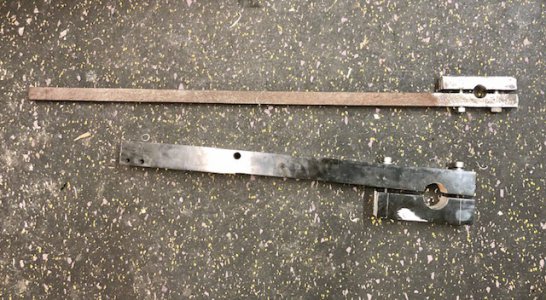
i made the handle for the HF cresent hammer in Case 1 above, so i used it to be the pre-drilled handle for wrench #2
this wrench needs to have the ability to grip with extreme amounts of pressure, without slipping- on a cylindrical surface
it sounds harder than it is, gunsmiths figured it out long ago.
i simply took a gunsmiths tool design , simplified it and adapted it for my use.
(the only credit i can EVER take is the application of things i learned somewhere else, then making them )
)
Back to the game...
as i said before i sidetracked , i was going to use the handle, that was pre-drilled to save time (read:lazy)
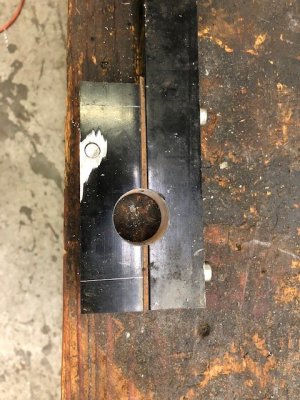
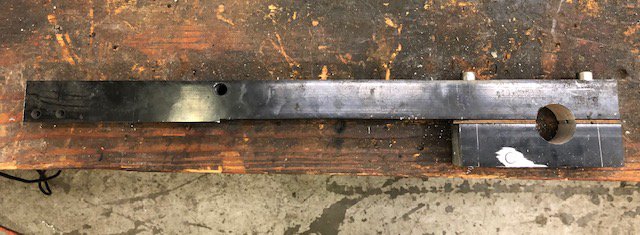
i cut off another piece of the same 3/4" stock to 4" and transfer punched, drilled and tapped to 3/8-16tpi
i put 2 1/4"spacers on the installed bolts- top and bottom- and sandwiched the spacers between the wrench halves
i center drilled and progressive drilled the wrench to 3/4"
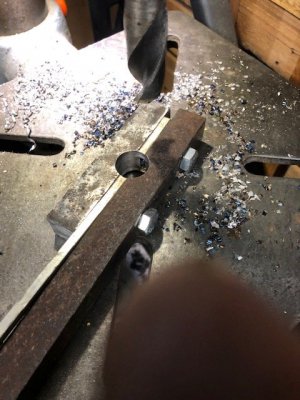
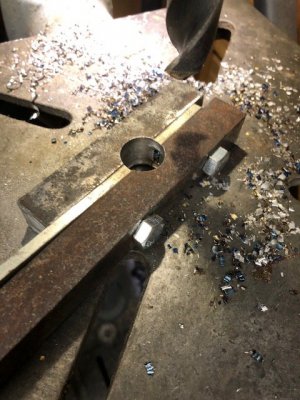
there was a little chatter in the interrupted cut phase of the drilling
i removed the sacrificial spacers and now have a wrench ready to go.
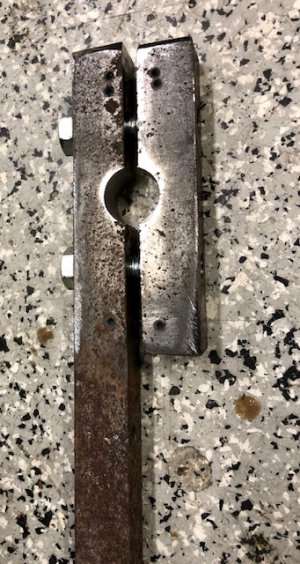

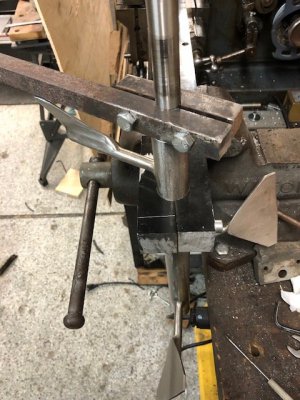
and a test fit to see if it will have necessary clearance to function
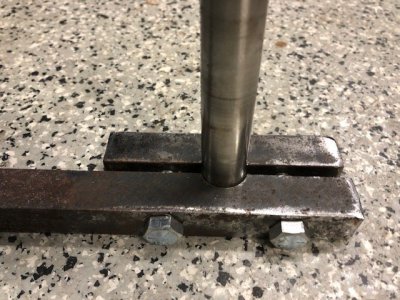
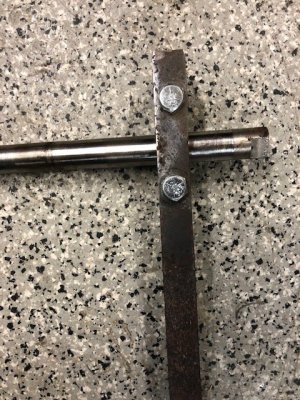
case 3 is coming soon!
i had need to loosen a few things that didn't wanna let go.
rather than tryin' to work harder, i did my best to work smarter.
Case 1- Large Stainless Nut-
2" wrench needed...
i didn't have a 2" wrench, but i do have a HF 15" Cresent Hammer* (adjustable wrench) that opens up to 2"

(*better hammer than wrench)
i didn't have enough mustard to move the nut (in a confined space) by just shoulder and wrench alone.
pipe was an obvious choice, but i didn't have any 1-1/2" ID Pipe to fit the handle of the HF cresent hammer
square steel tube was available but it would have been cumbersome to utilize.
so, i did the best thing i could come up with in 5 minutes of intense scrutiny and poor planning
i took a 28" long hunk of 3/4" square hot rolled unknownium bar and drilled 2 size X (.397") clearance holes on the center line.
i transfer punched the holes to the HF wrench and drilled and tapped the holes to 3/8-16TPI
i inserted a couple washers between the wrench and the newly formed handle and installed some 1-1/4" bolts
here's a couple shots


the extension was a bit over 23" and worked like a charm without much added bulk.
the best part is that it comes off !
Case 2- Stuck Stainless
i had 2 stainless steel parts frozen together by (all i can assume is) product and cleaning solutions
the assembly didn't want to come apart by gentle means
i didn't want to replace, discolor, or weaken the main part, so high heat was out of the question
i didn't want to mar the main part, the secondary part is considered a consumable part and doesn't need to be reused
(i made it a personal challenge to extract the shaft, without marring it too)
here are the particulars ...
the shaft is 3/4" OD and the main part is 1-1/2"OD
my immediate thought was to hold the 1-1/2" part and try to turn the 3/4" shaft out due to the size and awkwardness of the assembly
i made the handle for the HF cresent hammer in Case 1 above, so i used it to be the pre-drilled handle for wrench #2
this wrench needs to have the ability to grip with extreme amounts of pressure, without slipping- on a cylindrical surface
it sounds harder than it is, gunsmiths figured it out long ago.
i simply took a gunsmiths tool design , simplified it and adapted it for my use.
(the only credit i can EVER take is the application of things i learned somewhere else, then making them
 )
)Back to the game...
as i said before i sidetracked , i was going to use the handle, that was pre-drilled to save time (read:lazy)
i cut off another piece of the same 3/4" stock to 4" and transfer punched, drilled and tapped to 3/8-16tpi
i put 2 1/4"spacers on the installed bolts- top and bottom- and sandwiched the spacers between the wrench halves
i center drilled and progressive drilled the wrench to 3/4"


there was a little chatter in the interrupted cut phase of the drilling
i removed the sacrificial spacers and now have a wrench ready to go.


and a test fit to see if it will have necessary clearance to function


case 3 is coming soon!
Last edited:

