Happy Thanksgiving Day!
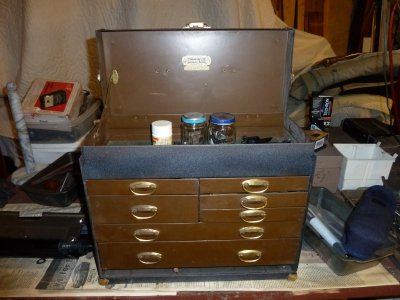
I bought a partly disassembled ATLAS TH54 10F & JVM 026 recently, and am still sorting through boxes of stuff I got with them. So far, I have the following - 3&4 jaw chucks, steady & following rests, a Kennedy toolbox full of all sizes & shapes of bits & indexable carbide inserts(no holders though), 5 atlas & williams toolholders, a thread-on-the spindle Jacobs chuck, about 25 calipers, 2 #2MT dead centers(junk), 1 V grooved pad for tailstock centering of rounds, taper attachment. I got some things I can't I.D. & would appreciate help. See attached photo. One of the items, I've been told, could be a quick mount for armatures//generators, the other item(no photo yet) could be a homemade tailstock replacement for long, long stock, where the lathe tailstock would be removed from the lathe, and this piece mounted on a bench or table some distance away. (can't find the photo of this one- will send with later post)
I have replaced the split nuts and done a lot of cleanup work and assembly of the drive components. The ways mic just over .375(.378) which is a surprise because I thought I saw somewhere that .375 was the as-new dimension. Can anyone explain this? There is no noticeable wear to the ways that can be felt with a fingernail. A thought - I didn't check my mic, but it has been reliable in the past.
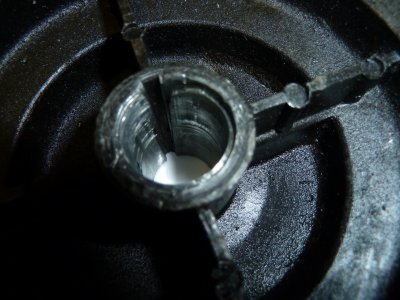
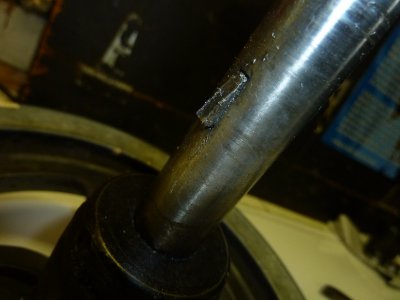
Locating the jackshaft drive base took some real studying, but I am pretty close now. I will have to move it over about 3/4" to line up with the headstock pulley again since I discovered that the jackshaft pulley was not in the right place initially and will have to be repositioned over the key. One problem I've come to with the jack shaft pulley is that the bore is in poor shape, but may yet be useable. The woodruff key was not sticking out of the slot more than about 3/32" & it appears the pulley worked off it with the previous owner, & chewed up the edge of the keyslot. The very shallow key may have been loctited in because I really mangled it getting it to move. Heating it finally helped, but still don't have it out.
The leadscrew is worn a little in the area near the headstock, but after cleaning looks pretty good. The 1/2 HP ATLAS motor runs fine & is smooth & quiet.
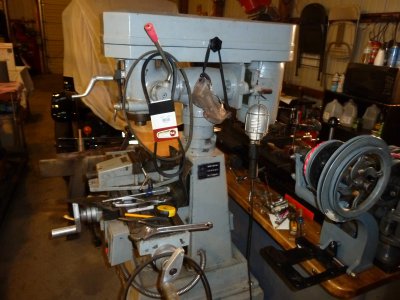
I am looking forward to getting this lathe running so I can start working on the mill.
Oh, One other thing, I have a Craftsman 6x18 lathe that I bought at a yardsale 20-30 years ago. I've tinkered with it over the years and cut my teeth on it, so am looking forward to being able to do more and bigger things with the ATLAS, but I am going to keep the Craftsman for small jobs here in the basement.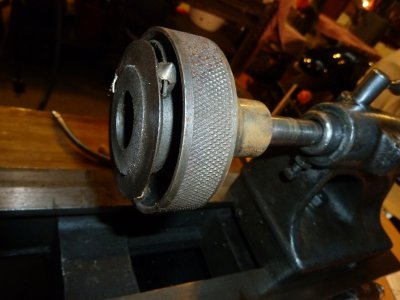
 .
.
Arature holder? chewed up bore shallow key Jet mill & Atlas Kennedy chest
Regards,
Roy- (BANJO5)
I bought a partly disassembled ATLAS TH54 10F & JVM 026 recently, and am still sorting through boxes of stuff I got with them. So far, I have the following - 3&4 jaw chucks, steady & following rests, a Kennedy toolbox full of all sizes & shapes of bits & indexable carbide inserts(no holders though), 5 atlas & williams toolholders, a thread-on-the spindle Jacobs chuck, about 25 calipers, 2 #2MT dead centers(junk), 1 V grooved pad for tailstock centering of rounds, taper attachment. I got some things I can't I.D. & would appreciate help. See attached photo. One of the items, I've been told, could be a quick mount for armatures//generators, the other item(no photo yet) could be a homemade tailstock replacement for long, long stock, where the lathe tailstock would be removed from the lathe, and this piece mounted on a bench or table some distance away. (can't find the photo of this one- will send with later post)
I have replaced the split nuts and done a lot of cleanup work and assembly of the drive components. The ways mic just over .375(.378) which is a surprise because I thought I saw somewhere that .375 was the as-new dimension. Can anyone explain this? There is no noticeable wear to the ways that can be felt with a fingernail. A thought - I didn't check my mic, but it has been reliable in the past.
Locating the jackshaft drive base took some real studying, but I am pretty close now. I will have to move it over about 3/4" to line up with the headstock pulley again since I discovered that the jackshaft pulley was not in the right place initially and will have to be repositioned over the key. One problem I've come to with the jack shaft pulley is that the bore is in poor shape, but may yet be useable. The woodruff key was not sticking out of the slot more than about 3/32" & it appears the pulley worked off it with the previous owner, & chewed up the edge of the keyslot. The very shallow key may have been loctited in because I really mangled it getting it to move. Heating it finally helped, but still don't have it out.
The leadscrew is worn a little in the area near the headstock, but after cleaning looks pretty good. The 1/2 HP ATLAS motor runs fine & is smooth & quiet.
I am looking forward to getting this lathe running so I can start working on the mill.
Oh, One other thing, I have a Craftsman 6x18 lathe that I bought at a yardsale 20-30 years ago. I've tinkered with it over the years and cut my teeth on it, so am looking forward to being able to do more and bigger things with the ATLAS, but I am going to keep the Craftsman for small jobs here in the basement.


 .
.Arature holder? chewed up bore shallow key Jet mill & Atlas Kennedy chest
Regards,
Roy- (BANJO5)

