- Joined
- Oct 30, 2019
- Messages
- 225
Well, today I used my lathe to get started installing the flooring in our living room.
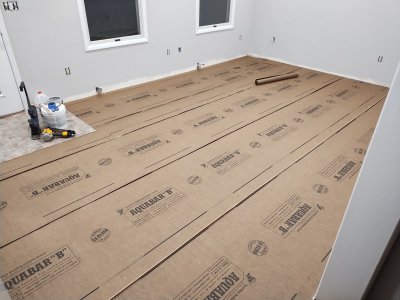
The issue that needed to be solved is that the last course of the existing flooring (dining room) ran parallel to the doorway into the living room, and because the living room was carpet the flooring installers cut the tongue off the last board in the doorway.
Now that I'm installing more T&G flooring in the living room, I need a groove or tongue to start from the dining room. Unfortunately I cannot reasonably pry up and replace the last course from the dining room without removing the casing that wraps the wide doorway between the two rooms.
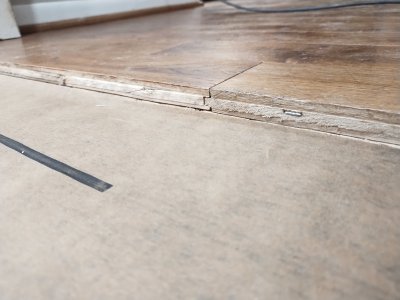
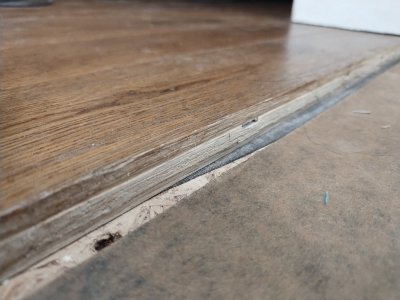
I figured my next best option, since the living room flooring will run parallel to the existing flooring, is to use the router to cut grooves into the last boards from the dining room. I say "grooves" because it would need to be multiple small grooves between the flooring staples that are installed. Then I would use floating tenons cut to length for each slot.
The issue, however, is that our 1/4" slot cutter for the router has a guide bearing and retainer screw combination that would interfere with the subfloor when trying to cut the slot in-place.
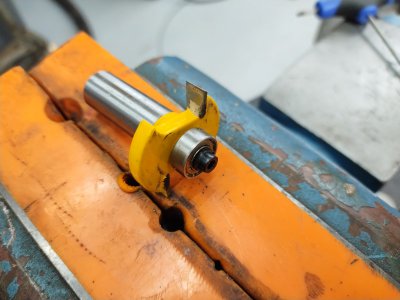
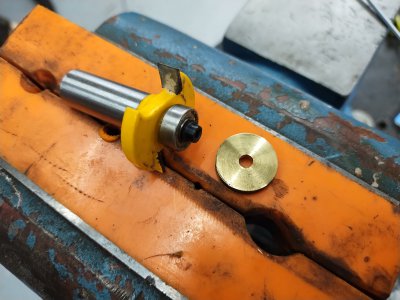
What about making a brass guide bushing that would press onto the boss/hub where the bearing would go?
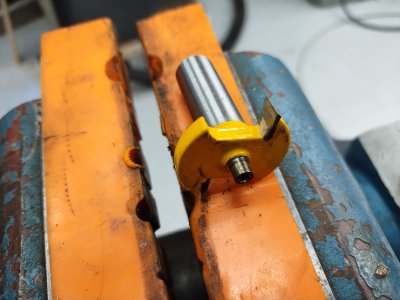
I parted off a small piece of 3/4" brass with a hole drilled just undersize for the boss, and pressed it on
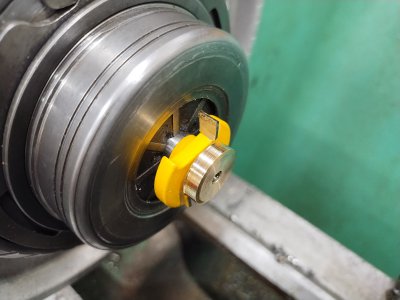
Then I chucked the entire cutter up in a collet chuck so that I could bring the thickness down exactly to the boss' height, as well as skim the OD to ensure concentricity with the cutter.
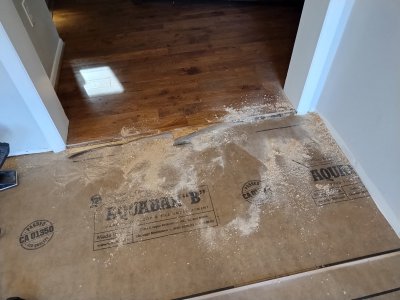
This made a nice mess on the underlayment I had just put down, but did work and I made some floating tenons that were a snug fit in the groove to form a new tongue
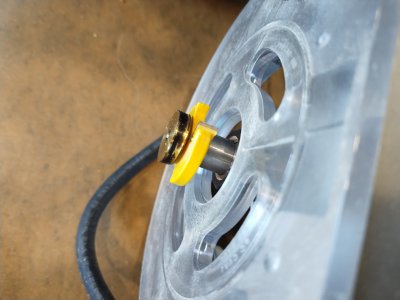
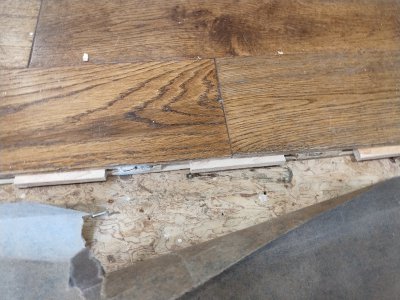
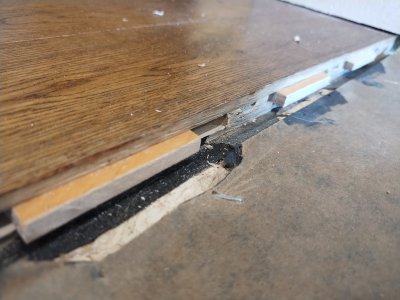
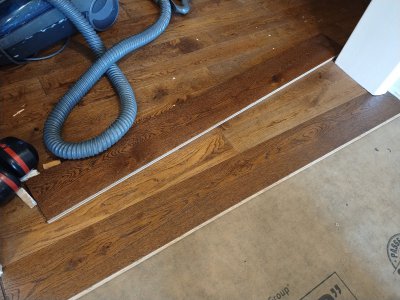
First board in and ready to get going on the rest of the project
Pried the bushing off and I'll keep this in the case of cutters in case a future use case shows up again. If the fit ever gets sloppy I can always locktite it on or make a new one

The issue that needed to be solved is that the last course of the existing flooring (dining room) ran parallel to the doorway into the living room, and because the living room was carpet the flooring installers cut the tongue off the last board in the doorway.
Now that I'm installing more T&G flooring in the living room, I need a groove or tongue to start from the dining room. Unfortunately I cannot reasonably pry up and replace the last course from the dining room without removing the casing that wraps the wide doorway between the two rooms.


I figured my next best option, since the living room flooring will run parallel to the existing flooring, is to use the router to cut grooves into the last boards from the dining room. I say "grooves" because it would need to be multiple small grooves between the flooring staples that are installed. Then I would use floating tenons cut to length for each slot.
The issue, however, is that our 1/4" slot cutter for the router has a guide bearing and retainer screw combination that would interfere with the subfloor when trying to cut the slot in-place.

What about making a brass guide bushing that would press onto the boss/hub where the bearing would go?

I parted off a small piece of 3/4" brass with a hole drilled just undersize for the boss, and pressed it on
Then I chucked the entire cutter up in a collet chuck so that I could bring the thickness down exactly to the boss' height, as well as skim the OD to ensure concentricity with the cutter.

This made a nice mess on the underlayment I had just put down, but did work and I made some floating tenons that were a snug fit in the groove to form a new tongue


First board in and ready to get going on the rest of the project

Pried the bushing off and I'll keep this in the case of cutters in case a future use case shows up again. If the fit ever gets sloppy I can always locktite it on or make a new one

