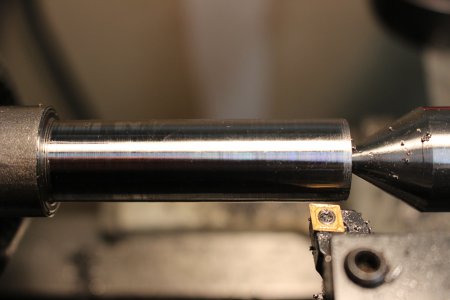
Hi all....Attached is a photo of piece I am turning down with the purpose of putting an MT2 on it. My problem is this: I am getting a .005" taper over 2 1/2 inches and I'm having trouble figuring out why. I have measured and calibrated numerous times. I have a test bar from Edge Technologies and when I put an indicator on that I end up only .001" off over 12 inches. The diameter is larger on the right and decreases moving to the left.
One thing that I see as I cut from right to left, using the power feed, is that as the tool makes contact with the workpiece the tool appears to push back very slightly. Before I engage the half-nut I pull back on the tool post to remove any back lash in the cross slide.
Oh! The other thing is this....the taper I'm getting doesn't always stay the same....sometimes when I make a pass I'll get no taper at all.
So I'm a little miffed as to what can be my problem...I make sure everything is tightened up and still end up with the problem.
I'd be more than happy to hear any ideas you all might have. Thanks!

