- Joined
- Jan 4, 2021
- Messages
- 2,982
Back in the Summer when I was thinking about what large/heavy items I would have Little Machine Shop deliver to me at Cabin Fever (they transport machines for a flat $50 [much better than $195] and smaller stuff for free), I decided that I needed a tilting table. LMS has a nice 5" x 7" version with a crank to make adjusting it easier, but it's $200 and would normally cost $28 to ship. After doing some research, I found a 4" x 5" version which I felt would better suit my needs and budget from an eBay supplier in India who I had worked with before and who sold better than average quality tooling.
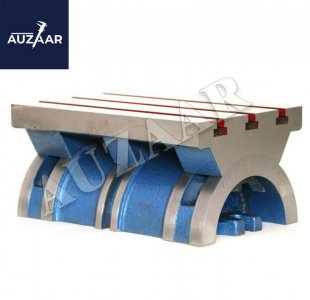
We negotiated a price (half of the delivered to Cabin Fever 5" x 7") and within a few days (it was in a warehouse at JFK, although they ship FedEx from India so I usually received their items within 7—10 days anyway) it was sitting on my bench. I stripped it down, gave it a good cleaning (wasn't bad), lubricated the mating surfaces and found it a home in a box with a Z-Rust Tab. There were a few modifications I wanted to make, but they could wait until later.
Last week I was checking that I had all of the necessary materials for a small project to submit to Village Press (Home Shop Machinist/Machinist's Workshop) that could use the tilting table to great advantage, but I then remembered the modifications. When mounted to the mini mill table, the top of the 3/8-16 bolt head was very close to the bottom of the M9 (yes, M9) bolt head that secured the table to the base, making it difficult to adjust. The "curved" washers that were between the M9 bolt and the top of the base weren't actually curved, they were flat stock that had been whacked in a press to push the ends down and they didn't move freely along the curved surface of the base (sorry, forgot to take "before" photos):
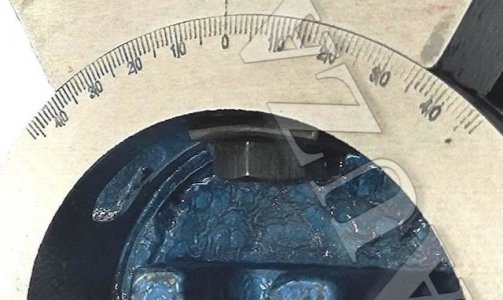
I disassembled the table, and using a small machinist's clamp to hold onto the washers, ground the top surface of each into a curve that mated with the underside of the top of the base using my 1" x 30" belt sander (too cold to go up to the garage and use the 2" x 42" or 4" x 36" belt sanders). I then filed the backs of the washers flat and broke all of the edges. I faced the tops of the M9 bolts from 7mm down to 4.5mm thick and cut 3mm off the threads to make the washer/bolt assembly easier to install & remove. While as was at it, I eased the edges of the mating surfaces with a small second-cut half-round file. I then used Brownell's OxPho- Blue on the bright surfaces of the hardware, followed by an overnight oiling:
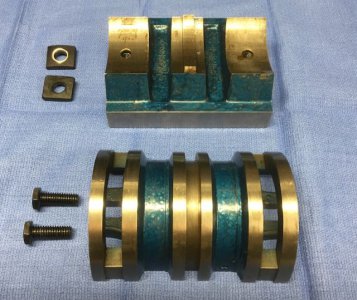
It doesn't show up well in the photo, but I masked the curved surface of the washers so they would be smooth.
Between the slightly thinner washers and the thinner M9 bolt heads, things are much better:
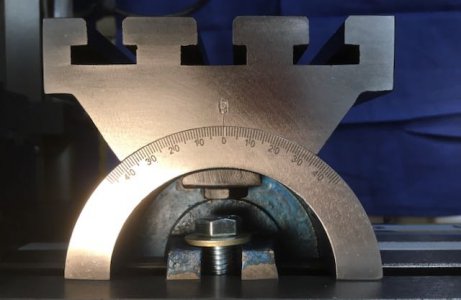
The slots in the table are just a wee bit smaller than those in my mini mill table, so I made some t-nuts to suit, using OxPho-Blue & oil on them as well:
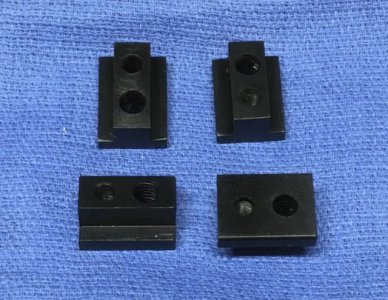
The t-nuts have both 10-32 & 1/4-20 threaded holes to fit my smaller toe clamps.
I can now get working on the part for the article. While not as easy to adjust as a larger table with a crank, my table does move smoothly and it is easy enough to get it spot on with a few taps from a dead blow hammer.

We negotiated a price (half of the delivered to Cabin Fever 5" x 7") and within a few days (it was in a warehouse at JFK, although they ship FedEx from India so I usually received their items within 7—10 days anyway) it was sitting on my bench. I stripped it down, gave it a good cleaning (wasn't bad), lubricated the mating surfaces and found it a home in a box with a Z-Rust Tab. There were a few modifications I wanted to make, but they could wait until later.
Last week I was checking that I had all of the necessary materials for a small project to submit to Village Press (Home Shop Machinist/Machinist's Workshop) that could use the tilting table to great advantage, but I then remembered the modifications. When mounted to the mini mill table, the top of the 3/8-16 bolt head was very close to the bottom of the M9 (yes, M9) bolt head that secured the table to the base, making it difficult to adjust. The "curved" washers that were between the M9 bolt and the top of the base weren't actually curved, they were flat stock that had been whacked in a press to push the ends down and they didn't move freely along the curved surface of the base (sorry, forgot to take "before" photos):

I disassembled the table, and using a small machinist's clamp to hold onto the washers, ground the top surface of each into a curve that mated with the underside of the top of the base using my 1" x 30" belt sander (too cold to go up to the garage and use the 2" x 42" or 4" x 36" belt sanders). I then filed the backs of the washers flat and broke all of the edges. I faced the tops of the M9 bolts from 7mm down to 4.5mm thick and cut 3mm off the threads to make the washer/bolt assembly easier to install & remove. While as was at it, I eased the edges of the mating surfaces with a small second-cut half-round file. I then used Brownell's OxPho- Blue on the bright surfaces of the hardware, followed by an overnight oiling:

It doesn't show up well in the photo, but I masked the curved surface of the washers so they would be smooth.
Between the slightly thinner washers and the thinner M9 bolt heads, things are much better:

The slots in the table are just a wee bit smaller than those in my mini mill table, so I made some t-nuts to suit, using OxPho-Blue & oil on them as well:

The t-nuts have both 10-32 & 1/4-20 threaded holes to fit my smaller toe clamps.
I can now get working on the part for the article. While not as easy to adjust as a larger table with a crank, my table does move smoothly and it is easy enough to get it spot on with a few taps from a dead blow hammer.

