- Joined
- Aug 3, 2017
- Messages
- 2,437
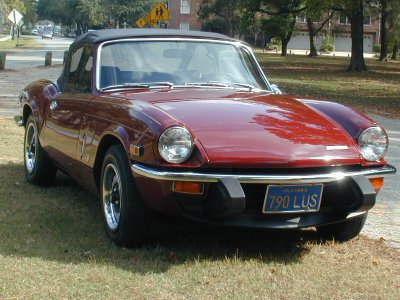
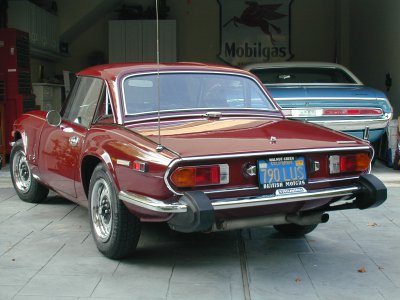
So as a back story: A friend of mine bought a '78 Triumph Spitfire about 20 years ago, had some problems with it that a bunch of shade-tree mechanics made worse, then parked it for 10-15 years. Its now a bit of a rust-bucket, and everything is corroded/'bad'. In addition, past owners have done 'upgrades' a few times that make things perhaps a little better or worse. IN ADDITION TO THAT, there are some questionable design decisions, mixed with Lucas Electronics.
He brought it over to my shop to get me to spend my spare time on/off trying to get it at least 'working' again. I had to rebuild/replace the entire brake system, fuel system, I ended up having to replace the entire fuel system, cooling system, redo a lot of the wiring, and quite a bit else! I still have to replace the dashboard, as the plywood was basically shattered from the water, so touching it made it turn to dust.
ONE such previous-owner install was to replace the factory twin carbs with a Weber DGEV (though, someone along the way cut the wire to the choke... why? who knows...). The replacement carb had a 'clamp-on-wire' style throttle cable adapter, which required 'cutting' the ferrule off the end of the throttle cable. We ordered a new throttle cable (thanks to some pretty terrible damage to it), plus a new carb (due to a failed rebuild attempt!).
However, I couldn't bring myself to cutting the new throttle cable. Instead, I went to the machine shop!
First step was measuring the current part, the throttle cable end, and the part it attached to, then use those to plan the new part:
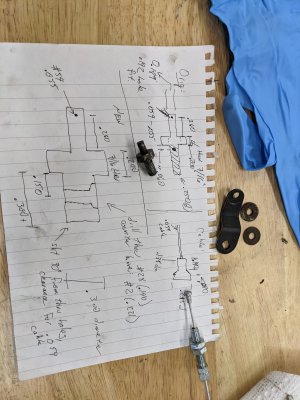
I chose to make the hex head on it anyway, since it is useful when putting the split pin in the small hole, and made the cable side pretty large to make it easier to get it right.
Next, I needed to find material! I went with this piece I cut off my old mill's X axis leadscrew (to adapt a different/newer power feed!), so I hope it is something like 4140. It certainly machined like something harder than 1018.
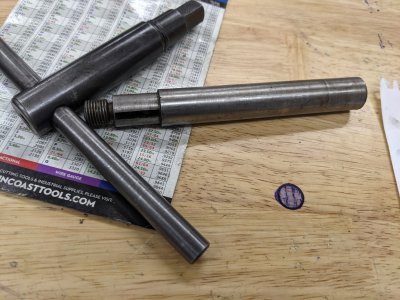
Now, onto the lathe work! I cut the small end on the outside, made an area for the hex head, then swapped left and right-hand tools back and forth to cut the inside. I still haven't found a good way of moving a lot of material like this. I think I need to come up with a "Left and right" hand tool shaped like a dovetail
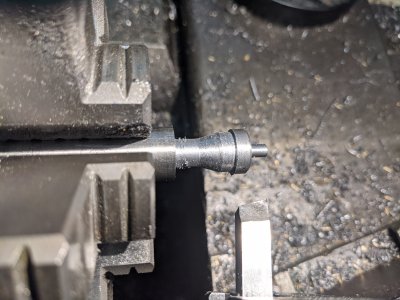
Once down to size everywhere, I parted off and was done with the lathe work.
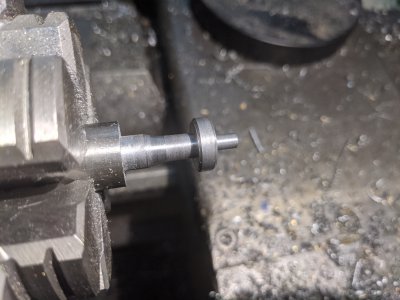
Here it is parted off. There is a nub at the end (I tried to shape my parting tool, but it seemed to only make it walk? Oh well, I end up removing these some way or another, and it was easy on this project.
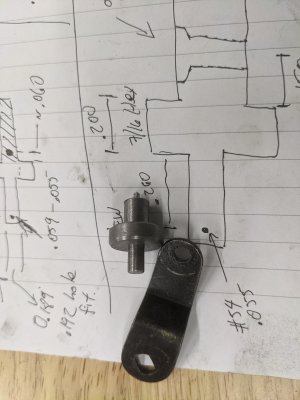
Now, onto the mill! (This is the first project using my new mill by the way! Pretty exciting!) First step was cutting the hex. I just used a hex collet block and a 5/8" endmill:
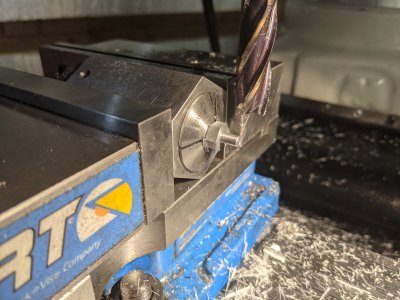
Same setup, I drilled for the split pin. The DRO was useful for getting it in the right place.
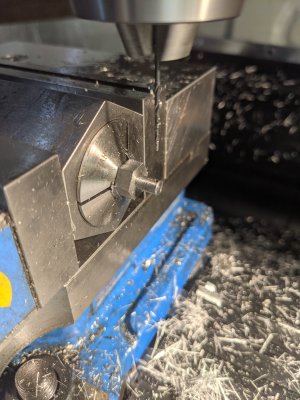
Next, flipped around in the collet block (and square this time!), I started drilling the ferrule hole.
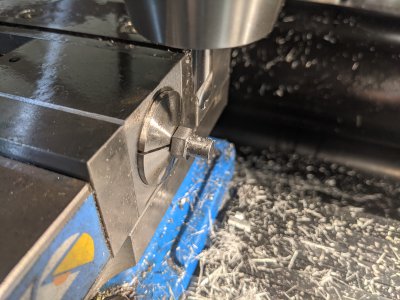
This ended up being a center drill, followed by a small thru-hole, then a larger 'counter bore', which fits the ferrule perfectly! I was a touch nervous, since if my measurements/the holes didn't end up being right for the throttle cable, I would have a tough time resetting this drilling (since there is no way to test it until the next step!).
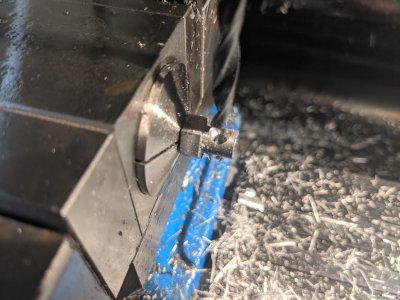
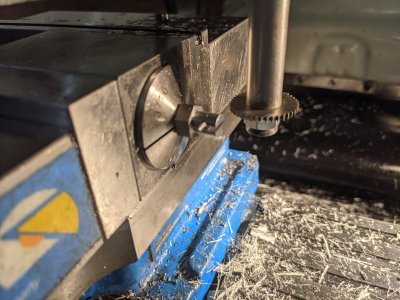
Finally, I needed clearance for the cable. Cable was measured as .059", but I only have 2 slitting saws: a large diameter .032" and a small diameter .078". I wasn't thrilled with trying to do 2 cuts with the small one, so I went with the large one. I only have a 2 axis DRO, so I missed the Z axis DRO here! I did a pretty poor job getting it centered with the dial, and lost count, so I wasn't anywhere near the center. SO, I eyeballed it and it is 'fine'. Its a little off center, but it works.
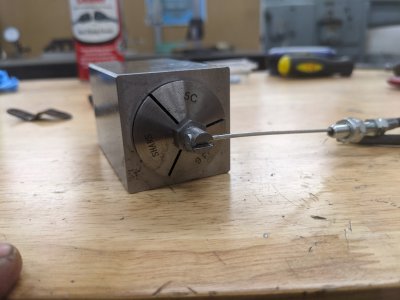
Finally, a test fit on the throttle cable! It is just about the perfect amount of 'tight'!
Last, but not least, cold blue to make it rust slower than the rest of the car:
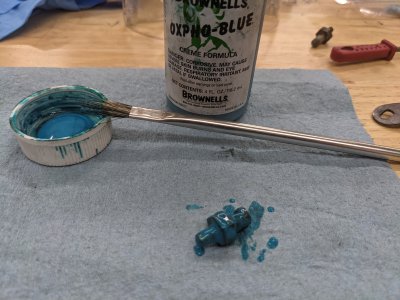
And no 'finished product' picture, I grabbed a beer and let the blue work, then forgot to take a finished picture.
He brought it over to my shop to get me to spend my spare time on/off trying to get it at least 'working' again. I had to rebuild/replace the entire brake system, fuel system, I ended up having to replace the entire fuel system, cooling system, redo a lot of the wiring, and quite a bit else! I still have to replace the dashboard, as the plywood was basically shattered from the water, so touching it made it turn to dust.
ONE such previous-owner install was to replace the factory twin carbs with a Weber DGEV (though, someone along the way cut the wire to the choke... why? who knows...). The replacement carb had a 'clamp-on-wire' style throttle cable adapter, which required 'cutting' the ferrule off the end of the throttle cable. We ordered a new throttle cable (thanks to some pretty terrible damage to it), plus a new carb (due to a failed rebuild attempt!).
However, I couldn't bring myself to cutting the new throttle cable. Instead, I went to the machine shop!
First step was measuring the current part, the throttle cable end, and the part it attached to, then use those to plan the new part:

I chose to make the hex head on it anyway, since it is useful when putting the split pin in the small hole, and made the cable side pretty large to make it easier to get it right.
Next, I needed to find material! I went with this piece I cut off my old mill's X axis leadscrew (to adapt a different/newer power feed!), so I hope it is something like 4140. It certainly machined like something harder than 1018.

Now, onto the lathe work! I cut the small end on the outside, made an area for the hex head, then swapped left and right-hand tools back and forth to cut the inside. I still haven't found a good way of moving a lot of material like this. I think I need to come up with a "Left and right" hand tool shaped like a dovetail

Once down to size everywhere, I parted off and was done with the lathe work.

Here it is parted off. There is a nub at the end (I tried to shape my parting tool, but it seemed to only make it walk? Oh well, I end up removing these some way or another, and it was easy on this project.

Now, onto the mill! (This is the first project using my new mill by the way! Pretty exciting!) First step was cutting the hex. I just used a hex collet block and a 5/8" endmill:

Same setup, I drilled for the split pin. The DRO was useful for getting it in the right place.

Next, flipped around in the collet block (and square this time!), I started drilling the ferrule hole.

This ended up being a center drill, followed by a small thru-hole, then a larger 'counter bore', which fits the ferrule perfectly! I was a touch nervous, since if my measurements/the holes didn't end up being right for the throttle cable, I would have a tough time resetting this drilling (since there is no way to test it until the next step!).

Finally, I needed clearance for the cable. Cable was measured as .059", but I only have 2 slitting saws: a large diameter .032" and a small diameter .078". I wasn't thrilled with trying to do 2 cuts with the small one, so I went with the large one. I only have a 2 axis DRO, so I missed the Z axis DRO here! I did a pretty poor job getting it centered with the dial, and lost count, so I wasn't anywhere near the center. SO, I eyeballed it and it is 'fine'. Its a little off center, but it works.

Finally, a test fit on the throttle cable! It is just about the perfect amount of 'tight'!

Last, but not least, cold blue to make it rust slower than the rest of the car:

And no 'finished product' picture, I grabbed a beer and let the blue work, then forgot to take a finished picture.

