Tramming my (absolute newbie) mill

macrls

Registered
Registered
Joined
Jan 2, 2013
Messages
5
I'm an old, retired, wanna-be machinist with a little experience on a Unimat years ago. In November I picked up an LMS lathe and in January an LMS mill. After getting things mounted and organized I wanted to "tram" (square) the mill. I found some references to using a machined disc as a surface for measurement. So I thought since I don't have a disc, perhaps a glass surface would do the job. I bought a sheet of 1/4" plate glass and after wiping down the table and the glass thoroughly it worked just fine. Anyone else tried this? Is there any reason to not use glass?

I also built a heavy duty rolling (with caster locks) stand with drawers for the mill. Seems quite stable and easy to move out of the way when not in use.
 
I'm sure one of the Metrology experts will chime in and tell us how inaccurate that idea is, but it definately sounds like a low cost way to get pretty darn close. For a newcomer tolerances under .001 are pretty tough to hold consistently so I would say use what works for you until you decide you need better. If you never get further than that and are happy with your results then I would call it good and move on to something I was not happy with and work on solving that. SOmetimes the simplest and least expernsive ideas turn out to be some of the best, and a plate of glass is probably about as accurate as a granit surface plate at way less of an impact on your left rear hip pocket. How bout some pics of how you set it up and use it too?
Bob
 
Since that piece of glass is not verified as truly flat, you would be much better off tramming on the table inself.

Move the spindle so it's centered in the table and mount your indicator for a full width swing. Since you will be perfectly centered over the center T slot, just take your reading on the close side on your right and far side on your left ( or visa versa).

Jeff
 
Unverified is the key word here. You have no idea how flat the glass is, unless you have a surface plate to check it against. A common way to tram the head is to stone off the table to remove any burrs then lay a couple of parallels on it at a 45º angle with the ends on the compass points and swing the indicator across them. Keep minimum interference between the indicator and the parallels so you don't beat it up when running on and off the parallels.

Tom
 
Recently made up a tool for tramming. 5/8 square bar from behind the mill, a 1/2 round bar from under the lathe and a dial indicator from a 5$ box of auction junk. Drilled and tapped the 5/8 bar, threaded the 1/2 round, tap the other end of 5/8 bar so that the indicator plunger is 4" from the 1/2 round. Rock solid. Cost me nothing(remaining contents of the box made the indicator dirt cheap) and the only other thing I had going at the time was to aggrivate my wife.
 
Don't want to steal your thread, just seems like a good place to chime in.
I've bee looking at the "Pro Tram System" (http://www.edgetechnologyproducts.com/pro-tram-system1.html).
I know they're made in China, but wanting any opinions from anyone who might own/use one.
Have also ordered one plus the lathe set up stuff as well
Would be nice to hear from some of the "old Hands" here on how accurate and good this PRO TRAM is
thanks in advance
aRM
 
As when measuring with any indicator based tool, it's only as precise as the indicator used. In this case, you are looking for relative change from one indicator to the other so as long as they are reasonably precise, they don't need to be accurate.

Personally, I don't see the utility in this tool. It's not direct reading like a micrometer, so before you can use it, it needs to be calibrated. That's an extra step that you don't need to do just swinging an indicator. Also, that's a lot of money to spend on something that gets used so infrequently. There are many other mill accessories that would get used more often than a fancy tool to tram the head. I fell into that trap when I bought a co-ax indicator. Yes, it's cool, but if I had to do it all over again, the nearly $400 I spent on it could have been used on more practical tools.

Tom
 
Hi guys
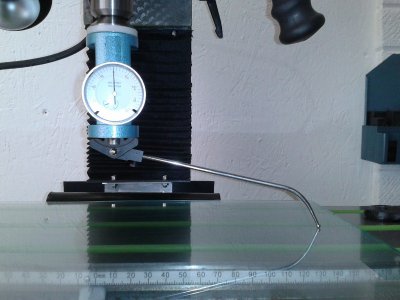
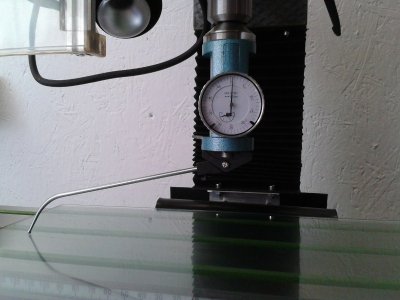
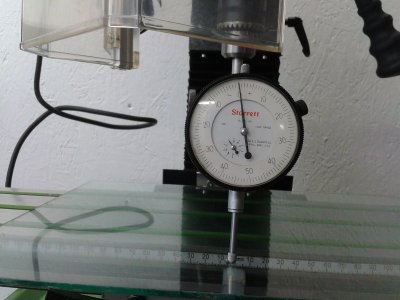
I have trammed my mill using the glass method, together with a co-ax indicator (yeh!, did I need to buy one?) & I read over a 300mm span a runout of 001" from right to left on the X & Y axes, I followed this up with a check using a DTI & had the same results, in fact my reading on the Y axis showed a discrepency of .0005(1/2 thou') from front to back which is even better than I hoped for, & this with the machine 'straight out of the box' & levelled up.
I know a lot of guys will say that the Co-ax indicator is only a comparator, this is true, but it seemed a good buy at the time.. 'on offer 25% off' at the time IIRC, that's why I followed up with a DTI, so for me that is as close as I need/can expect considering it is one of the so called infamous 'Chinese' machines, if anyone has got it closer then 'you're a better man than I am Gunga Din' & I am quite satisfied with the set up as is :thumbzup:, so what ever method you use & it meets the objective then it's right for you.


Co -ax indicator reading x axis ....0005" - 001" (or 1/2 .. 1 'unit' if you wish).

2012-09-08 Tramming mill   (2) (800x600).jpg2012-09-08 Tramming mill   (3) (800x600).jpg


DTI check.. reading front to back ... - 0005"

2012-09-08 Tramming mill   (12) (800x600).jpg2012-09-08 Tramming mill   (13) (800x600).jpg


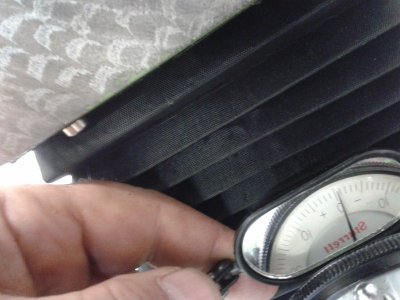
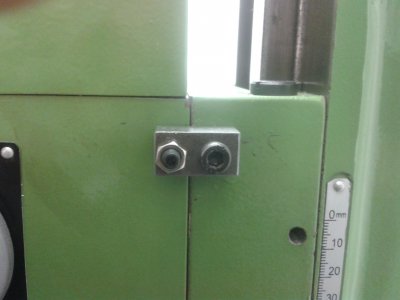
What I did after was to make a couple of stops, one either side, to lock the head in this position to prevent any movement in the future, regular checks will show any deflections after some use, pic shows lock one side only.


2012-11-30 12.38.14.jpg

Just my two 'pennorth' (two cents worth).

Cheers
George.

2012-09-08 Tramming mill   (2) (800x600).jpg 2012-09-08 Tramming mill   (3) (800x600).jpg 2012-09-08 Tramming mill   (12) (800x600).jpg 2012-09-08 Tramming mill   (13) (800x600).jpg 2012-11-30 12.38.14.jpg
 
Back
Top