- Joined
- Jul 5, 2014
- Messages
- 2,853
I purchased a Bridgeport about 2 months ago and have been working on fixing it up and installing a DRO on it. I have a thread in the Bridgeport section if you would like to take a look.
I've been asked by several people to do a write up on the DRO install. I guess if this helps just one person it's more than worth it to me. I've been helped by a number of people here and met two of them in person. I wouldn't have a running machine if it weren't for the help I've received here.
I know there are probably many other ways of doing this, but this is what worked for me.
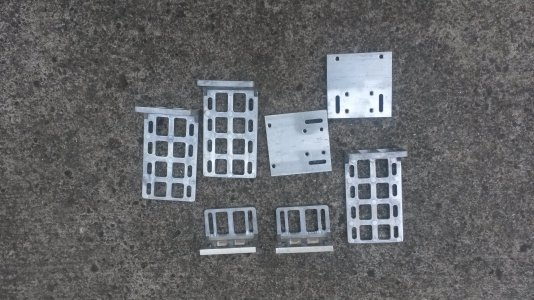
The kit from TPAC contained a number of "universal" brackets none of which I used. It would have taken me longer to work out how to use them than it took for me to make my own brackets. I have a milling machine, why not use it to make what I want for brackets.
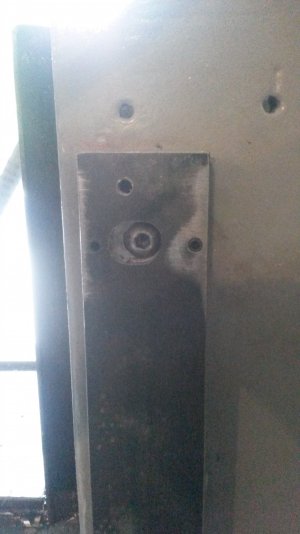
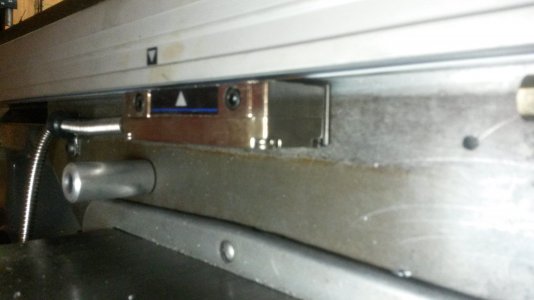
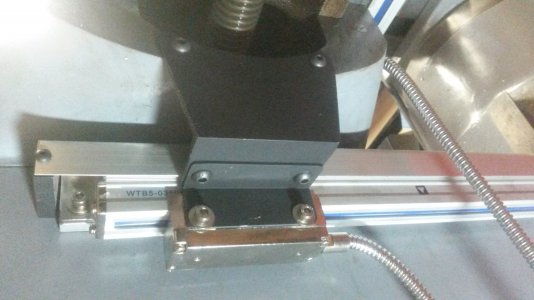
I started off installing the Y axis scale first. It was pretty straight forward. I used the mounting bar supplied with the kit and drilled holes to match the ones already in the side of the knee to mount the bar using flat head allen bolts. To connect the reader head to the saddle I used a piece of 3" aluminum angle and drilled it to match the two existing holes in the side of the saddle. The hole distances for those with Bridgeports are 3.37" center to center, and are 1/4"x20. I also used a short piece of 1" angle attached to the 3'. You can see that in the pics.
I started with this
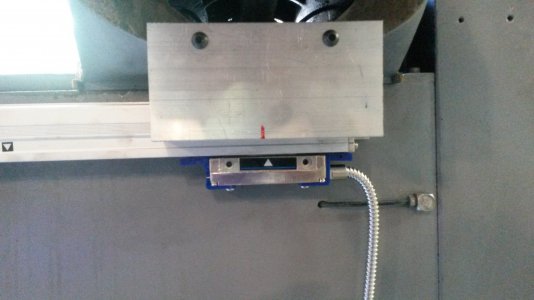
And ended up with this
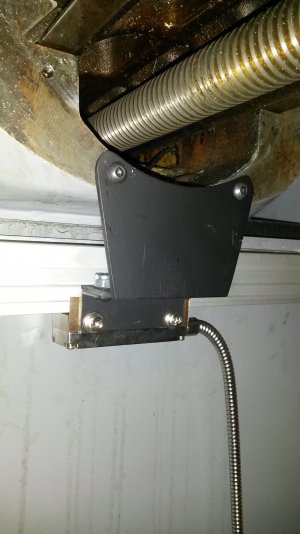
And this is how I dialed in the scale. The instructions are in very broken english and all I could gain from them is max run out is .005. This wasn't that easy to do. Took a lot of time but I got it down to .002 and .004. Seems to work very well like this. Has great repeatability.
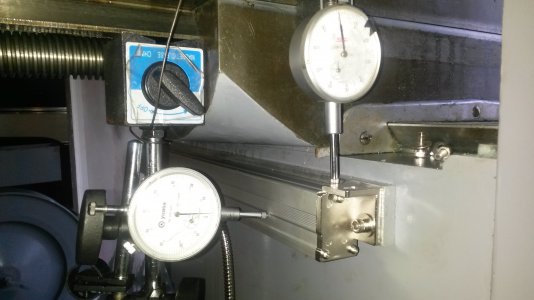
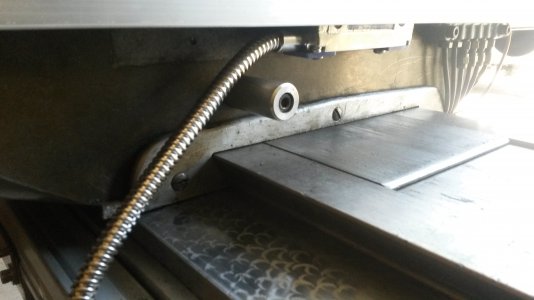
Next was X axis. I used some 3/8" bolts and oversize washers in the coolant drain holes to temporally mount the scale.
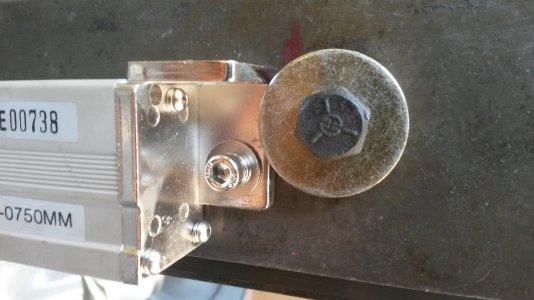
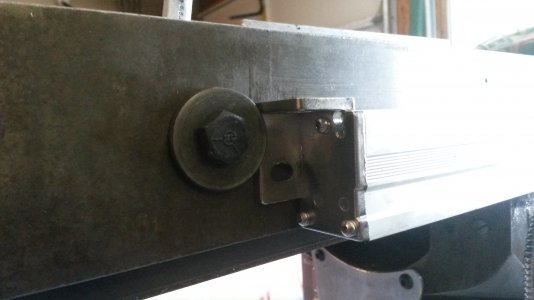
At first I had the scale just above where he saddle and table meet. I took a transfer punch and marked where I needed to drill the holes for the reader head to attach the the saddle. I'm glad I looked before I drilled. With the scale up higher like I had it I would have drilled into my ways. I found out you have to set the scale even with the bottom of the table.
Here is a pic showing what I mean. The top punch mark is where I started, then you can barely see the second mark below it.
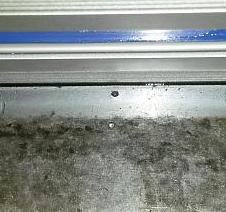
I didn't take any pics of dialing the scale in, but this one was pretty easy.
I also made a stop so I wouldn't go back to far with the table and crush the scale.
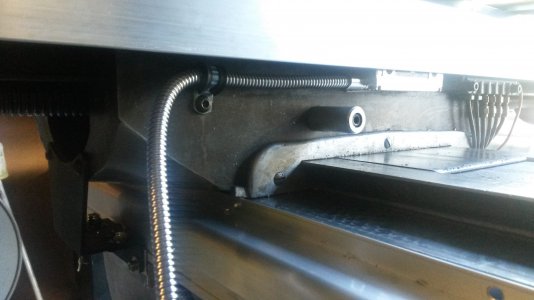
I worked on Z axis next. We have a Bridgeport at work with an Acu-rite 3 axis DRO and I looked at it but the scale is mounted out at least an inch from the head. Really gets in the way at times. So I decided to mount my scale as close to the head as possible, and even with the bottom of the casting to keep it out of harms way. I used 3/8" aluminum to make my brackets to mount the scale to the head, and a piece of 3/4" to make my quill adapter along with a small piece of 3/4' angle to attach the reader head the the quill.
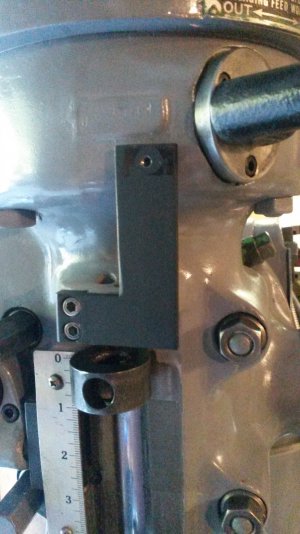
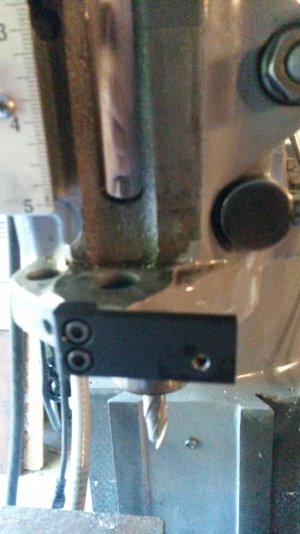
Here is what I started out with for the quill adapter. I used a hole saw to make the hole, then just cut and milled away the rest of the material.
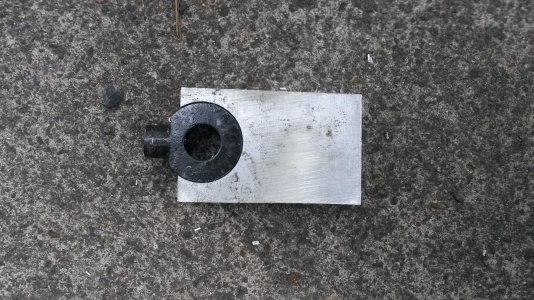
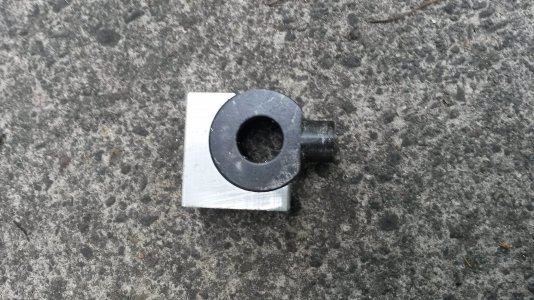
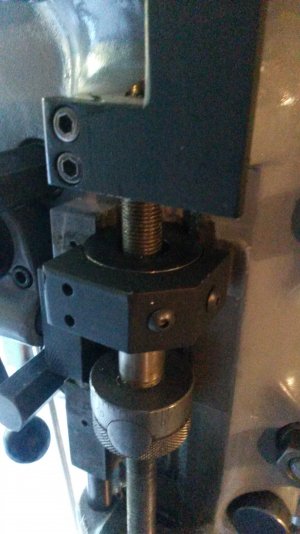
Here is how I attached the reader head to the quill. It was a challenge to dial this scale in. I used to dial indicators and ran the table up and down to get it dialed. No matter how hard I tried using shims I couldn't get the scale dialed in, so I put a small jack screw on the bottom bracket to get the final few thou adjusted. Took time and my arms were sore from moving the table so many times, but it was worth it in the end.
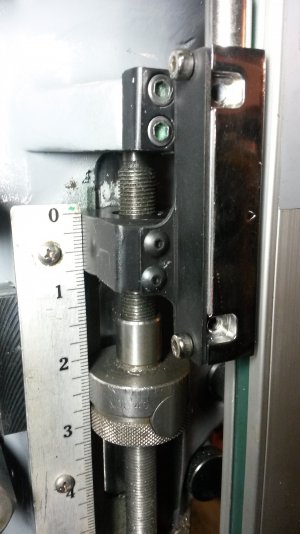
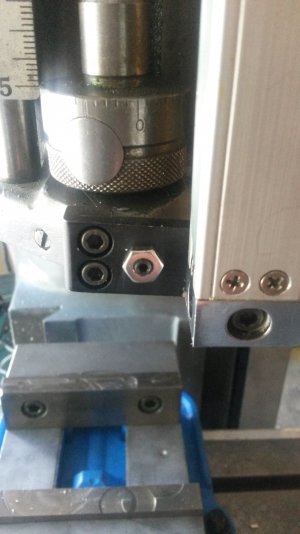
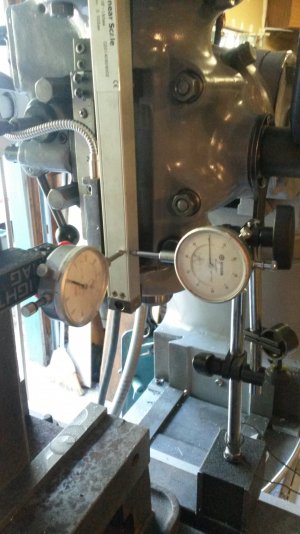
With the scale mounted like this it's easy to get to my speed nut to adjust it. I just wrap my thumb and forefinger around the scale. Works great.
Last but not least is K axis. This was the hardest on by far. The casting is tapered and contoured where the scale needs to mount. I got my location set for the scale and got my holes drilled and tapped and again tried to use shims to get the mounting bar square and vertical, but it was impossible. So again I put some jack screws in and found the the supplied mounting bar was easy to distort using the jack screws. So I picked up a piece of 1/2" X 1 1/2" CRS bar stock and drilled and tapped it for my jack screws. It took a lot of time to get the bar adjusted square and vertical.
I used more of the 3" angle to make the bracket to attach the reader head to the knee.
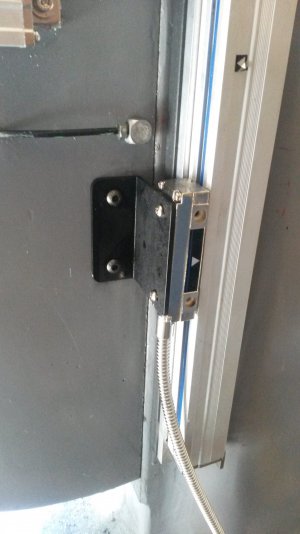
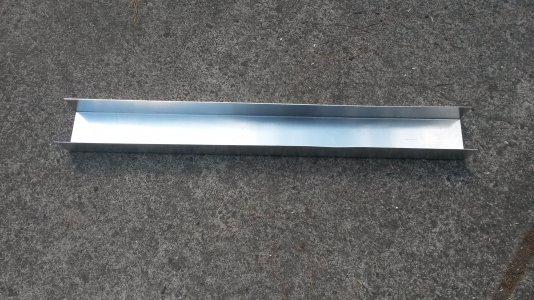
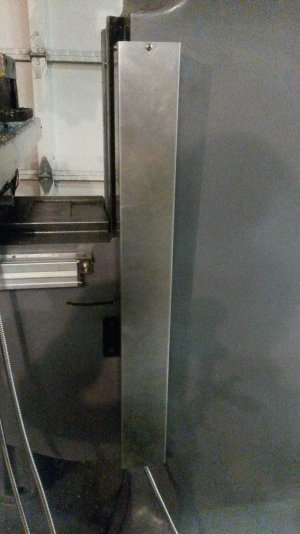
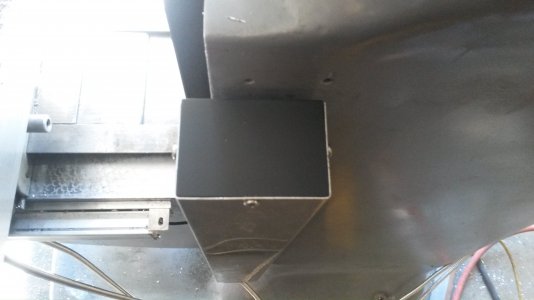
Next I tried to figure out how the use the supplied chip guards. There was just no way to make them work without a bunch of fabrication. So I came up with the idea of a piece of custom bent channel. I called around and finally found a shop and close to me to cut and bend it up. I asked him how much and he said bring me a case of Corona. So I said ok, so what's it really going to cost me? He said I'm thirsty and a case it what it will cost you. So I grabbed a case walked in, handed him the beer, he handed me the part and I shook his hand and left. I have to say that's the first time I've ever paid for anything with beer.
Overall I really like this kit. It's a great value for the money. Just takes a little work to get it installed. I still have to get the cables tied up and out of the way. They are "extra" long in my opinion. But I figure I'll coil the excess up and tie wrap them up in the back of the mill.
If anyone has questions just let me know. Sorry for the duplicate attachment. Can't seem to delete it.
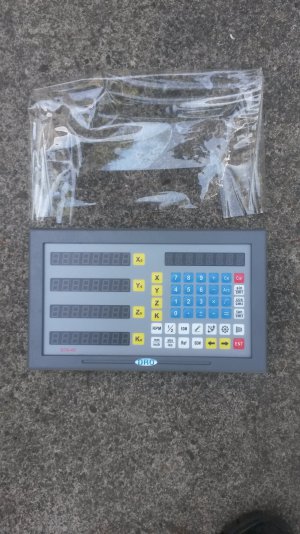
http://www.tpactools.com/4-Axis-Package_c_26.html3


I've been asked by several people to do a write up on the DRO install. I guess if this helps just one person it's more than worth it to me. I've been helped by a number of people here and met two of them in person. I wouldn't have a running machine if it weren't for the help I've received here.
I know there are probably many other ways of doing this, but this is what worked for me.
The kit from TPAC contained a number of "universal" brackets none of which I used. It would have taken me longer to work out how to use them than it took for me to make my own brackets. I have a milling machine, why not use it to make what I want for brackets.

I started off installing the Y axis scale first. It was pretty straight forward. I used the mounting bar supplied with the kit and drilled holes to match the ones already in the side of the knee to mount the bar using flat head allen bolts. To connect the reader head to the saddle I used a piece of 3" aluminum angle and drilled it to match the two existing holes in the side of the saddle. The hole distances for those with Bridgeports are 3.37" center to center, and are 1/4"x20. I also used a short piece of 1" angle attached to the 3'. You can see that in the pics.
I started with this

And ended up with this

And this is how I dialed in the scale. The instructions are in very broken english and all I could gain from them is max run out is .005. This wasn't that easy to do. Took a lot of time but I got it down to .002 and .004. Seems to work very well like this. Has great repeatability.

Next was X axis. I used some 3/8" bolts and oversize washers in the coolant drain holes to temporally mount the scale.


At first I had the scale just above where he saddle and table meet. I took a transfer punch and marked where I needed to drill the holes for the reader head to attach the the saddle. I'm glad I looked before I drilled. With the scale up higher like I had it I would have drilled into my ways. I found out you have to set the scale even with the bottom of the table.
Here is a pic showing what I mean. The top punch mark is where I started, then you can barely see the second mark below it.

I didn't take any pics of dialing the scale in, but this one was pretty easy.
I also made a stop so I wouldn't go back to far with the table and crush the scale.

I worked on Z axis next. We have a Bridgeport at work with an Acu-rite 3 axis DRO and I looked at it but the scale is mounted out at least an inch from the head. Really gets in the way at times. So I decided to mount my scale as close to the head as possible, and even with the bottom of the casting to keep it out of harms way. I used 3/8" aluminum to make my brackets to mount the scale to the head, and a piece of 3/4" to make my quill adapter along with a small piece of 3/4' angle to attach the reader head the the quill.


Here is what I started out with for the quill adapter. I used a hole saw to make the hole, then just cut and milled away the rest of the material.


Here is how I attached the reader head to the quill. It was a challenge to dial this scale in. I used to dial indicators and ran the table up and down to get it dialed. No matter how hard I tried using shims I couldn't get the scale dialed in, so I put a small jack screw on the bottom bracket to get the final few thou adjusted. Took time and my arms were sore from moving the table so many times, but it was worth it in the end.


With the scale mounted like this it's easy to get to my speed nut to adjust it. I just wrap my thumb and forefinger around the scale. Works great.
Last but not least is K axis. This was the hardest on by far. The casting is tapered and contoured where the scale needs to mount. I got my location set for the scale and got my holes drilled and tapped and again tried to use shims to get the mounting bar square and vertical, but it was impossible. So again I put some jack screws in and found the the supplied mounting bar was easy to distort using the jack screws. So I picked up a piece of 1/2" X 1 1/2" CRS bar stock and drilled and tapped it for my jack screws. It took a lot of time to get the bar adjusted square and vertical.
I used more of the 3" angle to make the bracket to attach the reader head to the knee.

Next I tried to figure out how the use the supplied chip guards. There was just no way to make them work without a bunch of fabrication. So I came up with the idea of a piece of custom bent channel. I called around and finally found a shop and close to me to cut and bend it up. I asked him how much and he said bring me a case of Corona. So I said ok, so what's it really going to cost me? He said I'm thirsty and a case it what it will cost you. So I grabbed a case walked in, handed him the beer, he handed me the part and I shook his hand and left. I have to say that's the first time I've ever paid for anything with beer.


Overall I really like this kit. It's a great value for the money. Just takes a little work to get it installed. I still have to get the cables tied up and out of the way. They are "extra" long in my opinion. But I figure I'll coil the excess up and tie wrap them up in the back of the mill.
If anyone has questions just let me know. Sorry for the duplicate attachment. Can't seem to delete it.

http://www.tpactools.com/4-Axis-Package_c_26.html3


Last edited:

