- Joined
- Feb 7, 2013
- Messages
- 792
Hi I got tired of everytime I put my chuck in my tail stock I would only have about 2" of travel because when you install anything with a tang you must crank out the cylinder about 3/4" before it will clear the ejector. Plus the end cap has no bearings and is a poor design.
Also everytime a bit would catch the chuck would come loose and one spin is enough that you have to re dress the tapper another poor design so I thought I would change it and see what I could come up with. All modifications are not final everything shown can be returned to stock.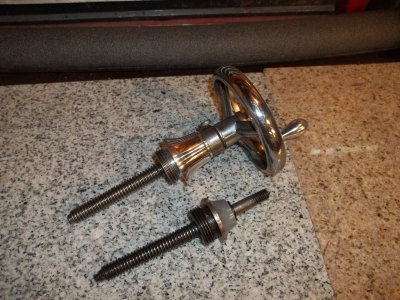
I started by making a different end piece complete with bearings and a longer screw I also added a extra dial I had laying around.
- - - Updated - - -
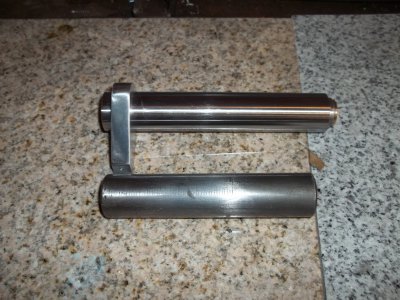
I then got a piece of hard chrome shaft cut a key in it bored and reamed the tapper. I also bored the other end to 3/4" and made a barrel with a slot milled in one end for the chuck or drill tang that got pressed in. The Chrome shaft is an 1 3/8 longer
- - - Updated - - -
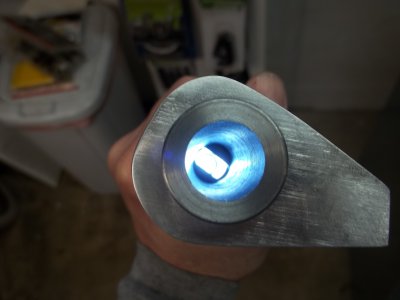
You can see here the tang holder pressed into place.
- - - Updated - - -
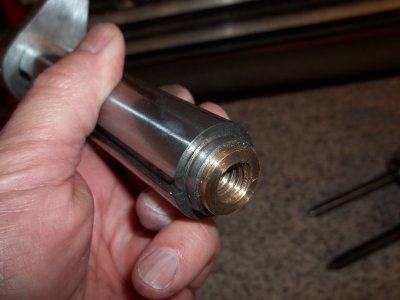
You can see here I machined an acme thread out of brass and pressed it into place. You may ask why is it sticking out the end? It fits in the counter bore of the new end piece I made this allows extra travel.
- - - Updated - - -
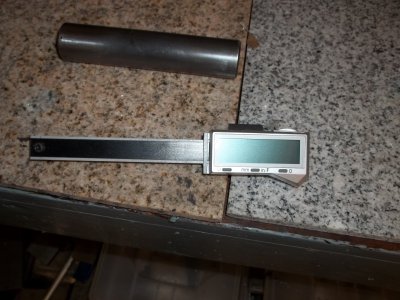
This is the remains of a cheap Igaging plastic depth gauge sold at Grizzly for about $14. I cut off all the stuff I dont need and shortened it.
- - - Updated - - -
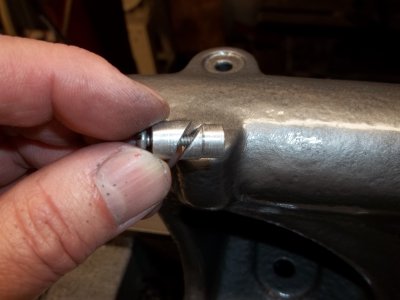
This is a little expaning plug I made like a bicycle stem to fit in the little oil plug that you never use the screw is a 6-32.
- - - Updated - - -
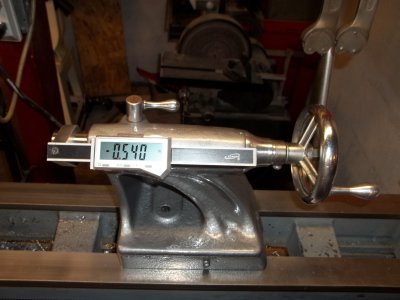
Well how did it turn out?? instead of 2" of travel I now have 3 1/2" not bad the DRO works great and looks damn sexy on there!! Now for some more mods on the tail stock lock down soon to come.. And repaint the rest of the lathe... Thanks for lookin.. Ray


Also everytime a bit would catch the chuck would come loose and one spin is enough that you have to re dress the tapper another poor design so I thought I would change it and see what I could come up with. All modifications are not final everything shown can be returned to stock.

I started by making a different end piece complete with bearings and a longer screw I also added a extra dial I had laying around.
- - - Updated - - -

I then got a piece of hard chrome shaft cut a key in it bored and reamed the tapper. I also bored the other end to 3/4" and made a barrel with a slot milled in one end for the chuck or drill tang that got pressed in. The Chrome shaft is an 1 3/8 longer
- - - Updated - - -

You can see here the tang holder pressed into place.
- - - Updated - - -

You can see here I machined an acme thread out of brass and pressed it into place. You may ask why is it sticking out the end? It fits in the counter bore of the new end piece I made this allows extra travel.
- - - Updated - - -

This is the remains of a cheap Igaging plastic depth gauge sold at Grizzly for about $14. I cut off all the stuff I dont need and shortened it.
- - - Updated - - -

This is a little expaning plug I made like a bicycle stem to fit in the little oil plug that you never use the screw is a 6-32.
- - - Updated - - -

Well how did it turn out?? instead of 2" of travel I now have 3 1/2" not bad the DRO works great and looks damn sexy on there!! Now for some more mods on the tail stock lock down soon to come.. And repaint the rest of the lathe... Thanks for lookin.. Ray


