Wanting to clamp a vise to the drill press table called for the use of T-nuts. I don't have a mill so making my own would have to be "old school" with a hack saw and file. Fortunately I found some already made for less than the price of the bar stock it would take to make them.
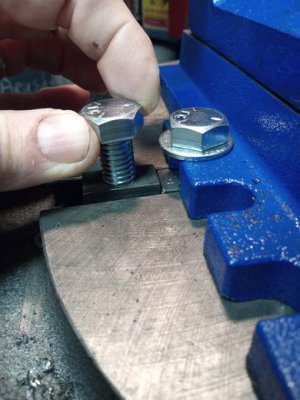
But when I tried to install the vise it wouldn't tighten down as the top of the nuts stood proud of the table top. Hmmm. Checked the nuts and they were all the same. Checked the slots and darned if that cheap import drill press didn't have any consistent measurements in the t-slots. I think they were cast but never machined. Anyway, it seemed simple enough, just take the top off of the nuts until they were a couple of thousands under the table top. A simple job, if you have a mill.
I could go old school and scribe a line on the nut and file it down in a vise. Or I could go all Tim Allen and use an angle grinder for a quick fix. But Damnit Jim, I'm a machinist, not a doctor.... Oh, wait, wrong series...
I've only had a lathe for a few months but every problem now looks like a lathe solution. Should be simple, chuck up a nut and face it off. Oops. Can't find a way to hold the nut in either the 3 or 4 jaw chucks that allows a good grip and good clearance from the tool to the chuck. Hmm. I could spin the nut onto a bolt and chuck that up. BUT the nuts have incomplete threads in the bottom of the hole to keep the bolt or stud from jacking into the table. I like that feature and wanted to keep it. Briefly thought about tapping the holes all the way through, doing the facing and then spoiling the threads again. That seemed like an option, but like the angle grinder, not very eloquent.
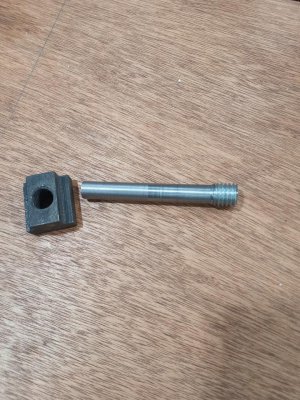
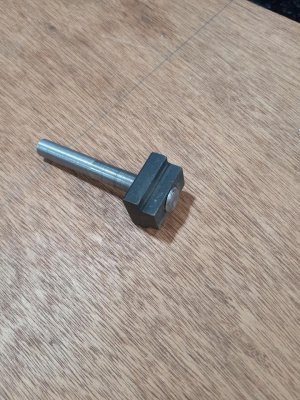
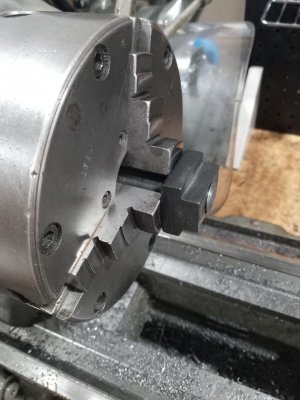
Then I had this idea. Use a piece of all thread (a bolt would work too) and turn off the threads for a distance that was at least as deep as the jaws to get a full grip. Then drop this mandrel into the nut from the top and thread it in until it bottomed out on the incomplete threads. Put this in the chuck and tap the nut to make sure it it tight against the jaw faces. The spinning forces want to un-screw the nut but to come loose it has to move toward the jaws so it is trapped.
From there it was an easy face to dimension for each nut. Since the crappy table had 4 slots, all different dimensions I opted to just scribe a line and turn a couple of thousands under it. I also stamped numbers at each slot and matching numbers on each nut to avoid confusion in the future.


