Super Max Mill Repair

Karl_T

H-M Supporter - Sustaining Member
H-M Platinum Supporter
Joined
Oct 14, 2014
Messages
2,116
My SupeMax mill has only three inch quill travel so I tore it down to find the trouble...

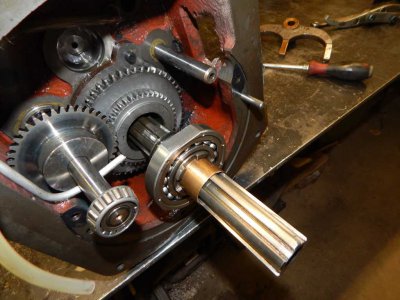
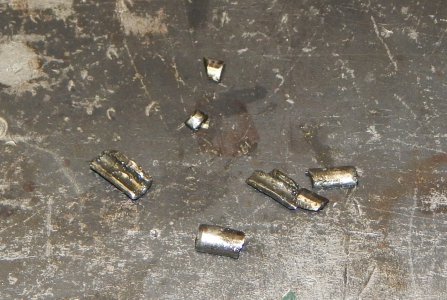
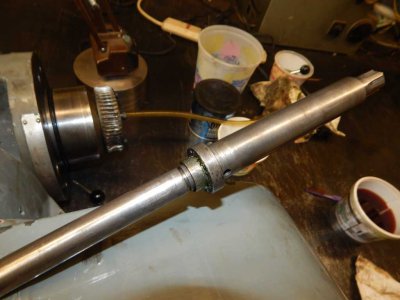
Look at the pics. The spline part driving the spindle has three inch travel before binding hard. By pounding up and down and using high pressure air i was able to get some metal bits out of there.

I'm stuck at this point on what else to try to disassemble to broken part. ideas?
spline yoke down.jpg spine yoke up.jpg spline bits.jpg
 
Last edited:
That looks like a broken spring pin, but where the heck did it come from? I don't think there is one in that area. I guess I would put a puller on it and use the brute force method at this point. I might make a pulling plate to minimize the damage, or maybe a bearing puller would get around it.
 
Yup. brute force is my LAST option. Most likely that will result in needing the torch to destroy it.

I'm going to bet i can't buy this part. Fabrication will be a real job.
 
Like you, I usually escalate the force, using the hot wrench or plasma torch as the last resort. Sometimes ya gotta do what ya gotta do!

Depending on the year the machine was built, it could be that a BP part would fit. In the clone early days, (70s-80s) the machines were pretty much built to BP specs. Some time in the late 80's (90s maybe) they started switching over to their own designs.

It is probable that a Topwell part might be available, they may have actually built that machine. They are still in business, and built a lot of the machines that we know as Enco, Eagle, Jet, Webb, and others that I can't remember. Not sure if they built SuperMax.
.
.
 
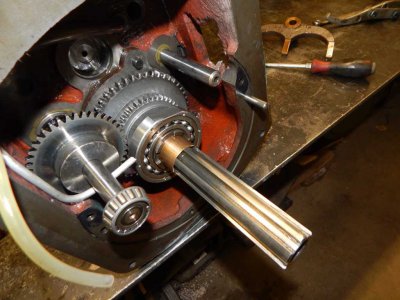
Got it apart! Took all day. Spent hours moving it back and forth and picking another piece out. Then about an hour after getting it out polishing the galling. The part slides up/down and even has a slight rattle to it now. I don't even need to replace it.

My guess is the remains of a spring pin was in there. Where it came from??? The brass part must serve as a funnel to help trap foreign material in there.

I was two days tearing down to this point. Bet its three days going back together.

Karl
 
That is probably the remains of that spring pin that flew across the shop, never to be seen again, until now.:confused:

If I recall it took me about 3 hours to put mine back together.
 
If I recall it took me about 3 hours to put mine back together.

Well you're about four times the man I am. I got the gearbox together yesterday. Lot of cleaning and polishing. Only had to put it together three times before it shifted right. Today, I'll shoot for getting the motor and vary speed assembly together and most if not all of the parts on the lower section of the head. ( I had first tried to slide the cartridge out - no go). I got "the Kid" to come out Thursday evening to help mount it back on the ram. This is a four horse series two size head - DIFFICULT to handle. I'll then spend a day upgrading wiring. (VFD install)

QUESTION

see pic. there's some kind of snap ring holding a collar on the draw bar. Way to wide for an E-clip. Anybody know what part I'm looking for?

Karl
 
pic try two

drawbar ring groove.jpg
 
The only place I have seen that type of retaining ring is in automotive transmissions. I did a quick search of McMaster and didn't find anything. It looks like it keeps a thrust bearing in place. I'm not sure it is really needed, the bearing can't go anywhere once the draw bar is in place.

Is that a spring pin hole just to the right of the flange on the drawbar?

I did mine the easy way. First I mounted the lower head assembly to the ram (quill still on the bench), that way it only weighs about 20 lbs or so. Then I assembled the lower gear box, and installed that. Then assembled the vari-speed assembly and installed that. Then installed the motor. Then last, installed the quill. I did clean all of the parts when I tore it down, so that was already out of the way.
 
"Is that a spring pin hole just to the right of the flange on the drawbar?"

It has a nearly sheared off solid pin in there now. Its an odd size just over 3/16. I'll likely use the base of a drill bit here. I've sheared this off before. The power draw bar uses a strong impact wrench style tightener.

Spent an hour on Mcmaster, This ring needs the groove cut 7 thou deeper and 3 thou wider
http://www.mcmaster.com/#external-snap-rings/=y2brmq

Guess I'll order this to try it.
 
Back
Top