- Joined
- Dec 21, 2018
- Messages
- 2,164
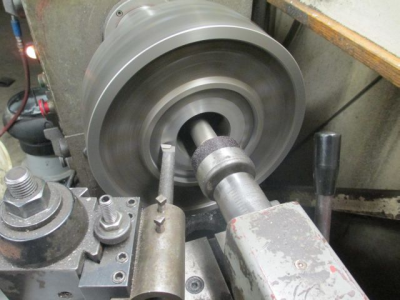
I recently bought a "Set-Tru" type ER-40 chuck with D1-4 camlock mounting. With the studs properly adjusted the chuck does not flush against the lathe spindle. The lathe spindle checks very true. The instructions say to shim the chuck back plate to the lathe spindle if needed. I don't want to go through shimming each time I change chucks! The chuck is dialed in concentric and running on axis. I can slip a .0025" feeler gage between the back plate and the spindle on one side.
I can see two options. Mount a 3 or 4 jaw chuck. Turn a piece of steel to 1" (largest that will fit my ER-40 collets.) With a 1" collet in the ER chuck, mount it face to face with the other chuck and face the back side of the ER. That seems risky since the collet will be holding considerable weight and the force of turning the hard steel body will also be working on it. However, since the ER has been dialed in using a gage pin to less than .0003” total runout, if nothing shifts while facing the back all would be pretty good. The catch is that the carbide insert turning tool will be under greater force for ½ of each revolution working with considerable leverage due to the diameter of the chuck. . An alternative to facing would be to do a tool post grind. Less force, but I only have a home made grinder setup. At least I could check the progress with an indicator mounted to the cross slide. Coat the backing plate with Dykem to see progress.
2nd option is to actually “”shim” with some metal filled epoxy. Coat the parts with release agent that I don't want anything on and ultra clean the other. Coat the surface and install the chuck. Let it set up. Remove and clean. No forces acting on the collet system for this process.
For darn sure I want to remove and install the chuck several times and check that it always returns to the same position before I do any of this.
This chuck ran “off-axis” when I got it. I.E. when the set-tru was adjusted to make the indicator run on center when close to the chuck, it would run considerably off center when the indicator was moved 1” away. In essence swinging a conical shape. I corrected that by facing the back plate surface that goes against the chuck. I also had to turn down the hub some to get enough adjusting room to center the chuck using the set screws of the “set-tru.”
Last observation: It seems like asking a lot to have the taper of the spindle to seat at the same time as the face touches. I always tighten the cams by steps.
Any suggestions are welcome since as usual I have no idea what I'm doing.

