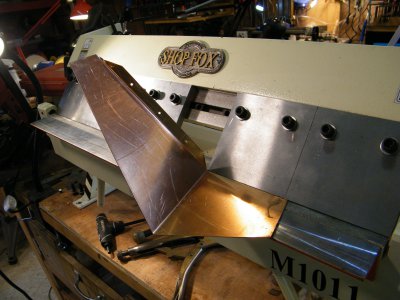
- Joined
- Feb 17, 2013
- Messages
- 4,417
Not really "today's" project, but something I've been working on for a few days and just completed...
I don't do that much sheet metal work, but when I've tried in the past I've had to make do with small, crude tools. I bought a plate shear and a Harbor Freight mini-brake in 2019 and did what I could to improve them.

 www.hobby-machinist.com
I finally got tired of having to store the heavy plate shear on the foor and lifting it onto a work table to use it. And though the HF was not too bad, it isn't suited to box and pan work. So this year I cleared out a bit of space in the Conex (OK, 20 foot shipping container) I use for material storage and ordered a 24" box/pan brake from Amazon. https://www.amazon.com/gp/product/B0778V6QWL/ref=ppx_yo_dt_b_asin_title_o00_s00?ie=UTF8&psc=1 Then I built "permanent" tables for both.
The brake arrived a couple days ago. It looked OK, but the crate was (strangely) totally covered with stretch wrap. I discovered why when I started to open it.
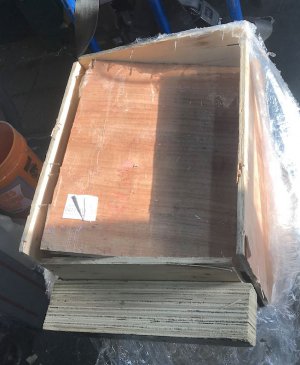
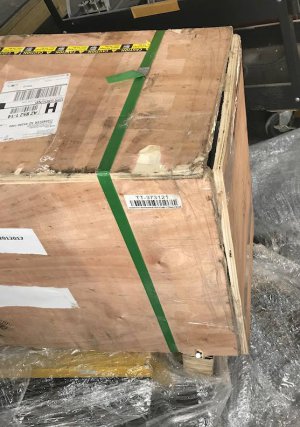
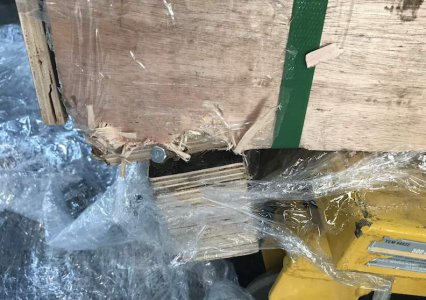
The instruction manual was missing from the crate and there was one totally unrelated piece of hardware rattling loosely inside. Guess there must have been a major collision at UPS, and they put things "back together" as best they could. After documenting the crate damage and unboxing the brake, the only damage I could find was to the retively thin metal of the base - two creases, squishing the front end to about 1/2" narrower than the back (yellow boxes)
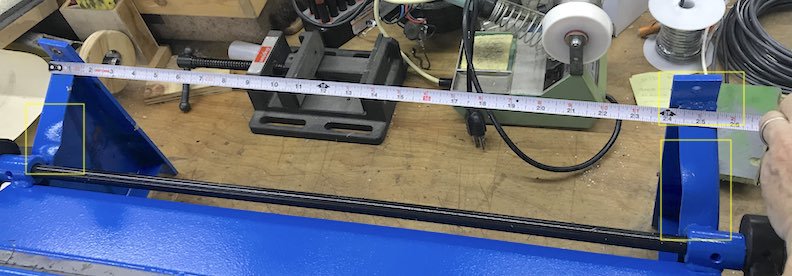
The damage was easy to repair, and much simpler than trying to re-box and return the brake.
I built two relatively simple tables framed with pressure treated 2x4s (generally a lot straighter than non-treated lumber!) I made them in two different heights, so that the material would be at the same level (32" above the floor) on both of them. Thin plywood on the sides and back prevents racking. The tabletops are double layers of 3/4" plywood. All plywood nowadays seems to be shaped like a potato chip. But by orienting the bends of the two layers at 90º to each other, layering the plywood so the high spots are against each other, gluing the surfaces and screwing the outlines down results in a pretty flat and very stout work surface.
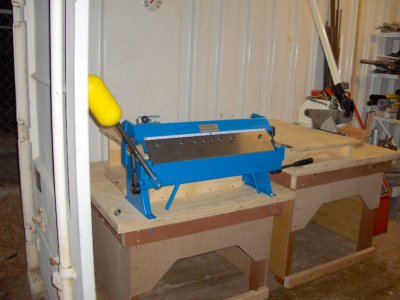
Here's the completed table for the brake.
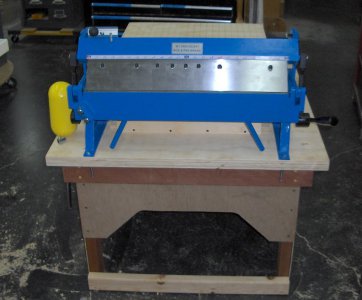
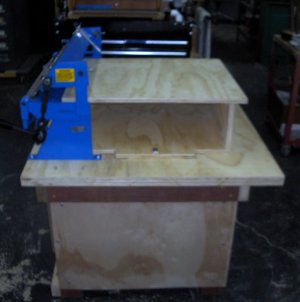
I like to keep a full set of adjustment tools near each of my major tools. For the brake, this includes an Allen wrench for the fingers, a tommy bar and locking bolt wrench for the setback adjustments, and a socket with a crossbar for the bolts that secure the counterweight (not really needed unless I'm bending thicker material).
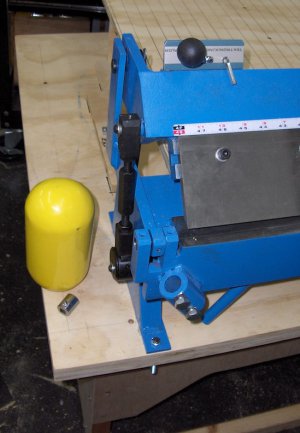
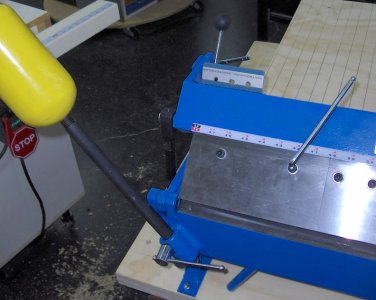
Note the material support platform behind the shear. It's easy to removed when necessary. I added guide lines perpendicular to the bend axis, to help with workpiece alignment.
Here's the plate shear. It, too, has a work support platform with guide lines. The smaller platform on the offcut side is (re)moveable. Note the DeStaKo hold-down clamp (yellow box) and the angle iron in the second photo. This is described in my previous post and has proved itself to be incredibly handy.
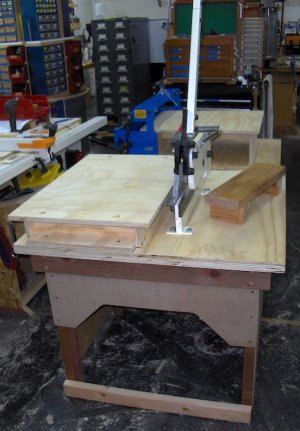
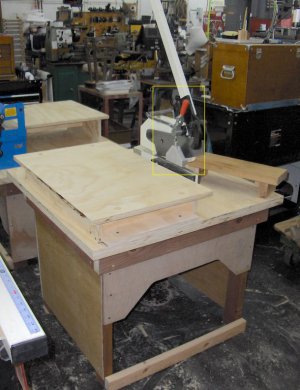
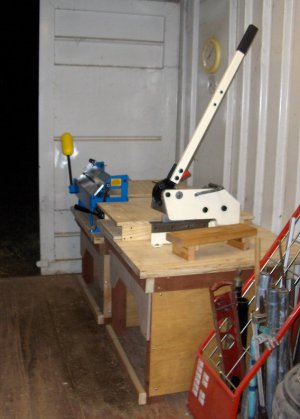
And finally, here are the both of them in their new home, not taking up floor space in the main shop, but ready to go to work. Just an 80 foot walk away from the shop and in the same space as the sheet metal storage. And maybe someday I'll be able to afford a real (stomp) shear. But so far, Craigslist has let me down. Ah, well ...
I don't do that much sheet metal work, but when I've tried in the past I've had to make do with small, crude tools. I bought a plate shear and a Harbor Freight mini-brake in 2019 and did what I could to improve them.

Improving a plate shear
A couple weeks ago I was at a meeting of Valley Metal, the Phoenix area machinists' club. I'd mentioned that I was on the way to buy a Pexto stomp shear from a Craigslist seller, but I was concerned about all the floor space it would take up. The president of the club, Marty Escarcega...
 www.hobby-machinist.com
I finally got tired of having to store the heavy plate shear on the foor and lifting it onto a work table to use it. And though the HF was not too bad, it isn't suited to box and pan work. So this year I cleared out a bit of space in the Conex (OK, 20 foot shipping container) I use for material storage and ordered a 24" box/pan brake from Amazon. https://www.amazon.com/gp/product/B0778V6QWL/ref=ppx_yo_dt_b_asin_title_o00_s00?ie=UTF8&psc=1 Then I built "permanent" tables for both.
The brake arrived a couple days ago. It looked OK, but the crate was (strangely) totally covered with stretch wrap. I discovered why when I started to open it.


The instruction manual was missing from the crate and there was one totally unrelated piece of hardware rattling loosely inside. Guess there must have been a major collision at UPS, and they put things "back together" as best they could. After documenting the crate damage and unboxing the brake, the only damage I could find was to the retively thin metal of the base - two creases, squishing the front end to about 1/2" narrower than the back (yellow boxes)

The damage was easy to repair, and much simpler than trying to re-box and return the brake.
I built two relatively simple tables framed with pressure treated 2x4s (generally a lot straighter than non-treated lumber!) I made them in two different heights, so that the material would be at the same level (32" above the floor) on both of them. Thin plywood on the sides and back prevents racking. The tabletops are double layers of 3/4" plywood. All plywood nowadays seems to be shaped like a potato chip. But by orienting the bends of the two layers at 90º to each other, layering the plywood so the high spots are against each other, gluing the surfaces and screwing the outlines down results in a pretty flat and very stout work surface.
Here's the completed table for the brake.


I like to keep a full set of adjustment tools near each of my major tools. For the brake, this includes an Allen wrench for the fingers, a tommy bar and locking bolt wrench for the setback adjustments, and a socket with a crossbar for the bolts that secure the counterweight (not really needed unless I'm bending thicker material).


Note the material support platform behind the shear. It's easy to removed when necessary. I added guide lines perpendicular to the bend axis, to help with workpiece alignment.
Here's the plate shear. It, too, has a work support platform with guide lines. The smaller platform on the offcut side is (re)moveable. Note the DeStaKo hold-down clamp (yellow box) and the angle iron in the second photo. This is described in my previous post and has proved itself to be incredibly handy.


And finally, here are the both of them in their new home, not taking up floor space in the main shop, but ready to go to work. Just an 80 foot walk away from the shop and in the same space as the sheet metal storage. And maybe someday I'll be able to afford a real (stomp) shear. But so far, Craigslist has let me down. Ah, well ...


Last edited:

