- Joined
- Aug 3, 2017
- Messages
- 2,437
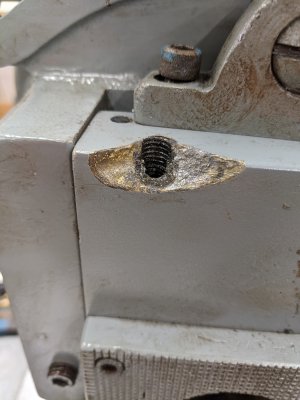
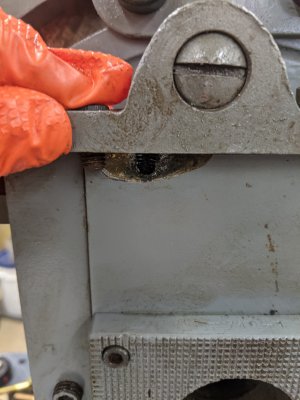
Not 'today's project, but the last week or so  The clapper to my shaper was poorly brazed at one point, and broke out on me. I was able to 'fix' it by using longer bolts, but between that break, the mediocre paint job, and the pitting on a couple of surfaces, I chose to just remake it. The original was cast Iron, but I chose 1018. I picked up a large block (5"x2"x7") online, and got to town. First, the damage:


I didn't take much picture-wise, but step 1 was to square 5 of the sides. I surface ground the width to be a perfect 'slide' fit in the clapper, and also surface ground the thickness while I was there, but that was for the finish.
I bored the big hole with a boring head, and used the DRO to place the various holes. I actually had to come back and clean up the big hole on the lathe later on (I hadn't accounted for the depth of the tool lifter, so I needed to cut it deeper).
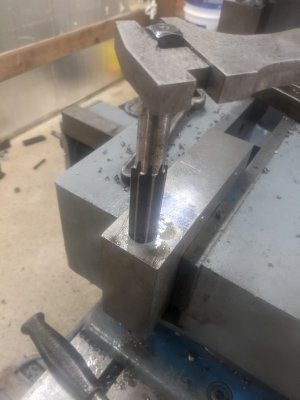
The hardest part however was the pivot hole. First, it has to go through 4.375 nearly 3/4". I ended up finding a large drill bit, but I had to peck it near the end, since the flutes would fill up, so I had to wind it all the way out and clear chips every about 50 thou. The pivot is a #11 pin taper, which made it that much more challenging! I started by power-reaming with a helical reamer, which left a mediocre finish. However, I left it 'short' so that I could 'fit' it just right. I then used a straight flute hand reamer to finish. I spent about 3 hours cutting a tiny bit, test fitting, and returning. It was VEERY time consuming:

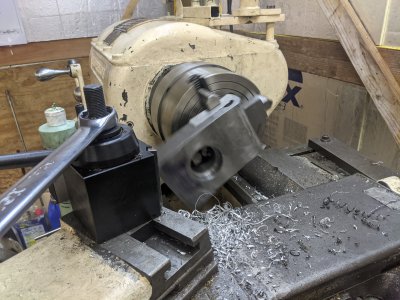
The last big 'feature' was the bottom 'arc'. I calculated its size (it was cast from the factory), and cut it on the lathe in the 4 jaw. I actually knocked it out of the chuck 2x before I realized the carriage was crashing into it and popping it out :/ There are a few dents along it from that sadly. Eventually I was able to cut it, as scary as it was! A fairly large off-center piece somewhat precariously held, mixed with a double-interrupted cut to start, so I took small cuts.

Finally, I blued it, reassembled (after paint-stripping the checkered part), and took a picture! It was at this point today that I discovered the 'relief' cut for the tool holder was too small to clear the tool lifter post. I ended up just tossing it into the 4 jaw centered on that piece and bored it a little deeper. Finally, a final reassembly!


I didn't take much picture-wise, but step 1 was to square 5 of the sides. I surface ground the width to be a perfect 'slide' fit in the clapper, and also surface ground the thickness while I was there, but that was for the finish.
I bored the big hole with a boring head, and used the DRO to place the various holes. I actually had to come back and clean up the big hole on the lathe later on (I hadn't accounted for the depth of the tool lifter, so I needed to cut it deeper).
The hardest part however was the pivot hole. First, it has to go through 4.375 nearly 3/4". I ended up finding a large drill bit, but I had to peck it near the end, since the flutes would fill up, so I had to wind it all the way out and clear chips every about 50 thou. The pivot is a #11 pin taper, which made it that much more challenging! I started by power-reaming with a helical reamer, which left a mediocre finish. However, I left it 'short' so that I could 'fit' it just right. I then used a straight flute hand reamer to finish. I spent about 3 hours cutting a tiny bit, test fitting, and returning. It was VEERY time consuming:

The last big 'feature' was the bottom 'arc'. I calculated its size (it was cast from the factory), and cut it on the lathe in the 4 jaw. I actually knocked it out of the chuck 2x before I realized the carriage was crashing into it and popping it out :/ There are a few dents along it from that sadly. Eventually I was able to cut it, as scary as it was! A fairly large off-center piece somewhat precariously held, mixed with a double-interrupted cut to start, so I took small cuts.

Finally, I blued it, reassembled (after paint-stripping the checkered part), and took a picture! It was at this point today that I discovered the 'relief' cut for the tool holder was too small to clear the tool lifter post. I ended up just tossing it into the 4 jaw centered on that piece and bored it a little deeper. Finally, a final reassembly!

