- Joined
- Dec 23, 2012
- Messages
- 25
I decided I need a project in the garage that had lots of mindless effort and relatively little planning, so I scraped a cheap drill press (13" diameter) table flat.
I don't present this as a great idea for several reasons:
- I didn't need to be very flat
- It isn't the best drill press in town, so any accuracy improvement is likely lost on it
- I could have likely improved the drill press more in the same time doing something else
- It should have been remachined flatter before scraping, but scraping was kind of the point and my mill is sick.
What I did that worked well:
- The table is pretty flat now
- I didn't spend one cent (other than electricity)
- It was therapeutic to just be out there with the scraper
- I found that my scraper is at the end of its brush life and I will have to deal with that
- The biax allowed me to tackle more scraping than I would have ever done by hand.
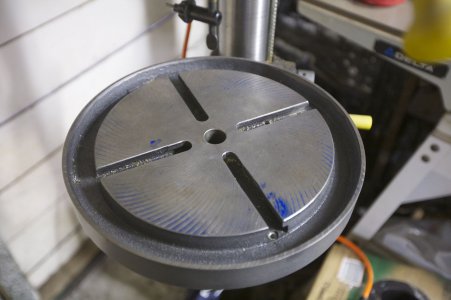
Here is the starting point. I didn't measure the dip in the middle, but I would say it was between 0.005" - 0.010" deep in the middle.
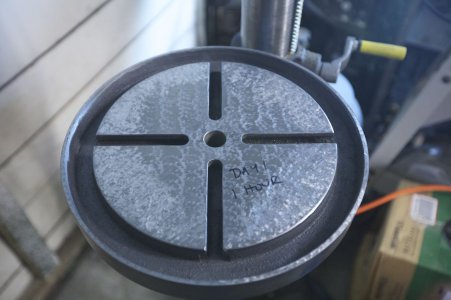
Here is the end of day 1 (1 hour of scraping). I did some light scraping all over, but not enough. I'm using a long stroke (1/2"?) and really leaning on the scraper here. This is just roughing, while keeping track that I'm not creating a huge hole somewhere.
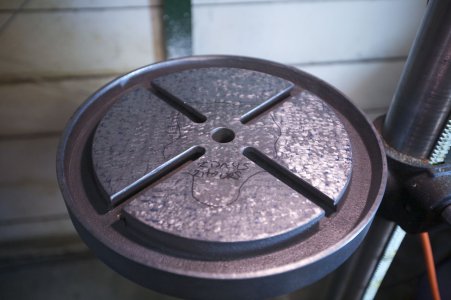
Here is the end of day 2 (1 more hour of scraping). I scraped some more in the middle. I found that the machined surface was a LOT harder than the scraped surface. Scraping through this not only removed the machining marks, but got to a uniform hardness. The outline is the low spot left to scrape.
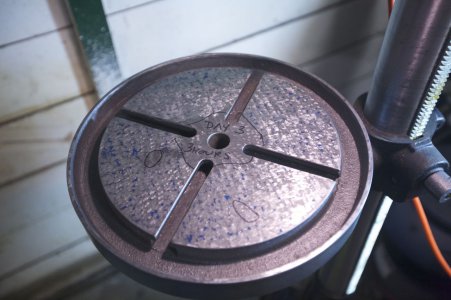
Here is the end of day 3 (1 more hour of scraping). You can see that as I scrape more surface flat, it takes longer to dig down.
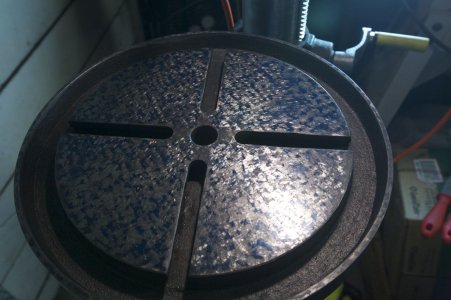
Here is the end of day 4 (3 more hours). There is a nice distribution of blue spots all over (there are some minor depressions in the middle). The spots are reasonably sized for the job.
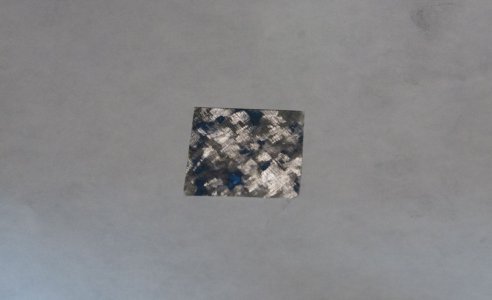
Here is a 1 square inch hole in a paper to see that there are ~15 spots / in^2. I don't know how I would do less than that with a Biax without leaving a big hole somewhere and having any real spot size.
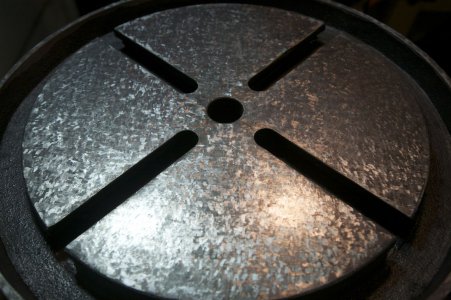
Here is a picture of the final result, with the blue cleaned off.
What did I learn?
- If you want some physical labor, scraping will do it for you.
- Don't drop your deburring stone - it will break in two
- Scraping isn't really that hard, if you follow Rich's method. Let's see if I can remember...
-- Pivot the part to make sure you have uniform contact when you think you do. This was a revelation to me the first time and really gives me confidence that I can trust the bluing pattern
-- Scrape individual scrapes. I admit that I am pretty lax on this, but follow the general concept, while scraping in a zig zag shape. When I'm finish scraping, I take this to heart. I can easily go 10-20 scraping cycles without digging a big hole when scraping individual scrapes.
-- No chicken scratches!
-- I'm forgetting one...
- For this drill press table, I scraped it on the drill press. It pivots, and is height adjustable, so it was a very convenient place to scrape. Normally I would scrape on my bench.


I don't present this as a great idea for several reasons:
- I didn't need to be very flat
- It isn't the best drill press in town, so any accuracy improvement is likely lost on it
- I could have likely improved the drill press more in the same time doing something else
- It should have been remachined flatter before scraping, but scraping was kind of the point and my mill is sick.
What I did that worked well:
- The table is pretty flat now
- I didn't spend one cent (other than electricity)
- It was therapeutic to just be out there with the scraper
- I found that my scraper is at the end of its brush life and I will have to deal with that
- The biax allowed me to tackle more scraping than I would have ever done by hand.
Here is the starting point. I didn't measure the dip in the middle, but I would say it was between 0.005" - 0.010" deep in the middle.

Here is the end of day 1 (1 hour of scraping). I did some light scraping all over, but not enough. I'm using a long stroke (1/2"?) and really leaning on the scraper here. This is just roughing, while keeping track that I'm not creating a huge hole somewhere.

Here is the end of day 2 (1 more hour of scraping). I scraped some more in the middle. I found that the machined surface was a LOT harder than the scraped surface. Scraping through this not only removed the machining marks, but got to a uniform hardness. The outline is the low spot left to scrape.

Here is the end of day 3 (1 more hour of scraping). You can see that as I scrape more surface flat, it takes longer to dig down.

Here is the end of day 4 (3 more hours). There is a nice distribution of blue spots all over (there are some minor depressions in the middle). The spots are reasonably sized for the job.

Here is a 1 square inch hole in a paper to see that there are ~15 spots / in^2. I don't know how I would do less than that with a Biax without leaving a big hole somewhere and having any real spot size.

Here is a picture of the final result, with the blue cleaned off.

What did I learn?
- If you want some physical labor, scraping will do it for you.
- Don't drop your deburring stone - it will break in two
- Scraping isn't really that hard, if you follow Rich's method. Let's see if I can remember...
-- Pivot the part to make sure you have uniform contact when you think you do. This was a revelation to me the first time and really gives me confidence that I can trust the bluing pattern
-- Scrape individual scrapes. I admit that I am pretty lax on this, but follow the general concept, while scraping in a zig zag shape. When I'm finish scraping, I take this to heart. I can easily go 10-20 scraping cycles without digging a big hole when scraping individual scrapes.
-- No chicken scratches!
-- I'm forgetting one...
- For this drill press table, I scraped it on the drill press. It pivots, and is height adjustable, so it was a very convenient place to scrape. Normally I would scrape on my bench.


