Rotary Broach

rwm

Robert
H-M Lifetime Diamond Member
Joined
Mar 25, 2013
Messages
5,127
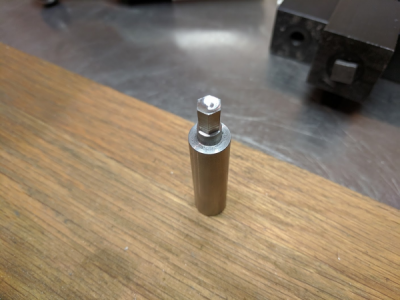
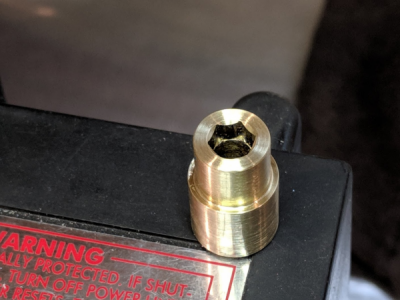
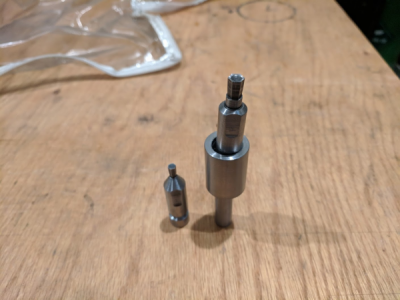
I finally got around to making a rotary broach for that special project that I have not yet envisioned:
292437

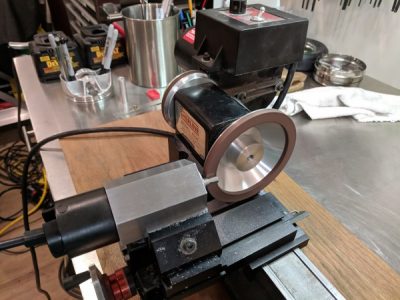
I used my Sherline tool cutter and grinder to grind the broaches out of O1 tool steel:
I clamped a 1/2" bar in my 5C collet block and mounted the vise with 2.5 deg of angle as viewed from above.
The hexagonal collet block worked out perfectly. I was within .02mm on the cutter diameter.
292438

Then I used my Dremel precision tool grinder to dish out the ends rotating the work and the tool:
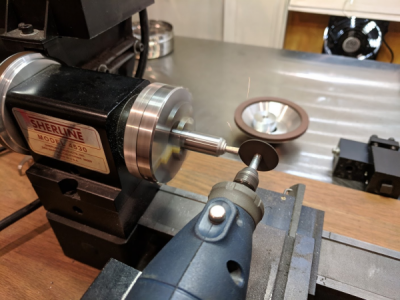
292439

292440

Finished after hardening and tempering:
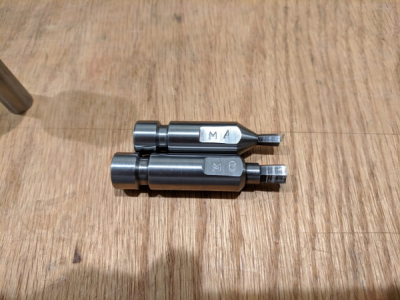
292441

Here is the first hole I made. It is not as clean as subsequent holes. I sharpened the tool after this cut and it works much better.
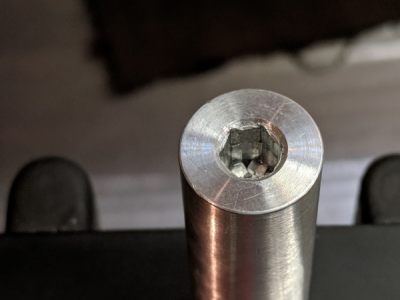
292442

I have one question. The offset base that I made has a wobble of about 0.070". Is that enough wobble? I could go up to 0.100" without interference. Is it worth increasing this offset?

Robert

1555076549850.png
1555076628732.png1555076686704.png1555076727229.png1555076764882.png1555076840583.png
 
Last edited:
can you explain how you made the wobble holder for the broaching tool bit. Unless it is somewhere else
 
I did not show it because it's pretty simple. I machined a holder (socket) with a countersunk bottom to accept a 3/8" bearing ball. There is a matching countersink in the base of the broach. The socket was placed in a 4 jaw chuck and offset in one axis by .035". Then I machined the shaft down to 1/2". The offset results in a wobble of the broach base by .070" The ball joint allows the degrees of freedom necessary for the broach to move. Keep in mind the broach must rotate and wobble with respect to the base.
Robert
Edit: look carefully at the first pic and you can see the shaft is offset to the socket.
R
Thanks I like this approach, and there is a set screw holding the broach bit in place?
 
You do not say anything regarding hardening the 0-1 material.
 
Looks good. I did not do the geometry math on your design to see if you had side clearance on your broach when broaching. That’s all you need to be aware of. You need that clearance. The rotary broach is not that fast an operation. But it gets the job done well. So adding more wobble, being aware the side clearance issue. May not be all that big a deal when all is said and done. Be aware that the offset in your holder is one thing and the length of the broach is also another factor in the overall “angle” of things. I say this because, I see your two broaches are different lengths.
 
Looks good. I did not do the geometry math on your design to see if you had side clearance on your broach when broaching. That’s all you need to be aware of. You need that clearance. The rotary broach is not that fast an operation. But it gets the job done well. So adding more wobble, being aware the side clearance issue. May not be all that big a deal when all is said and done. Be aware that the offset in your holder is one thing and the length of the broach is also another factor in the overall “angle” of things. I say this because, I see your two broaches are different lengths.

Good point. For the longer broach I calculated that I can have .120" wobble without interference. I will measure the shorter one and do the math.

To harden the O1 I used a torch to get to red-orange heat and then quenched in ATF. I then re-heated to get to straw color for tempering. Does that sound correct? I have used the broaches on aluminum and yellow brass and they worked well with the edges remaining sharp.

I made a third broach today 3/16" just have something in SAE.

There is nothing holding the broach in the base. I am using this on the lathe so it doesn't drop out like it would on the mill.

292491

Robert
 
One point of art: The last broach I made I ground the hexagon, then hardened it. As the last operation I dished out the center with the Precision Dremel Tool Grinder. That gave me a very sharp and crisp cutting edge. Also, if your broach measures a little oversize, you can shorten it to get a smaller diameter. I was shooting for .002-.005 oversize.
Robert
 
So assuming the 4 mm broach has a 2 deg taper and is 2" long. One could look at the problem this way. How far can I offset the base until the clearance angle becomes 0 deg? Using this model, the side clearance should be approximately Sin 2 deg x 2" = .069. So the total clearance would be about 0.14.
Based on this, I should probably remake the base with a larger offset.
Robert
 
Last edited:
In contemplating this project I am left with one question. Why does the broach need to rotate? I understand that this engages each tooth separately. But if I put the punch in a press and forced it into the work each tooth should see the same cutting force? Yes it would take more overall force but wouldn't the cutting force on each part of the tool be the same?
Robert
 
Last edited:
Back
Top