- Joined
- Nov 23, 2014
- Messages
- 2,634
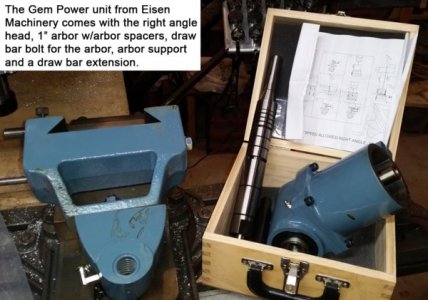
I bought a right angle head attachment for my Bridgeport mill from Eisen Machinery for about $510 delivered. As I mentioned in the “tools bought today” string, I have an Atlas MFB mill with a broken power feed gear box. I have one job that works best with a horizontal mill and am moving the job to the BP over the Atlas. This thread will go through my set up for the head. Frankly, don’t know if it’s correct or not, but it worked for me. At least it gives others a starting point for setting one up; more experienced guys/gals will chime in with better ways.
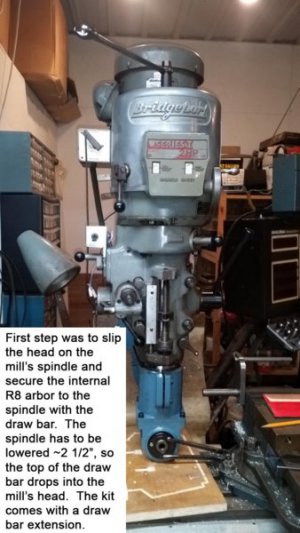
I started by setting the head on a board on my Kurt vise. Ran the table up until the head was just going into the quill. Then tightened the middle set screw on the housing which spreads the housing open for easy slipping onto the BP’s quill. Moved the quill down which made the hex end of the draw bar disappear, the Gem Power head comes with a draw bar extension. Used a spanner wrench on the Rt. Angle head output shaft and a ratchet on the draw bar; tightened the internal R8 arbor in the rt. Angle head to the mill’s spindle.
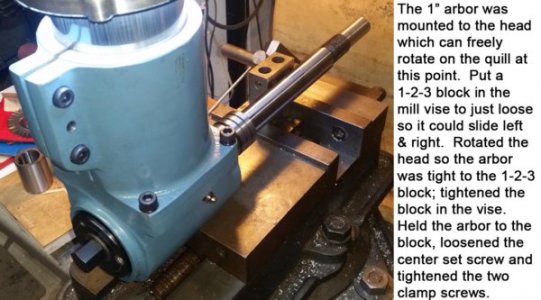
Next step was securing the 1” arbor in the right angle head. I put a 1-2-3 block in the mill vise and slid it side to side until it set hard against the arbor surface. The head freely rotates on the quill at this point, so rotated the head and slid the 1-2-3 block until the arbor was flat on the 1-2-3 block; tightened the mill vise to lock the 1-2-3 block in place. Held the arbor up against the 1-2-3 block, then loosened the center set screw on the head and tightened the two clamp screws. The arbor was now perpendicular to the mill vise jaws.
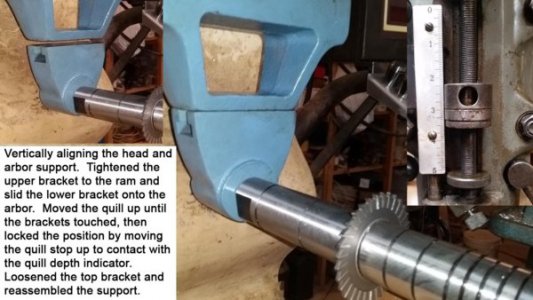
Next step was to vertically align the arbor support with the right angle head. First step was to separate the two pieces of the arbor support. I slipped the bottom part on the end of the arbor and slipped the upper ram bracket onto the mill’s ram. Slid the upper bracket on the ram’s dovetail until it lined up with the bottom bracket and tightened the side clamp bolt (raises the upper bracket to it's "in use" position). Next, raised the mill spindle until the lower bracket kissed up to the upper bracket. I then moved the quill stop up to the quill height indicator which kept the quill from dropping below this point.
I then loosened the upper arbor support bolt, slid the upper bracket away from the head and pulled the lower bracket from the arbor. Reassembled the two arbor support pieces together and slid the assembly back toward the head slipping the end of the arbor into the arbor support hole. Tightened the upper bracket clamp bolt to the ram, and then the upper/lower support bracket bolt.
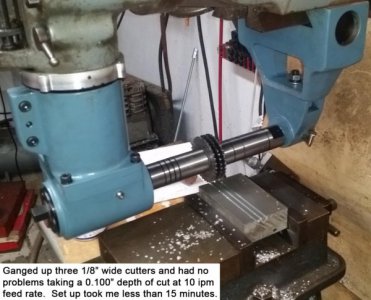
Did a test run on a block of mystery aluminum with 3 ganged up 1/8” wide cutters. No problem taking 0.100” depth of cut at 10 ipm feed rate. I’m going to really like moving this job from the Atlas to the BP. No more conventional only cutting and hand cranking.
Hope this helps others setting up their right angle attachment.
Bruce


