New to me Mori Seiki MV-40

rgray

Active User
H-M Supporter Gold Member
Joined
Nov 26, 2012
Messages
1,307
I bought this 1993 Mori Seiki MV-40 somewhere around the end of June. It took a long time to get to me and took even longer for me to figure out how
to run it.
I wanted to set up with positive tool offsets as that sounds like the best way, and I do have a nice height gauge for measuring tool length.
This machine came from a big shop , but was set for negative off sets which surprised me. Maybe they just changed it to that for my sake
when they deleted all the files???

I got my first cnc about 2 years ago (lathe)and this is my first experience with a cnc mill.
I finally got the tool off sets and machine settings to work and I made this little program that makes a soft jaw for a vice like the one being used.

 
Learning work offsets, and now changed the program to do 2 parts.
Rerun of machined parts in video so coolant could be off for visibility.

I was reluctant to buy a machine like this, but was assured by the salesman that I would get all the books. I got all books EXCEPT the
programming manual. That's right all but the important one.
My guess is the programming manual remained on the shop floor for the operators and was lost eventually. It's a 1993 so it has been awhile.

Also it's a pallet change machine and I got no book or instruction for that either. Set up info there would have been nice. I struggled
to get that lined up. It is on an adjustable base, but without info on the base placement it was not fun getting that lined up.
Book would give dimensions on where to place the base that gets bolted to the floor. Then the changer could be put on it and aligned.

Other thing that I'm struggling with is the sensoring tool. 2 can be entered. I just entered 1 and it is just one of those electronic light up
edge finders. It works just fine, but after called to the spindle I can't put it back in the tool magazine. Must be a special code to do this?
I figured just calling a different tool would do it but it alarms (ex1449 sensoring tool in spindle) and won't let me do anything.
I can push the button on the Z axis and remove it manually, but that's no help because as far as the machine is concerned it's still there and
the alarm comes on again.
The times I've used it the only way out was to delete the sensoring tool from the registry, remove it manually and carry on.
So now the edge finder sits on my tool cart and I can put it in manually if I want to use it. One of the advantages of having it entered in the
machine was when it was called to the spindle the spindle rotation was locked. That was handy for indicator use like for setting vise's straight etc.
Any ideas for fixing that? It's a 93 Mori Seiki MV-40B with fanuc mf-m6 control. Internet search shows mf-m6 is fanuc 16 control.

 
Also going to experiment with pre-staging tools for a quicker tool change.
not sure if this control is capable of it.

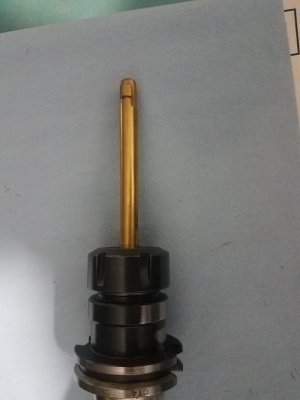
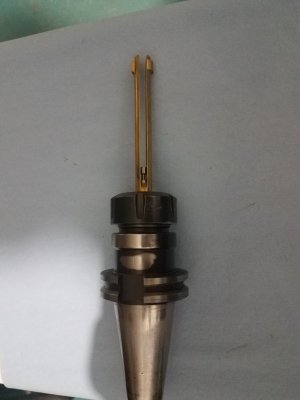
Also have a whats-it. This was in with tooling I purchased. Anyone know what it is?


20191116_092054.jpg

20191116_092102.jpg
 
Most impressive!


No no..... watch some you tube cnc video if you want to see impressive..
I thank you for the comment, but I'm just learning.

I learned that the Mori can rapid a 5/8 end mill right down through a 1" block of aluminum while simultaneous taking .100 or so out of the side of the hard jaw and continue right on through the vise. Program had it sopping 1" above part and I was single blocking(one piece of code at a time) next
button push did that in about 1 second. I hit the stop switch but not fast enough.
I was learning tooloffsets.lol
Vise is fine. It then needed the jaws I was making. Same vise is in the videos. It's the one on the left.
 
I hit the stop switch but not fast enough.

I normally run test cuts with the feed and rapid set at about 10% or less, with one hand on the E-stop. Sometimes even that's too fast. Frightening what a big machine will do. :eek:
 
I normally run test cuts with the feed and rapid set at about 10% or less, with one hand on the E-stop. Sometimes even that's too fast. Frightening what a big machine will do. :eek:

Yep. don't know why I didn't put it on 25%. That's as low as it goes, but next selection puts it at feedrate and then that knob can be turned
down also.
It's the same exact knob and selections as on my 83 mori lathe. I just wasn't thinking.
At 25% it's not to hard to keep up with. I use the "feed hold" button that isn't as forgiving as the E-stop cause it is much smaller, but I just keep
my finger close to it.
 
I learned that the Mori can rapid a 5/8 end mill right down through a 1" block of aluminum while simultaneous taking .100 or so out of the side of the hard jaw and continue right on through the vise.

That’s impressive too, but I was really thinking about having your own machining center and making useful parts.
:)
 
Plugging along and wondering if this machine can do ridged taping. The tooling for it tells me it can as there were taps solidly mounted in tool holders.
After trying a few different ridged tap style programs I finally found the one it works with. It requires the m29 style coding.
One would think that it would also peck tap with a Q value but I either coded that wrong or it's not capable. It approaches the work and stops dead and just sits there ...no alarm, no button pushing will make it proceed.
So I hand coded a peck tap cycle just to try that.
Playing with aluminum cuttoffs but need this taping and peck taping as I'm going to drill a series of holes in the top plates that were mounted on my pallets. They are set up for a quick change system that I did not get with the machine.
I cut and ground spacers to mount the plate with a space over the top of the pallet so I can drill and tap and ream some to 1/2" for location pins.
Plate is held on with (12) 1/2x13 bolts.
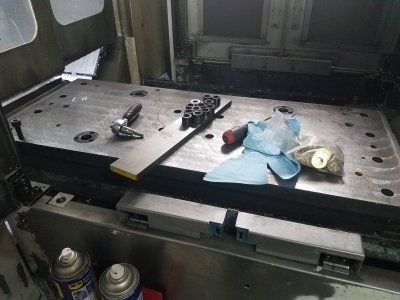
Picture of the pallet with it's top plate loose on it and ground spacers to place under to allow drilling and taping.
20191125_100935.jpg

Short video of ridged peck taping.
Rerun in finished hole for visibility with coolant off.
 
Back
Top