New Shop Press

woodchucker

Registered
Registered
Joined
Nov 25, 2015
Messages
9,510
I have wanted to upgrade my old shop press which was bed frame angle that I welded up.
I picked up a Soloflex weight bench, and am cutting it up, and measuring it out. The nice thing about it is the sides have nice rub strips that have been ground flat/parallel.
I am hoping that the single support for the table on the end is enough, otherwise those ground strips will have to be drilled through, and they may be glued on.

The one I have now.
SDC11664.JPG

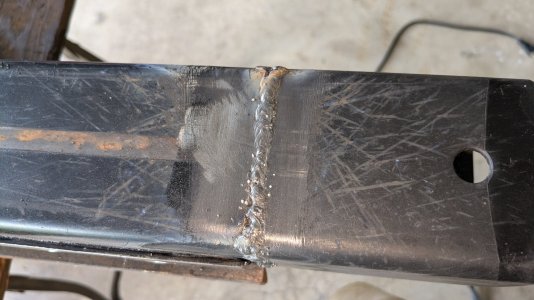
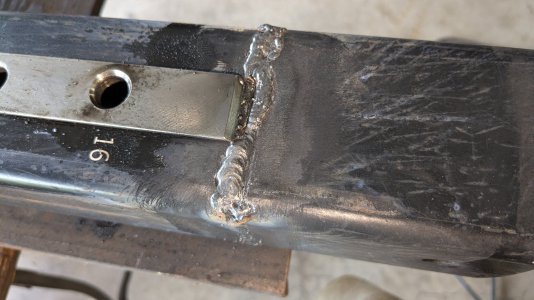
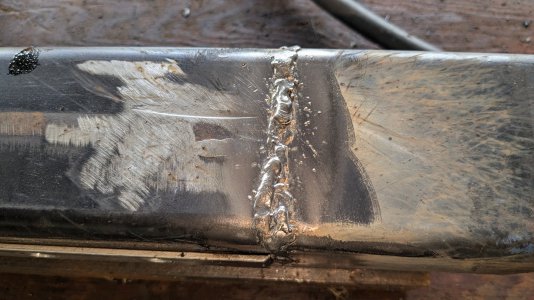
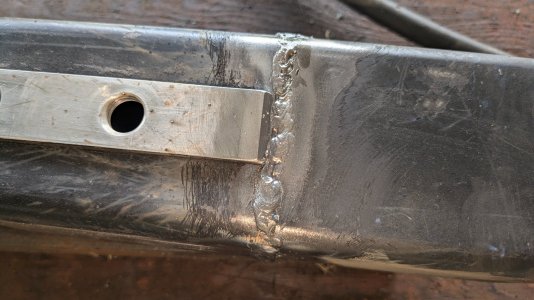
The material for the frame so far. I have some heavy C channel for the table.

PXL_20240704_191444746.jpgPXL_20240704_191450203.jpgPXL_20240704_195644348.jpgPXL_20240704_195647478.jpgPXL_20240704_200808673.jpg
 
I determined the support on the end was not going to cut it. So I ground it off, cut the pipe in almost half, I measured against the ground strips, not the pipe length. I wanted equal support strips. I will add to the pipe length welding on new pieces. Unfortunately they will have to be the top where the ram is so that the length is not wasted.

PXL_20240704_211137404.jpg

I'll weld that 24" piece on to both sections as 12" add ons.
PXL_20240704_225014224.jpg

PXL_20240704_225035548.jpg

I'll have to drill all the holes for the pins. What I'll do is drill one side, then drill a jig with a pin that's bolted down to the table and just keep moving the pipes down. That should do a decent fixturing from one side to the other.
 
The silver strips are 304 Stainless I believe. I had one hole damage the drill bit and then work hardened. I am using Anchor Lube, it's boiling off from the heat, sizzling. I have been running the drills slower since damaging my bit. I resharpened. The stainless is glued on with either glue or tape, so I take care of that later on.
PXL_20240715_182211715.jpg
PXL_20240716_173918746.jpg

I drilled one side, then used a pin to locate the other side. This assured a good alignment, and was a mechanical indexing.
 
Welding lower riser
I am not a good welder. I am a much better at brazing O/A I had lots of good experience with. So I started with the bottom to raise the press and practice welding before I do the more critical top section that takes the high pressure. All tubing ground to 45's. Tacked at each corner, Then stringers run. Some good, some ugly. My biggest problem is pin holes where I either traveled away, or start and stopped. All welds seem to be penetrating, a couple of burn throughs where I was going to slow.
 

Attachments

  • PXL_20240726_201618002.jpg
    PXL_20240726_201618002.jpg
    571.1 KB · Views: 6
  • PXL_20240726_201609917.jpg
    PXL_20240726_201609917.jpg
    563.8 KB · Views: 5
  • PXL_20240726_201011844.jpg
    PXL_20240726_201011844.jpg
    603.1 KB · Views: 4
  • PXL_20240726_191908674.jpg
    PXL_20240726_191908674.jpg
    657.3 KB · Views: 4
  • PXL_20240726_191901083.jpg
    PXL_20240726_191901083.jpg
    619.4 KB · Views: 4
  • PXL_20240726_191853812.jpg
    PXL_20240726_191853812.jpg
    705 KB · Views: 6
PXL_20240727_205716177.jpgPXL_20240727_205722909.jpgPXL_20240727_205737138.jpg

Welding Top stressed area
First weld of the stressed area. Not a bad first weld of the day.
PXL_20240729_192302121.jpgPXL_20240729_192320358.jpgPXL_20240729_192341500.jpgPXL_20240729_194112980.jpg
The ugly. Ugly cap .
PXL_20240729_200240298.jpg

Added 8-32 flat head screws on the stainless strips so that they don't pull off and stay put.
3 per strip.
PXL_20240730_153320756.jpgPXL_20240730_153325495.jpg
 

Attachments

  • PXL_20240729_202555173.jpg
    PXL_20240729_202555173.jpg
    642.9 KB · Views: 4
Trimming the bottom to length
Pins used to lock both tubes together to set the bottom length, marks scratched.
And side cutting the tubes.

PXL_20240731_200226844.jpg
 
Back
Top