My round column RF30 mill to CNC conversion, the cheap way

stioc

Registered
Registered
Joined
Feb 22, 2017
Messages
596
So almost exactly 1yr after the purchase of the mill I've decided to convert it to CNC.

Let me get some things out of the way first, this is going to be a cheap build. Yes in a perfect world I'd have a Tormach 1100 but that would be an overkill for how much I'll use it. Nope, not even going to convert it to ballscrews, at least not yet.

Goals: cheap, quick and easy :p

Hopefully, this conversion will help someone out who has wanted to do this but wasn't sure about it, didn't know how, or thought it was too expensive. If it all blows up, it'll at least provide some entertainment! :lol_hitti

How the mill sits today:
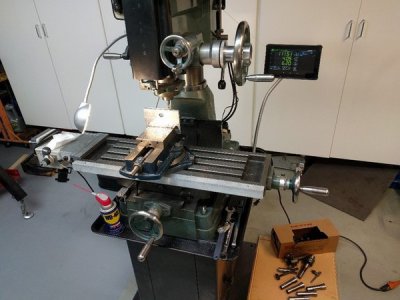
39848675704_45d6d2cc58_o.jpg
 
My CNC experience: until about 2 months ago I knew almost nothing about CNC. Then I decided to build a small Arduino+GRBL based CNC router/engraver for knowledge and fun. This went better than expected, while I have a degree in computer engineering and did a lot of PLC and microcontroller projects back in college anyone can do this stuff these days with the help of Youtube and just general info available on the Internet. In fact, too much info so you have to weed through it all to find what you're looking for sometimes.

I had a budget of $300 for the router and I came just under it by a couple of bucks. It would've been cheaper if I didn't waste $30 or so on crappy endmills from Amazon based on their good reviews. However, the endmills from ebay seller drillman1 totally changed the tiny router from being nothing but an engraver to actually being able to cut mdf and HDPE.

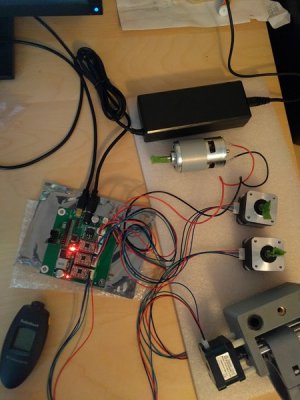
Bench testing the electronics of my last CNC project
39848484704_b43598d1e1_o.jpg

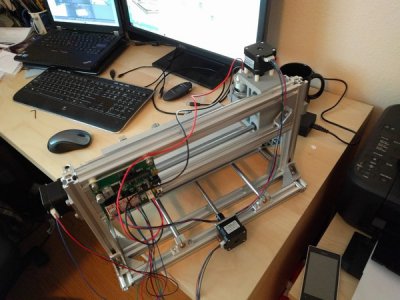
Done - took about 6-7hrs to assemble it from scratch
38748885380_788100476d_o.jpg

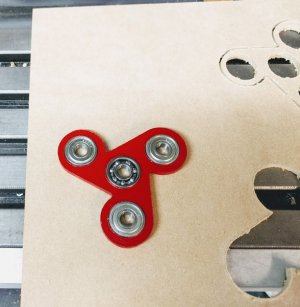
An example of what I made with it:
38748885540_b1861df0e0_o.jpg

My biggest hurdle with CNC is not being good at Fusion360 or CAD/CAM in general but I manage to stumble through it once I have a design/idea in mind.

Anyway, this was/is my entire CNC knowledge but while the router is fun I want to be able to tackle bigger sized projects. Its working capacity is only about 8"x11" and the spindle is pretty weak. Sure I can upgrade, modify to suit my needs, I was even considering buying a Shapeoko XL but then I thought, I already have a 750lbs mill with a decent sized table why not convert that to CNC?
 
Last edited:
So here's the breakdown of the electronics that I'll be using.

CNC software: While I enjoyed the simplicity and speed of GRBL running on Arduino (2 sec from boot up to being ready!) for the little router, for the mill though I wanted something with more features even if I don't have a use for most of them at this time. I boiled my options down to either Mach3 or LinuxCNC. I've chosen the latter for now. Cost: $0

Computer: I have an old Athlon X2 desktop sitting around in the garage, I'll start with it and see if I need to upgrade to something better. It's not the fastest of desktops made even back then lol. Cost $0

Stepper motors: Three Nema 23, 270 Oz from Amazon. Cost $98 total

Drivers: Three TB6600 clones from Amazon. Cost $45

Parallel port interface/Breakout board: 5 axis generic BoB from Amazon, comes with cables: Cost $17

Power supply: 400W 36V PSU from Amazon. Cost $36

Total cost for all electronics: $196
 
Last edited:
Cheap is good, as long as it gets you where you want to go. This should be interesting, I'll be following along. Mike
 
I converted an RF30 many years ago as cheaply as possible - sort of. Even after making the mounts and brackets myself I had $1k in it. Nema 23's are going to need som good gear reduction to work IMO, especially with original acme screws.

I used ball screws driven 1:1 with nema 40 500 ozin motors X&Y, geco drives, and homemade 72vdc power supply. IIRC the first 3 geckos ate up $600 of the cost. I added a 4th axis later on.
 
Last edited:
Thanks guys. I'm doing this not just in a cheap way but also quick and easy way, hopefully, stay tuned! Also, I'm all ears for any words of wisdom along the way.

@Holescreek, that sounds like a great setup, I'd love to see pics as well as more info on it. The prices have come down quite a bit lately and my electronics are cheap and generic unlike your Geckos :p Yes, the motors will have gear reduction :)
 
stioc,
This will be a great build log. I see post from time to time of people trying to understand how to get into CNC with the least cash outlay so this build might help a lot of people. Not only for how to do it simply but also after you get it built to be able to talk about what trade-offs and limitations you encounter.
 
@Boswell - thanks, the idea was to learn and share with others and if nothing else set an example of 'how not to do a CNC conversion' :p
 
LinuxCNC setup:
I installed LinuxCNC 2.7 on the old HP desktop. It was pretty straight-forward, I chose the lazy way and downloaded the full version that's self contained, meaning it'll install Linux and LinuxCNC altogether on a bare disk/computer. I did have to build a bootable USB drive - which is easily done using Rufus (Google for it) on my Windows laptop.

LinuxCNC isn't as intuitive as Mach3 for the uninitiated so I'll give a couple of pointers below. A quick background story on Mach3 first- I was really considering Mach3 but for the first time in my life i got banned on a msg board...I guess for asking questions (perhaps too many?) about backlash compensation. Their Administrator quietly banned me, funny thing is he only banned one of my IP addresses so I can use an open proxy and still cruise around and even post if I wanted to since my account is still active. However, I realized if that's their mode and attitude for providing support I should look elsewhere. I know this is probably atypical as Mach3 is used by so many people but I'm a principles guy so...onward and upward for me.

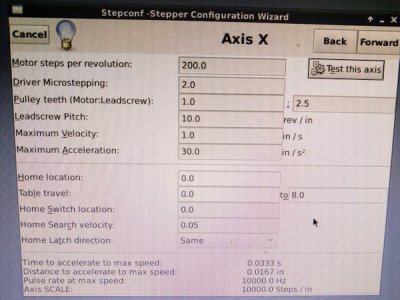
So after I first installed LinuxCNC and logged into the system I couldn't figure out where to start, I ended up in the main panel in demo mode and got frustrated pretty quickly. Then some RTFM later you're supposed to start with the Stepconf Wizard where you fill out some basic information about your mill i.e. axis config, speed, parallel port pin setup etc. When you finish it creates the initial config files etc and places a shortcut to launch LinuxCNC with those settings.

The pic below isn't my actual settings, I'll be playing around some with the numbers and post the config at some later point once I've finalized them. The default velocity and acceleration settings are on the high side in my opinion so I'll be dropping those down quite a bit to start with. Probably 1in/s for Velocity and 5 in/s/s (second squared).

40559229511_b4fe8e0524_o.jpg
 
Bench test and file transfers from Windows to Linux:
OK, so I got quite a bit done today...

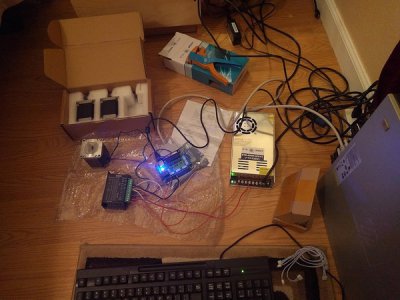
I configured LinuxCNC enough to do a quick bench test to make sure the parallel interface/BoB, the drivers and the motors worked. It was a successful test and no smoke so that means I got the connections setup right lol The key is to remember not to mix up the polarity or the smoke will happen.

The wiring is messy but it'll all get cleaned up soon.
25688582517_f055ca9547_b.jpg

The drivers can microstep to something like 64k steps per revolution but I only opted for 800 steps per rev. This is to ensure as much torque as possible while still getting a decent resolution.

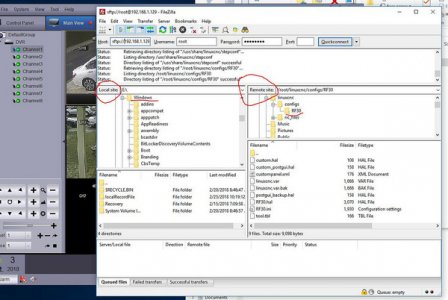
Oh I also got setup to do file transfers from my main workstation in the house to the LinuxCNC computer in the garage over wifi. I'm using sFTP via Filezilla which makes it drag-and-drop simple from left to right.

39700471325_dff620eafa_b.jpg

Next I'll talk about the mechanical parts...
 
Back
Top