- Joined
- Nov 2, 2012
- Messages
- 415
There hasn't been a lot of other users sharing information about this machine, so I thought I'd share my experience so far with it and Quality Machine/Precision Matthews. It took about a month to receive. In stock, time needed to install the DRO, Road Runner Freight over a week in Transit to CA. Not bad. Tracking by RRF was lacking, but I supposed those companies aren't FedEx.
I wish I had a photo of it prior to uncrating, but the guy bringing it down on the liftgate was scaring the crap out of me. The pallet wasn't clearing the floor of the truck, and he was jogging it to get it past the floor while not having it tip over. If it had, my machine, driveway and house would have sustained damage.
But, it landed nicely and in fine shape. I had to take the crate apart to inspect it and get it in the garage on the driver's pallet jack (remember to tip your delivery guy and tell him you will before you ask him to go above and beyond) but we got it inside and safe. From there I had to chop the pallet so my neighbor and I could get it on the floor using my HF 2-T engine hoist. Note: my floor is very smooth, but the cast iron casters do not roll easily or spin well at all when loaded. No surprise, I supposed, but I can't complain for the price. The crate was made of high-quality materials.
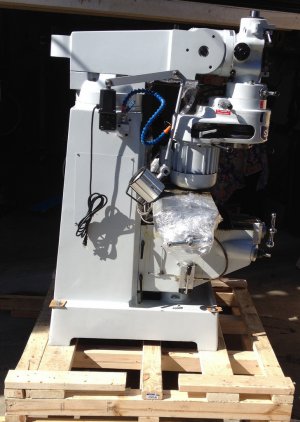
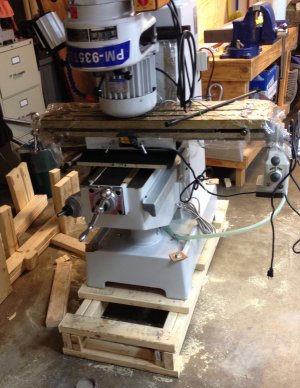
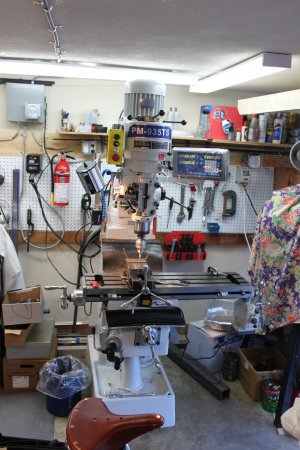
Checking the work envelope, a 5 gallon pail fit easily. For a size comparison, the now disbanded trio of the PM, my Benchmaster and my Grizzly G0704 now living up in Sacramento.
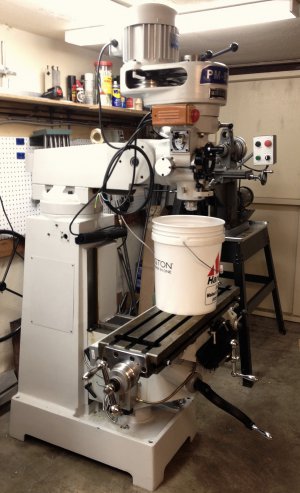
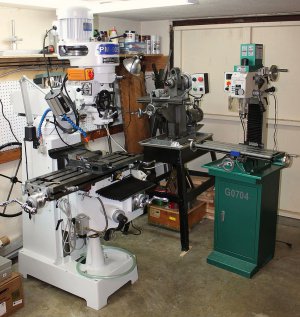
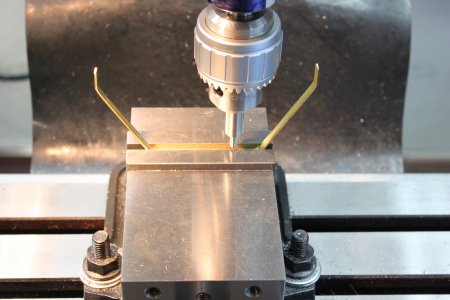
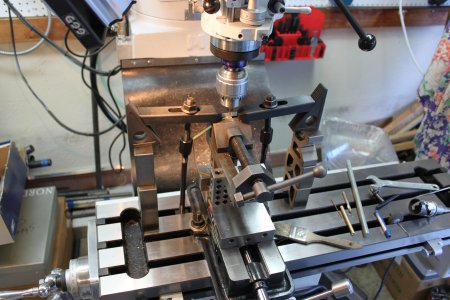
A 4" Glacern vise fits this table very nicely. I do need a speed handle, though.
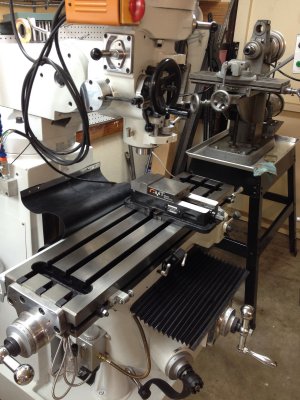
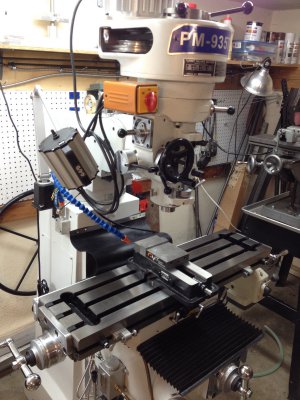
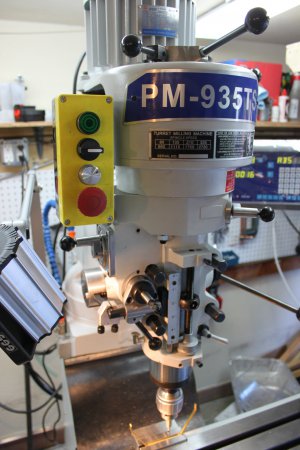
The motor is 3hp 3phase. There was an option for a single phase motor, but that was half the cost of a VFD. Having very recently installed a VFD on the Benchmaster after learning about them via Tubalcain on Youtube (and really enjoying how it turned out), the step-pulley/VFD seemed like a no-brainer (not to mention $1k cheaper, much more simple than variable speed and in stock.) Programming the VFD takes some learning, but rewiring the motor was simple enough. I bought switches and a box from Wolf Automation and made a bracket out of a bit of brazed and painted bed frame and scrap. Currently it's got a start button, reverse/jog button, speed pot and e-stop. The VFD is temporarily mounted on the wall, but I intend to box it up at some point. Wiring is via 18g seven-conductor solid strand sprinkler wire (made in USA, actually) that I picked up at Home Despot. I needed eight wires, so I ran one extra wire next to the seven and wrapped them up in tape and loom.
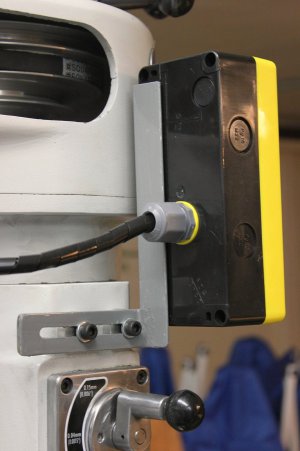
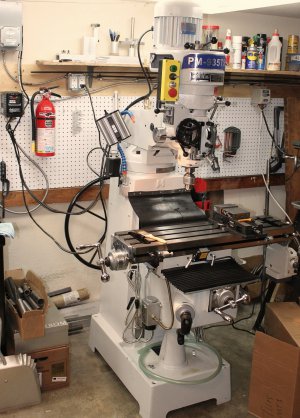
I'm not thrilled with my switch arrangement and programming as is, but it's easy enough to change how it's set up at some future date. For now, it's smooth and powerful. I've drilled half a dozen holes in some scrap steel, and it's so much more robust than the Grizzly (I know, obvious.) I can't fit a Bridgeport with my low ceiling (I still curse the builder who's surely been dead for decades) so this was the biggest alternative I could find. I considered the Grizzly 8x30 Rockwell (?) clone they sell, but lack of adjustment for the Y axis killed my interest. Plus the overall height was taller than this one when packed for shipping and I was worried about getting it inside.
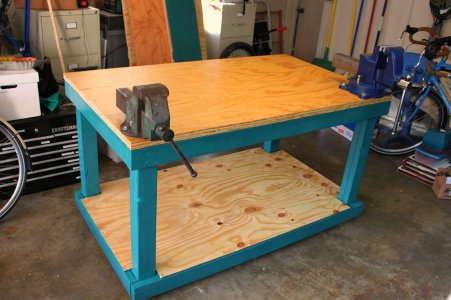
As mentioned, the crate was very well made of quality materials. So much so that I salvaged what I could and made myself a new 3'x5' bench of which 80% or so was shipping materials with the rest of the 2x4s coming from my old bench. The rest was staples, nails and firewood (which I found this evening burned extremely well.)
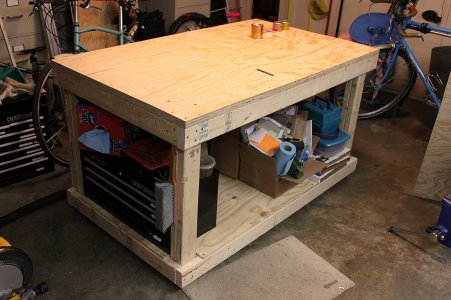
My experience with Quality Machine was very positive. Matt answered all of my questions and gave me a bunch of parameters he suggests for the VFD (which I wanted to install/program myself.) Road Runner Freight delivered with no damage that I can find and I got a new bench out of it. My only gripe is the DRO isn't here because I'm told the last batch had issues and were returned. But better than sending defective stuff, and I can certainly read dials well enough to get some things going. I'd like to build a boring head as a first or second project.
Hey Ray, what's the run-in procedure for this rig? The manual has four pages of "Don't operate while blind, stinking drunk", "Don't operate with long hair or jewelry", etc. but no mention of a run-in procedure. Any idea? I emailed Matt earlier, but probably after business hours. Thanks for any help here. Edit: Matt says no real break-in needed, just start using it.
-Ryan


I wish I had a photo of it prior to uncrating, but the guy bringing it down on the liftgate was scaring the crap out of me. The pallet wasn't clearing the floor of the truck, and he was jogging it to get it past the floor while not having it tip over. If it had, my machine, driveway and house would have sustained damage.
But, it landed nicely and in fine shape. I had to take the crate apart to inspect it and get it in the garage on the driver's pallet jack (remember to tip your delivery guy and tell him you will before you ask him to go above and beyond) but we got it inside and safe. From there I had to chop the pallet so my neighbor and I could get it on the floor using my HF 2-T engine hoist. Note: my floor is very smooth, but the cast iron casters do not roll easily or spin well at all when loaded. No surprise, I supposed, but I can't complain for the price. The crate was made of high-quality materials.


Checking the work envelope, a 5 gallon pail fit easily. For a size comparison, the now disbanded trio of the PM, my Benchmaster and my Grizzly G0704 now living up in Sacramento.


A 4" Glacern vise fits this table very nicely. I do need a speed handle, though.


The motor is 3hp 3phase. There was an option for a single phase motor, but that was half the cost of a VFD. Having very recently installed a VFD on the Benchmaster after learning about them via Tubalcain on Youtube (and really enjoying how it turned out), the step-pulley/VFD seemed like a no-brainer (not to mention $1k cheaper, much more simple than variable speed and in stock.) Programming the VFD takes some learning, but rewiring the motor was simple enough. I bought switches and a box from Wolf Automation and made a bracket out of a bit of brazed and painted bed frame and scrap. Currently it's got a start button, reverse/jog button, speed pot and e-stop. The VFD is temporarily mounted on the wall, but I intend to box it up at some point. Wiring is via 18g seven-conductor solid strand sprinkler wire (made in USA, actually) that I picked up at Home Despot. I needed eight wires, so I ran one extra wire next to the seven and wrapped them up in tape and loom.


I'm not thrilled with my switch arrangement and programming as is, but it's easy enough to change how it's set up at some future date. For now, it's smooth and powerful. I've drilled half a dozen holes in some scrap steel, and it's so much more robust than the Grizzly (I know, obvious.) I can't fit a Bridgeport with my low ceiling (I still curse the builder who's surely been dead for decades) so this was the biggest alternative I could find. I considered the Grizzly 8x30 Rockwell (?) clone they sell, but lack of adjustment for the Y axis killed my interest. Plus the overall height was taller than this one when packed for shipping and I was worried about getting it inside.
As mentioned, the crate was very well made of quality materials. So much so that I salvaged what I could and made myself a new 3'x5' bench of which 80% or so was shipping materials with the rest of the 2x4s coming from my old bench. The rest was staples, nails and firewood (which I found this evening burned extremely well.)

My experience with Quality Machine was very positive. Matt answered all of my questions and gave me a bunch of parameters he suggests for the VFD (which I wanted to install/program myself.) Road Runner Freight delivered with no damage that I can find and I got a new bench out of it. My only gripe is the DRO isn't here because I'm told the last batch had issues and were returned. But better than sending defective stuff, and I can certainly read dials well enough to get some things going. I'd like to build a boring head as a first or second project.
Hey Ray, what's the run-in procedure for this rig? The manual has four pages of "Don't operate while blind, stinking drunk", "Don't operate with long hair or jewelry", etc. but no mention of a run-in procedure. Any idea? I emailed Matt earlier, but probably after business hours. Thanks for any help here. Edit: Matt says no real break-in needed, just start using it.
-Ryan


Last edited:

