- Joined
- Mar 26, 2018
- Messages
- 2,725
Hi All,
I recently acquired a really nice 28mm Kennametal indexable drill (3.75280R215) in a tool trade with a friend. I've never used an indexable drill before and I was very excited to try it out. Unfortunately, I did not have any way to hold the 25mm stub straight shank on my lathe.
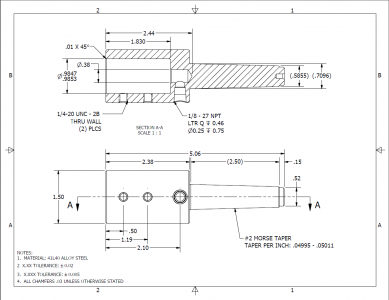
I quickly drew up a tool holder in Inventor and got to work making it. I've attached the design PDF for anyone to use to make their own or modify to suit a similar purpose. The drill is retained by (2) 1/4-20 set screws and has a 1/8" NPT fitting for coolant or air through the drill. Material can be anything, but I had a chunk of 41L40 on hand which machines beautifully.
I'd put the machining at a 6/10 on spice level. Accurately boring the bore and turning the MT2 taper are moderately challenging and would be tremendously frustrating on a lathe that was not well leveled.
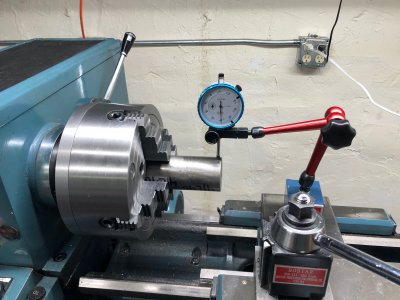
I started with an 8" long 2" Dia bar of 41L40 because that's what I had on hand. I got it roughly centered in my 4 jaw. I have a nice stain started on the back wall from the chuck spray.
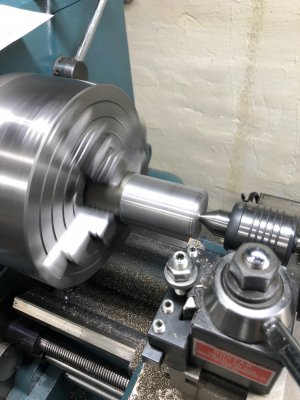
I roughed in the OD using a CCMT32.52 insert from Shars. I was able to get a .100 depth of cut on the diameter with .008"/rev feed at 100rpm. Not bad for a little home shop lathe! Chips were coming off a nice medium straw color and breaking nicely.
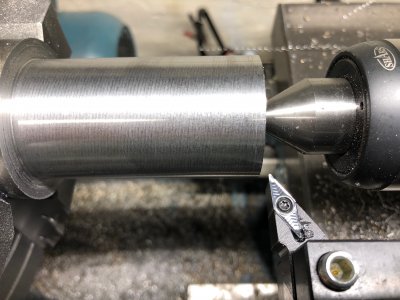
I used a VCGT once I got close to the final dimension since the cutting forces are lower (better accuracy) and the surface finish comes out great. Insert life is pretty crappy on these guys in steel (they are for non-ferrous metals), but at $0.50 per edge I really didn't mind. I just bought 3 more boxes of these because I like them so much.
I roughed in the bore using a 3/8" and a 15/16" drill, then finish bored it with a CCMT32.50 insert on a 3/4" boring bar to get the air tight slip fit that I wanted. Ended up being 0.0008" over the shank diameter. I applied a 45 degree chamfer to the edges with a 45 deg SCMT insert tool.
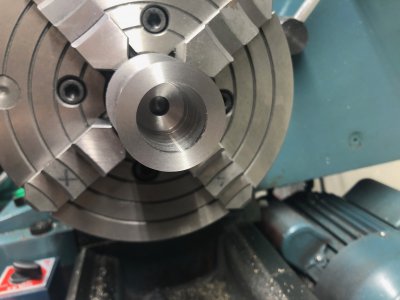
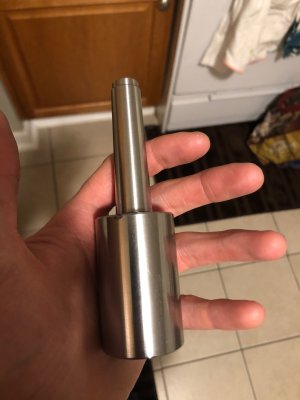
The fit of the drill is amazing!
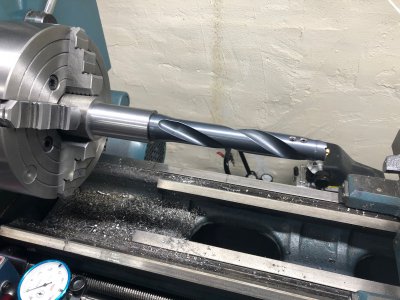
30 seconds with an ultra fine Scotch Brite pad really made it shine.
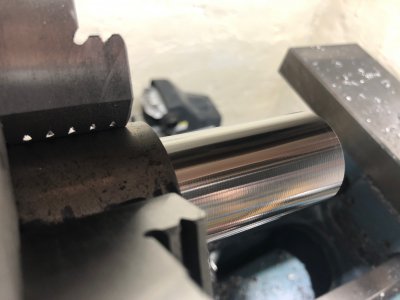
I flipped the part and indicated within .0001" TIR. Then parted off the excess material. I use my power cross feed and don't stress one bit about parting off large diameters.
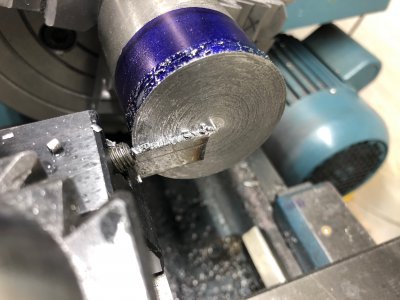
I used the tailstock for extra support and roughed in the back side, leaving 100 thou on the taper for cutting it.
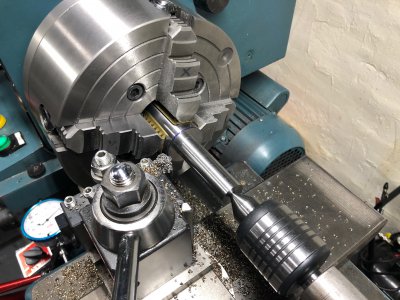
I first dialed in the compound angle using a MT2 dead center and various indicators down to .0001". I then switched to using two indicators, one to measure carriage travel and one to measure taper rate. This allowed me to verify the taper rate accurately. The taper tolerance is 0.04995 in/in +.00016 -0.00000. This was very difficult for me to dial in and took 2 hours of tapping the compound around before I was satisfied. I read on PM that a guy was 3X outside this tolerance and his taper wouldn't "stick".
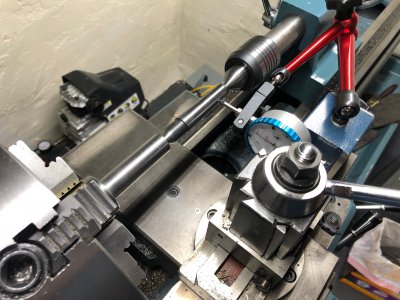
Here was my measuring setup to check the taper rate.
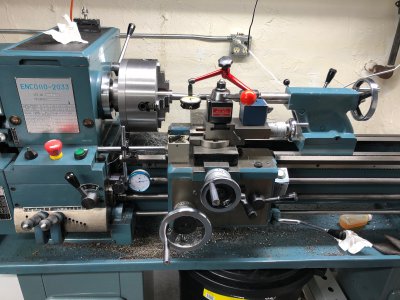
My taper stuck great on the first try without any touch up or hi spot bluing. It sticks better than a couple of my tools, but not as well as some of my newer ground shank MT2 tools. It has a light *pop* when it is released. The steel is soft, so it should wear in a little with use and maybe stick even tighter.
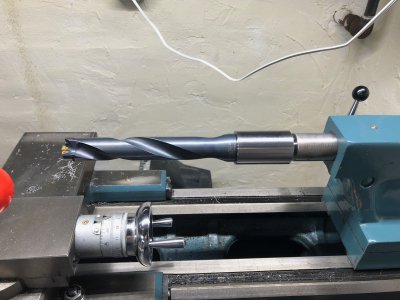
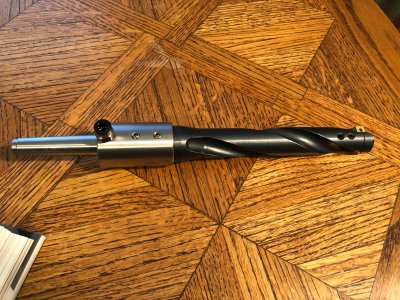
Finally some drilling and tapping on the mill (no pictures) added two setscrews to retain the drill, and a 1/4" push to connect fitting for air or coolant.
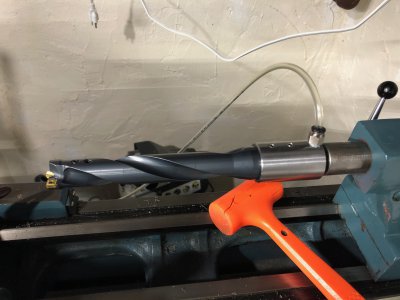
And installed on the lathe! Can't wait to give it a try!
Total time to make this was 4 days or around 8 hours in the shop. I'm not the fastest but I am getting much better about not rushing stuff too much.
Cheers,
Mike
I recently acquired a really nice 28mm Kennametal indexable drill (3.75280R215) in a tool trade with a friend. I've never used an indexable drill before and I was very excited to try it out. Unfortunately, I did not have any way to hold the 25mm stub straight shank on my lathe.
I quickly drew up a tool holder in Inventor and got to work making it. I've attached the design PDF for anyone to use to make their own or modify to suit a similar purpose. The drill is retained by (2) 1/4-20 set screws and has a 1/8" NPT fitting for coolant or air through the drill. Material can be anything, but I had a chunk of 41L40 on hand which machines beautifully.
I'd put the machining at a 6/10 on spice level. Accurately boring the bore and turning the MT2 taper are moderately challenging and would be tremendously frustrating on a lathe that was not well leveled.

I started with an 8" long 2" Dia bar of 41L40 because that's what I had on hand. I got it roughly centered in my 4 jaw. I have a nice stain started on the back wall from the chuck spray.

I roughed in the OD using a CCMT32.52 insert from Shars. I was able to get a .100 depth of cut on the diameter with .008"/rev feed at 100rpm. Not bad for a little home shop lathe! Chips were coming off a nice medium straw color and breaking nicely.

I used a VCGT once I got close to the final dimension since the cutting forces are lower (better accuracy) and the surface finish comes out great. Insert life is pretty crappy on these guys in steel (they are for non-ferrous metals), but at $0.50 per edge I really didn't mind. I just bought 3 more boxes of these because I like them so much.

I roughed in the bore using a 3/8" and a 15/16" drill, then finish bored it with a CCMT32.50 insert on a 3/4" boring bar to get the air tight slip fit that I wanted. Ended up being 0.0008" over the shank diameter. I applied a 45 degree chamfer to the edges with a 45 deg SCMT insert tool.

The fit of the drill is amazing!

30 seconds with an ultra fine Scotch Brite pad really made it shine.

I flipped the part and indicated within .0001" TIR. Then parted off the excess material. I use my power cross feed and don't stress one bit about parting off large diameters.

I used the tailstock for extra support and roughed in the back side, leaving 100 thou on the taper for cutting it.

I first dialed in the compound angle using a MT2 dead center and various indicators down to .0001". I then switched to using two indicators, one to measure carriage travel and one to measure taper rate. This allowed me to verify the taper rate accurately. The taper tolerance is 0.04995 in/in +.00016 -0.00000. This was very difficult for me to dial in and took 2 hours of tapping the compound around before I was satisfied. I read on PM that a guy was 3X outside this tolerance and his taper wouldn't "stick".

Here was my measuring setup to check the taper rate.

My taper stuck great on the first try without any touch up or hi spot bluing. It sticks better than a couple of my tools, but not as well as some of my newer ground shank MT2 tools. It has a light *pop* when it is released. The steel is soft, so it should wear in a little with use and maybe stick even tighter.


Finally some drilling and tapping on the mill (no pictures) added two setscrews to retain the drill, and a 1/4" push to connect fitting for air or coolant.

And installed on the lathe! Can't wait to give it a try!

Total time to make this was 4 days or around 8 hours in the shop. I'm not the fastest but I am getting much better about not rushing stuff too much.
Cheers,
Mike
