- Joined
- Feb 8, 2014
- Messages
- 11,176
Yesterday I was setting up a part on a fixture plate and snugged up, but forgot to tighten, the R/H clamp after dialing in the part. So I drilled the hole pattern, I spotted the dowel pin holes first, then the bolt holes. I was watching the DRO rather than the part, and somewhere in the process of drilling the bolt holes on the R/H side the part moved. Since I was through drilling both the part and the fixture plate the drill bit walked sideways and the holes were about 1/16 inch out of position.  The good news is that the dowel pin pilot holes were in the correct position. So I need to move the holes. The holes in the part are not really a problem, they are just clearance, but the holes in the fixture plate need to be moved over.
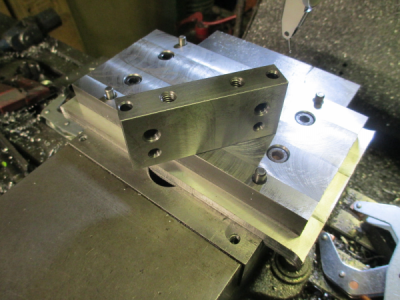
A pic of the part in the correct position on the plate just for perspective.
These two holes need to be moved
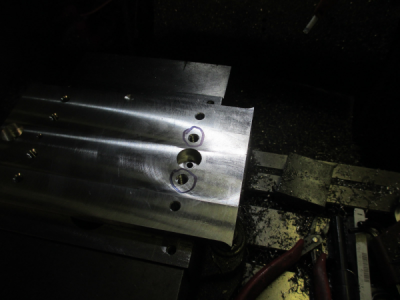
These were tapped at 5/16-18, so I dropped in with a 3/8, 2 flute end mill. An end mill will not follow an existing hole, it will cut exactly where you want it to. You can see how far off the holes are. EDIT: Do not put the end mill in a drill chuck for this operation, use a collet or it will walk off.
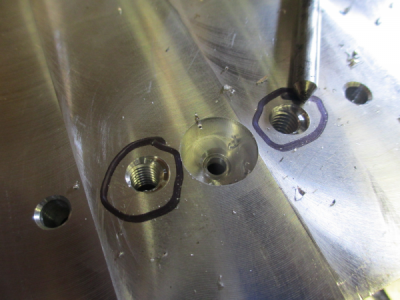
Even after plunging with a 3/8 end mill there are still some threads left in the hole, so I can't drill because the drill bit would just walk sideways. These need to be D&T for 1/2 -13.
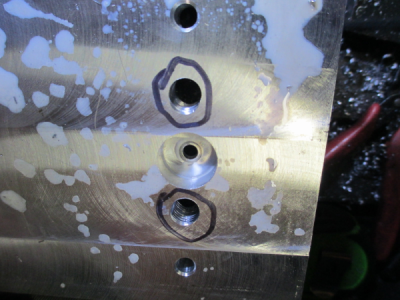
So plunge in with a 7/16 end mill to clean it up and by good luck also happens to be a good size for a 1/2-13 thread.
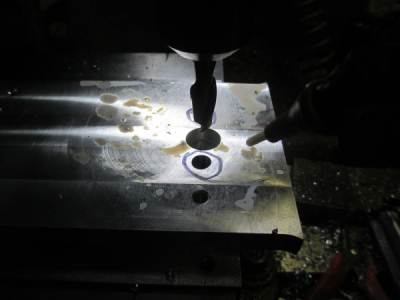
That cleaned up the holes and successfully moved them over. Now I can tap the holes.
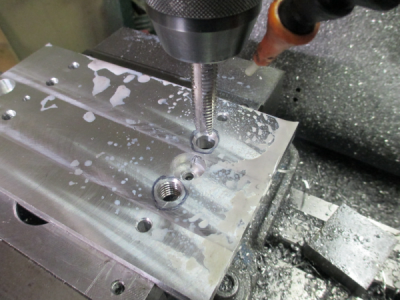
Then it's just a matter of filling the holes back up with something. I could have used a chunk of 1/2-13 all thread or a cut off piece of bolt, but I had to run to the hardware store for something else so I picked up a couple of thread inserts while I was there. So I grabbed a couple of 1/2-13 x ''5/16-18'' inserts out of the box. They turned out to be 1/2-13 x M8x1 metric thread, somebody can't figure out how stock properly. Fortunately I have a good stock of M8 cap screws, and since it's just for the fixture plate not a big deal. I removed most of the thread locker goo from the inserts with the wire wheel, I want to be able to get them back out to use again.
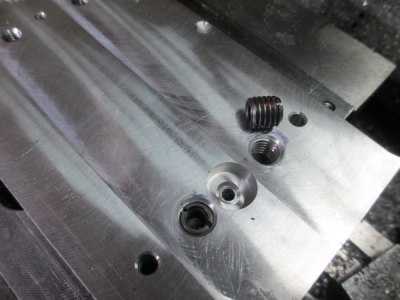
Then I relocated the part on the fixture plate, tightened the clamp this time , finished the dowel pin holes, and then went in and moved the hole centers in the part to where they are supposed to be, using the same end mill plunge technique that I use to move the holes in the fixture plate. This slightly elongated the holes, but it doesn't matter because it's just bolt clearance.
Bottom line: DON'T FORGET TO TIGHTEN THE CLAMP AFTER SETTING UP
A pic of the part in the correct position on the plate just for perspective.

These two holes need to be moved

These were tapped at 5/16-18, so I dropped in with a 3/8, 2 flute end mill. An end mill will not follow an existing hole, it will cut exactly where you want it to. You can see how far off the holes are. EDIT: Do not put the end mill in a drill chuck for this operation, use a collet or it will walk off.

Even after plunging with a 3/8 end mill there are still some threads left in the hole, so I can't drill because the drill bit would just walk sideways. These need to be D&T for 1/2 -13.

So plunge in with a 7/16 end mill to clean it up and by good luck also happens to be a good size for a 1/2-13 thread.

That cleaned up the holes and successfully moved them over. Now I can tap the holes.

Then it's just a matter of filling the holes back up with something. I could have used a chunk of 1/2-13 all thread or a cut off piece of bolt, but I had to run to the hardware store for something else so I picked up a couple of thread inserts while I was there. So I grabbed a couple of 1/2-13 x ''5/16-18'' inserts out of the box. They turned out to be 1/2-13 x M8x1 metric thread, somebody can't figure out how stock properly.

Then I relocated the part on the fixture plate, tightened the clamp this time
Bottom line: DON'T FORGET TO TIGHTEN THE CLAMP AFTER SETTING UP

Last edited:

