Modified tool post compound for broaching and slotting

Mondo

I'm Still Standing!
H-M Supporter - Silver Member
Joined
Nov 26, 2013
Messages
235
In roadie33's thread "New to me C4raftsman Commercial 12x36" he discussed possibly broaching a keyslot in a replacement gear. I offered a solution for folks who do not have a broach set (which can be rather costly) at post # 7.

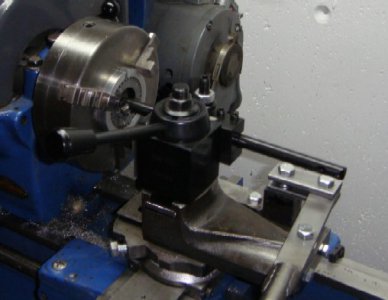
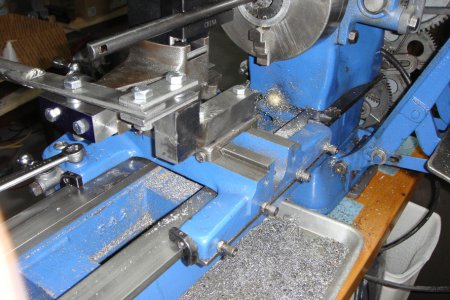
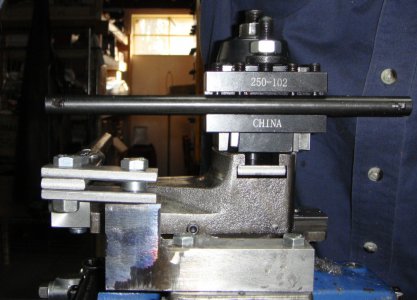
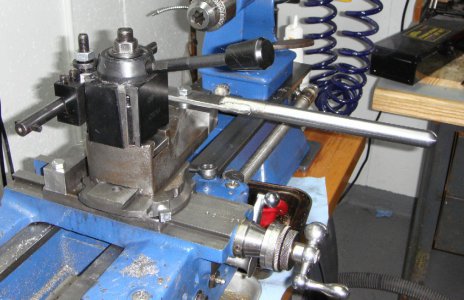
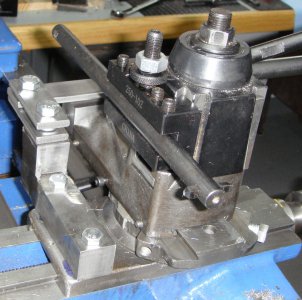
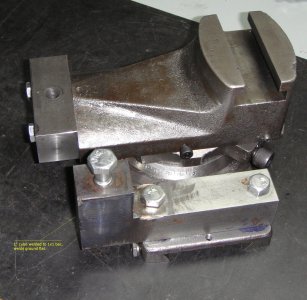
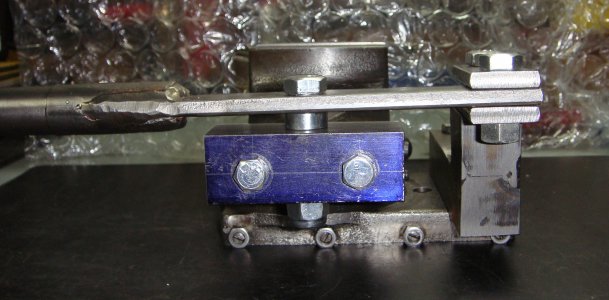
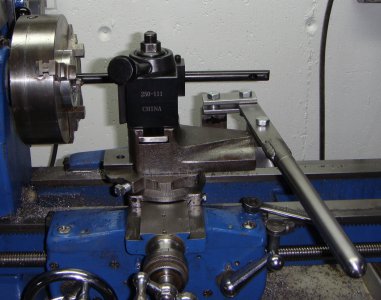
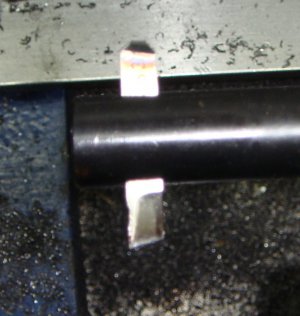
Here I am posting a more complete photo essay of how I modified a tool rest compound to be operated with a hand lever do do the broaching using a boring bar to hold the custom ground cutter.
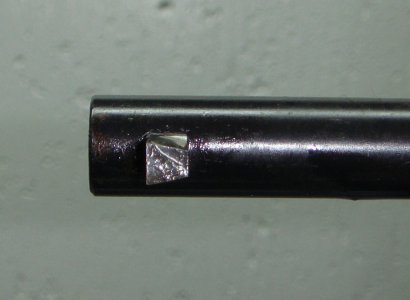
Lever-Operated_Broaching_Attachment_1.JPG 3-16_Broaching_Cutter_2JPG.jpg Lever-Operated_Broaching_Attachment_2.JPG Lever-Operated_Broaching_Attachment_3.JPG Lever-Operated_Broaching_Attachment_4.JPG Lever-Operated_Broaching_Attachment_5.JPG Lever-Operated_Broaching_Attachment_6.JPG 3-16_Broaching_Cutter_1JPG.jpg
 
Neat. How did you make the dovetail clamp?

Robert D.
 
Neat. How did you make the dovetail clamp?

Robert D.

?? Dovetail clamp? The cross slide? Just snugged up the cross slide gib screws a tad bit tighter than normal. No so much that I can't move the cross slide out 1 or 2 thou at a time by turning the hand crank, but enough so it doesn't wiggle or bounce.

Because of the phenomena of "spring back" I have to take three or four passes at a time before retracting the cross slide to advance the depth of cut. So that's three or four passes for each 2 thou advance. It is a bit tedious but for only a couple dollars worth of bolts, nuts, and loose metal I was able to get good results without dropping a Ben Franklin note or more on a broach kit and a press to drive it.

I'll post more photos showing how this is assembled a bit later today.
 
Never mind about the dovetail question. What looked to me like the hex head of a bolt is actually the lock nut on the rear cross slide gib screw. Upon closer inspection, I can sorta make out the slot in the screw. Another photo shows clearly the fixed pivot point L-shaped block and how it is attached.

Robert D.
 
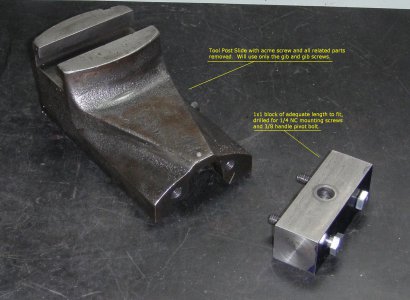
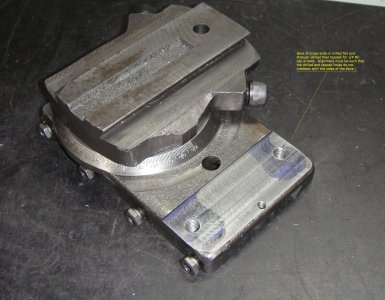
More detailed photos of assembly. You may have to zoom in to read the comments embedded in the pictures:

Tool_Post_Slide.JPGCross-Slide-Compound-Assy.JPGBroaching-Slotting_Attachment_Partially_Assembled.JPGLever_Assy.JPGPivots.JPGAssy_Detail.JPG

The lever has to be located high enough to provide good clearance above the back of the tool post slide.
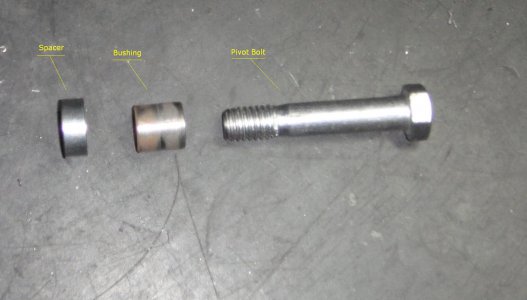
Not all parts are visible - each of the pivot points has a bushing that is just long enough so the bolt pivot can be snugged down tight but permit the lever to still pivot easily.

To avoid having to tear down my service compound for each use I assembled this from spare cross slide and TP slide purchased on E*bay. My total cost is less than 50 bucks, or about the cost of a single broach.
I ground the cutter from a stub of square HSS cutting tool blank. I can change the width of the slot by changing the boring bar and cutter or the way the cutter is ground.

PS:
Inspiration was from this YouTube video: https://www.youtube.com/watch?v=NpcKTtYPNKM
and my natural sense for finding the cheap and easy way of getting things accomplished.

Cross-Slide-Compound-Assy.JPG Tool_Post_Slide.JPG Broaching-Slotting_Attachment_Partially_Assembled.JPG Lever_Assy.JPG Pivots.JPG Assy_Detail.JPG
 
Last edited by a moderator:
Chips,

I think that I like this approach better than the design from several years ago (copy in Downloads, I think) that used the tailstock as the mount for the operating lever, and moved the entire carriage. You should collect your comments and all of the photos into a PDF and upload it to Downloads in the Atlas Accessories folder.

One other thing just occurred to me. If you happen to have the original Atlas boring bar holder that attaches directly to the compound, you could leave it on the modified compound and not have to transfer your QCTP. And leave the whole slotting accessory set up.

Robert D.
 
Chips,

I think that I like this approach better than the design from several years ago (copy in Downloads, I think) that used the tailstock as the mount for the operating lever, and moved the entire carriage. You should collect your comments and all of the photos into a PDF and upload it to Downloads in the Atlas Accessories folder....

Thank you for the comment! Now all I need is time to organize it into a good document.

One other thing just occurred to me. If you happen to have the original Atlas boring bar holder that attaches directly to the compound, you could leave it on the modified compound and not have to transfer your QCTP. And leave the whole slotting accessory set up.

Robert D.

I hadn't though of that.
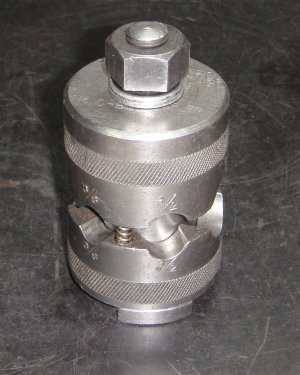
I have one of these Armstrong boring bar holders:

Armstrong_Boring_Bar_Holder.JPG

This would better center the stresses, too.

Armstrong_Boring_Bar_Holder.JPG
 
Yes, the Armstrong Turret type is the style that I was thinking of. And as you mentioned, it should be slightly more rigid that the QC.

Robert D.
 
Back
Top