Mini-mill First Timer.. Tram Troubles..

BOLTTHROWER

Registered
Registered
Joined
May 17, 2016
Messages
3
Hi everybody. I apologize in advance if this is not the best place to post this question. I have looked around a bit but I'm new here and still getting the hang of the forum. I have a HF Mini Mill and I'm trying to learn the basics. I'm having trouble tramming and was wondering if anybody can give me any tips based on the tools I am using.

Harbor Freight Mini Mill
Interstate 4" mill vise
Cheap Dial test indicator from LMS
Cheap clamping holder, unknown brand

I know cheap is not the way to go but I'm trying to work with what i can afford right now. I've read up and watched some youtube videos about how to tram the mill and I'm just having trouble getting things level. I will be using the vise for most projects so I figure it is best to tram using that surface. Just to get started, I thought I would check along the top edge of the vise jaws, although it doesn't seem like that is a relevant surface to measure against. Anyway, it seems that no matter how hard I try, I just can't get things level. The indicator also seems to jump around quite a bit which makes me think I should be using the indicator at more of an angle rather than somewhat vertical like I have been. Maybe this causes it to "skid" around on the vise surface? I would appreciate any tips or advice from anybody who might be able to shed some light on how I can successfully tram this mill. Feel free to tell me I'm doing everything wrong because I most likely am. Glad to be here!
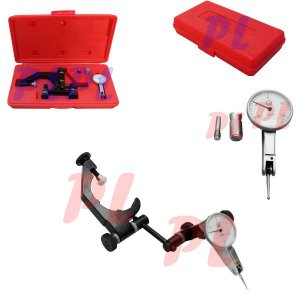
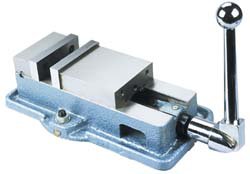
holderindicator.jpg vise.jpg
 
Generally you tram the head to the mill table, then check things like the vice by moving the DTI over surfaces by moving the trammed table. Then the DTI's arm should be almost parallel to the table.
Link to the mill-drill?

Ken
 
Your tools are acceptable. The indicator should be mounted to the spindle so it can turn. First, tram the head to the table, using your indicator and holder and lock all the axes of the mill. Adjust the indicator so it is barely touching the table, just a few thousands movement of the needle, so it does not want to clunk down into the t-slots. Make the circle that the indicator is sweeping a bit less than your table width front to back. Check the readings at the left side, back, right side and front. The idea is to get the same reading all around. For left to right, you loosen the head and twist it left or right until you get your indicator movement to zero, or close to it. The front to back is difficult to adjust, and involves removing the column and shimming it so the ways are perpendicular to the table. For now, just write down the front to back error, and address it later if it is significant. Check again after making any adjustments, with everything locked down.

You tram the vise on the vertical face of the stationary jaw. The vise needs to be loosened to make the adjustment, it is easier with one bolt snugged down gently and gentle tapping to twist the vise on the table. When you get no needle movement, or very little, lock the vise down and test to see if it is still correct.

You can check the top of the vise jaw in the same manner, but the only way to fix it is to precision grind it on something like a surface grinder. Just write down the readings you get for now and remember to take any inaccuracies into account when you are setting up your parts.
 
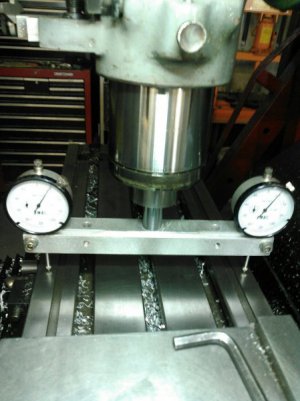
Indicators .0005 $17 ea. LMS , made this traming aid , very accurate , could be made any size.
Traming is quick and easy now
image.jpeg
Extra holes are for vice 5.5" ,still need to sweep vice fixed jaw with dti
 
This is now on my list of future projects for sure. Thanks.

Thanks everybody for the suggestions. Feel free to keep them coming.
 
That Cheap clamping holder, unknown brand is the same as I purchased from LMS. I don't know if their pro version is any better. I promptly threw it in the scrap box. It will allow the indicator to move around giving all kinds of false readings. It is the only tool I've purchased from LMS that I have not liked. They are a great resource. I first switched to a Noga magnetic base on the spindle and then ordered a mini pro tram setup. It works great. dlane has a great setup there for little $. I think I'll make copy it just for fun.

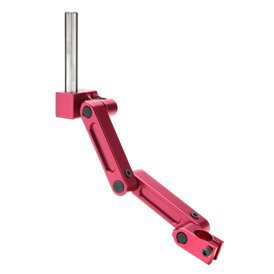
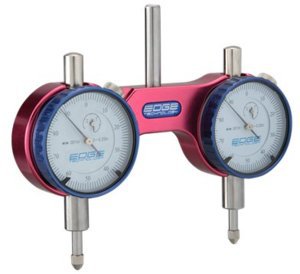
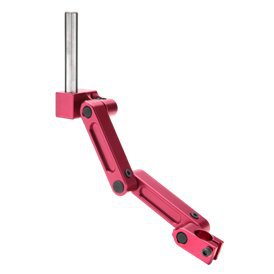
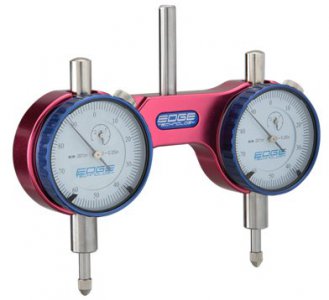
Another good indicator holder that works. $49.00 from Edge Technology
http://www.edgetechnologyproducts.com/

Edge Technology Indicator Holder Shank Mount

86432-38a7d681c3ebb4a5bdf622618d083c67.jpg
86433-42e51efb426a92473e9c0ea72e10ab72.jpgEdge Technology Mini Pro Tram

Edge Technology Indicator Holder Shank Mount.jpg Edge Technology Mini Pro Tram.jpg
 
I got my first one from edge , sent it back , this one works , mo better,
I used China indicators but they work good / repeatable .

Unfortunately USA is trying to compete with them now.
 
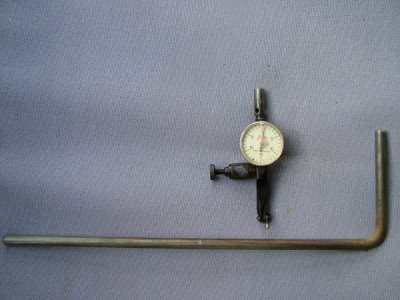
This is my tramming tool for my X2. $2 indicator (crystal was missing), and a piece of 1/4" rod found on building site. Don't laugh it works.
P.S. My head nods down 4 thou. across the width of the bed at the front, but comes back a fair bit when using a 4 insert 2" carbide face mill. :angry no: John.
DSCF1582.JPG
 
Tramming can be made easier when you put a spine on the back of the wet noodle column. I will be adding fine thread bolts to both sides to push rather than tapping with a hammer trying for a minuscule movement. The tilt column is the worst part of the machine BUT it's fixable!
 
Lol. Interesting quote of the day:

Unfortunately USA is trying to compete with them now.

Never thought I'd hear that one!
I got my first one from edge , sent it back , this one works , mo better,
I used China indicators but they work good / repeatable .

Unfortunately USA is trying to compete with them now.


Sent from my Nexus 5X using Tapatalk
 
Back
Top