- Joined
- Jan 29, 2013
- Messages
- 114
The following is a communication that Richard King wrote to a person who was indicating the tails stock (TS) quill from the chuck:
"I would not indicate the center hole of the tailstock spindle with mag base mounted on the chuck as the indicator will always droop or sag when it is turned over. There is a very simple method to prove this."
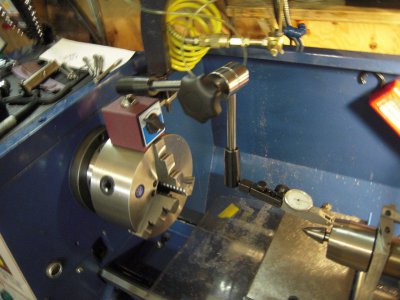
The procedure follows.
1) Mount the mag base on a flat piece of bar stock say 1" x 3" x 10"
2) extend the indicator out as far as you can go
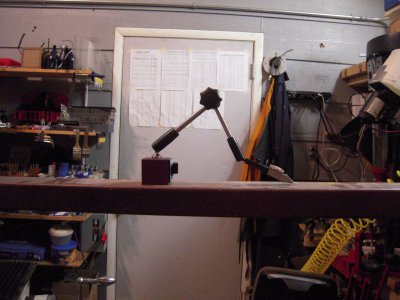
3) Put 1/2 turn of pressure on indicator and zero it.
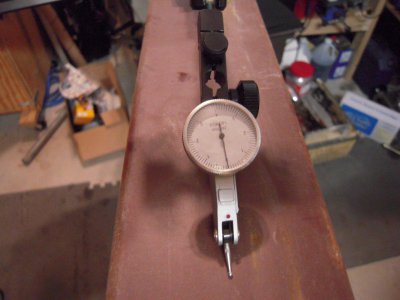
4) Flip the bar stock upside down and check the error.
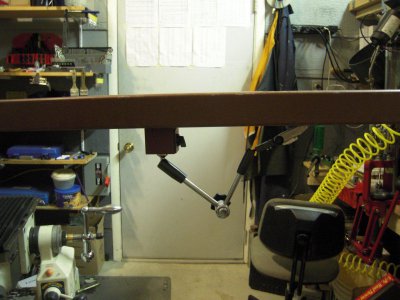
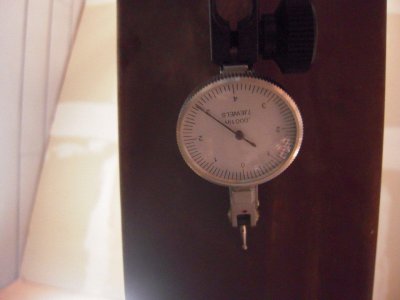
With this factor known mount the same mag base on your chuck and check your spindle and subtract the error you had from the bar. (be sure you have the indicator rod set at same length,) You will get less deflecting error the closer you can mount the indicator to the TS your checking. This is not a recommended method!
The better method:
1) Measure the OD of your tail stock (TS) quill.
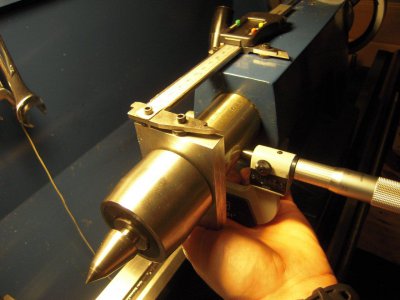
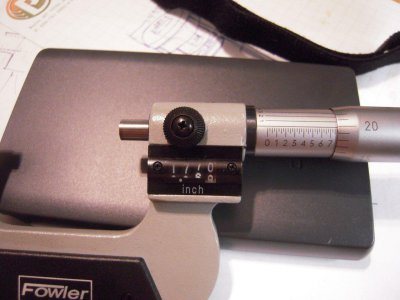
2) Chuck up a round bar stock in your chuck that is bigger diameter then TS quill.
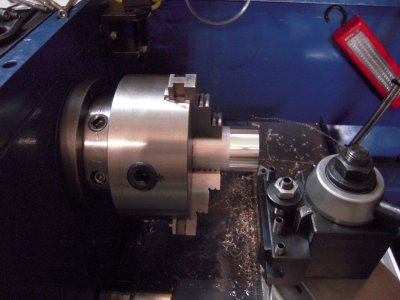
3) Turn it down to the same size.
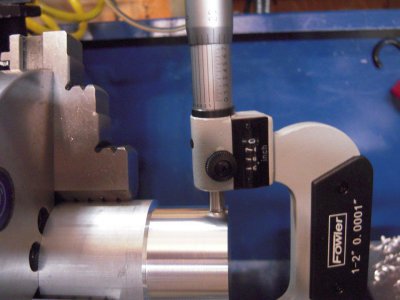
4) Move TS up as close to the Headstock (HS) test bar with TS quill out 3/4 of the quill travel and lock quill and TS down to bed.
5) Mount a mag base to cross slide or compound
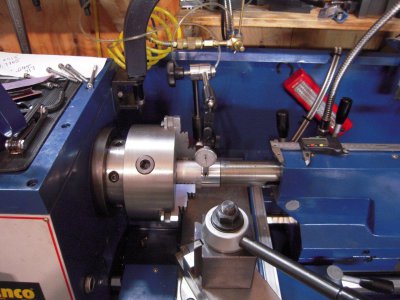
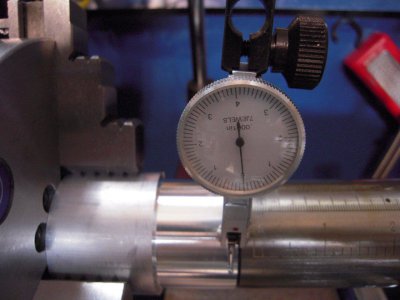
6) Check the side of test bar and quill to be sure they are aligned side to side.
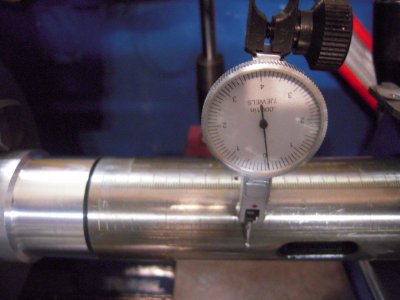
7) If they are off adjust TS sideways to match your HS test bar. (No picture here, sorry, mine didn't need adjusting but this is done by tightening one of the, usually, allen socket head screws on the sides of the tailstock and loosening the other while watching the DTI, 1/2 the distance to zero it and re-checking until the headstock bar measurement is the same as the tailstock quill measurement).
8) Do a top dead center test of HS test bar
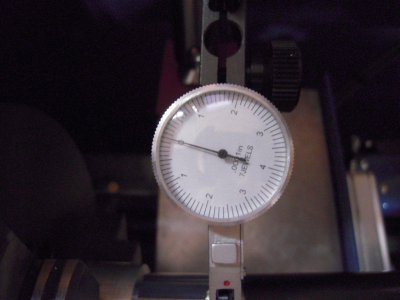
9) Move saddle down to TS, not touching mag base and indicator
10) Do a top dead center test of the quill to check if the centerline or TS is same height as HS centerline.
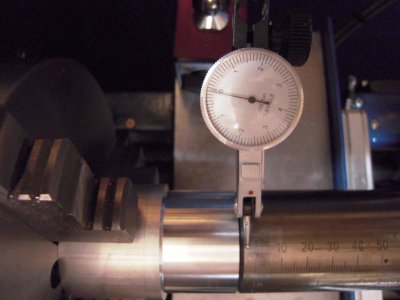
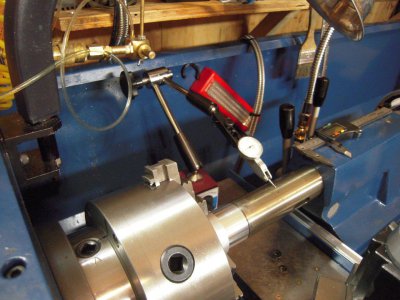
11) Then move the saddle further toward the tailstock and check TS quill to see if it is parallel to centerline.
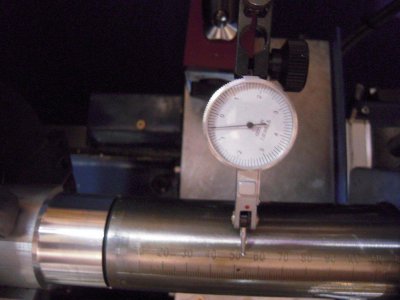

(don't look too carefully at the dial numbers of this first picture as I used the same pictures for the purpose of showing technique only and one was not zeroed when it was taken).
12) The majority of the time the TS is pointing down and low because the dirt gets under the front.
I wll also be doing the following, which Richard included in his instructions, but I will add it to this post when I have done it myself and taken pictures:
13) You may also want to check the ID hole of the TS to be sure it is not burred with the taper shank of TS chuck center or drill bit. Check this with new drill with ground taper.
14) Prussian blue the drill and rub it inside the hole and look in there with a flashlight.
15) If you find the TS low and pointing down post and Rich will tell you how to correct this. Or call Rich if you want more info. 651 338 8141.
More pictures to come
Barry


"I would not indicate the center hole of the tailstock spindle with mag base mounted on the chuck as the indicator will always droop or sag when it is turned over. There is a very simple method to prove this."

The procedure follows.
1) Mount the mag base on a flat piece of bar stock say 1" x 3" x 10"
2) extend the indicator out as far as you can go

3) Put 1/2 turn of pressure on indicator and zero it.

4) Flip the bar stock upside down and check the error.


With this factor known mount the same mag base on your chuck and check your spindle and subtract the error you had from the bar. (be sure you have the indicator rod set at same length,) You will get less deflecting error the closer you can mount the indicator to the TS your checking. This is not a recommended method!
The better method:
1) Measure the OD of your tail stock (TS) quill.


2) Chuck up a round bar stock in your chuck that is bigger diameter then TS quill.

3) Turn it down to the same size.

4) Move TS up as close to the Headstock (HS) test bar with TS quill out 3/4 of the quill travel and lock quill and TS down to bed.
5) Mount a mag base to cross slide or compound


6) Check the side of test bar and quill to be sure they are aligned side to side.

7) If they are off adjust TS sideways to match your HS test bar. (No picture here, sorry, mine didn't need adjusting but this is done by tightening one of the, usually, allen socket head screws on the sides of the tailstock and loosening the other while watching the DTI, 1/2 the distance to zero it and re-checking until the headstock bar measurement is the same as the tailstock quill measurement).
8) Do a top dead center test of HS test bar

9) Move saddle down to TS, not touching mag base and indicator
10) Do a top dead center test of the quill to check if the centerline or TS is same height as HS centerline.


11) Then move the saddle further toward the tailstock and check TS quill to see if it is parallel to centerline.


(don't look too carefully at the dial numbers of this first picture as I used the same pictures for the purpose of showing technique only and one was not zeroed when it was taken).
12) The majority of the time the TS is pointing down and low because the dirt gets under the front.
I wll also be doing the following, which Richard included in his instructions, but I will add it to this post when I have done it myself and taken pictures:
13) You may also want to check the ID hole of the TS to be sure it is not burred with the taper shank of TS chuck center or drill bit. Check this with new drill with ground taper.
14) Prussian blue the drill and rub it inside the hole and look in there with a flashlight.
15) If you find the TS low and pointing down post and Rich will tell you how to correct this. Or call Rich if you want more info. 651 338 8141.
More pictures to come
Barry


Last edited:
