Measuring Pitch Of Thread

prasad

Active User
Registered
Joined
Jul 4, 2014
Messages
156
Guys,

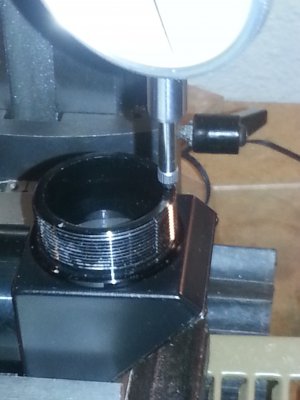
I am making an adapter for a 1.25" right angle telescope diagonal that I bought recently. I have to measure the pitch of thread so that the new one I make will fit the threads. So I mounted the unit in my vice and placed a DI touching the piece I need to replace. I made a mark on it and slowly rotated it keeping an eye on the DI dial. It measured 0.120 inch for 4 turns. I repeated a few times to reconfirm.

Here is my calculation. The pitch is 0.030 inch or 33.3333 TPI. So I think it is not an inch thread. Converted into metric it gives me a pitch of 0.762 mm. Again it does not look like a standard pitch. Am I wrong somewhere? Or should I go ahead and cut threads at 33 TPI in imperial or 0.75mm? Would it still fit the thread in the diagonal? ATT_1452013335757_4513.jpeg
Thanks
Prasad
Wynnewood PA
 
Last edited:
You could machine a piece of brass or aluminum rod to each of those pitches to make your own thread gauge. Then see which fits better. I've also seen 34 tpi referenced.


Sent from my iPad using Tapatalk
 
I guess I would make a test ''nut'' and simply try it to confirm the threads. If you have a spindle microscope, it's easy to find the pitch by measuring point to point.
 
Your technique sounds OK. From what I have seen, optical equipment can have some pretty weird threads. For "normal " threads, possible candidates are 32 tpi, .125" for four threads, 36 tpi, .111" for four threads, .75mm, .118" for four threads, and .80mm, .126" for four threads. I would check again to see if the measured distance could have been .118". Also, if you can make six or eight full turns, it will improve your accuracy.

If the thread is indeed 33-1/3 tpi, you may have a problem cutting it. Most lathes have unpublished gear combinations for oddbeat thread pitch. For example, a Grizzly G4000 will cut a 33.23 tpi with a 40 tooth "a" gear, a 52 tooth "b" gear and the change levers set at positions II B. This would be a 0.3% error which would probably be acceptable.

Each lathe will be different. (I haven't gone through the trouble of calculating them for my G0602 as I haven't had to cut a weird thread yet.)

Edit, I looked again, and I had done the possible combinations for the G0602. The above gears are for a G0602. In looking at the chart for a G4000, it appears that a 36 tooth A gear and 60 tooth B gear and position 4 will cut a 33-1/3 tpi gear exactly. (this should be verified before cutting)
 
Last edited:
If you don't have thread gauges, hold a tap of known TPI up to the threads in question and compare using a light source. The diameter may not match, but the pitch will.


Sent from my iPhone using Tapatalk
 
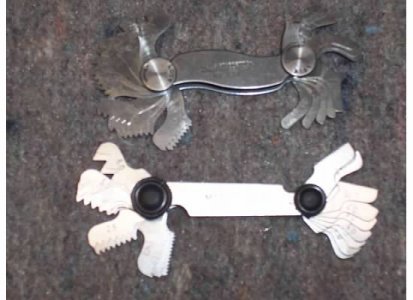
One measures thread pitch with a thread pitch gauge.
They are not expensive, and you need it to check you set up the lathe properly.

The method you are using will work provided everything is really rigid and the indicator is good.
You also need to get it really clean - no dust allowed. Threads have clearance, it is difficult to separate the clearance from the actual measurement. Try setting a weight on the end to force the profiles to engage at the "bottom" rather than being moved up to down by the dust that is visible on the photo.
For best results, you should zero the indicator at the bottom of the thread travel, and screw it up so it compresses the indicator. Indicators (all of them) are inherently less accurate when moving out than when moving in. This will be especially true with cheaper import indicators. I can't tell how you are holding the indicator, but I sense a place where you might be having trouble with rigidity. I would prefer to see a good DTI in a proper holder over a conventional travel indicator held at the wrong end in the mill.

I would have a very close look at the threads with a magnifying glass as well. There are some odd ball instrument threads out there that use different profiles, the BA thread is one example. Since you seem to be into telescopes, maybe you can rig up some kind of optical comparator from an objective lens and a piece of glass with a hair. This would let you measure the angle of the profile.
I am pretty sure you will ruin a BA thread if you screw a 60* thread onto it, so it is worth having a good look at the profile.

As suggested above, you can make a thread gauge. Just turn some small diameter stock and thread with the most likely candidates, then just hold them up to your part and shine a light through from the back. This will also give you a quick and dirty method of ensuring the new thread has the same profile as the old.
 
I've seen some really wacky thread size/pitch on optical instruments over the years. I will be watching to see how this goes for you. Good luck.

CHuck the grumpy old guy
 
Once again, I love this forum. So many replies!!! So much to learn.

OK, I dont have a thread gage and I am going to order one. Found some as cheap as $0.99 with free shipping from China on ebay but at that price they may be no good. I have seen some higher priced ones but need to some more searching.

The original part I am trying to replace has just four threads on it (it is the part that goes into the block mounted in the vise in the picture above. Can't be seen in the photo.). Quite difficult to test with a 10-32 tap. So I tried it with a 10-32 screw. Again not easy to see if they mate well. I think 32 tpi is very close to it. Thread length of 4 threads makes it really tough. I think I will go ahead cutting 33 TPI on my G4000 and see how it goes.

Thank you everyone for your replies,
Happy New year to all
Prasad
Wynnewood PA
 
Back
Top