Making Tiny Brass Washers

MensaPE

Registered
Registered
Joined
Aug 23, 2024
Messages
22
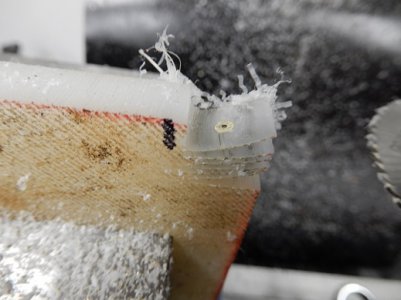
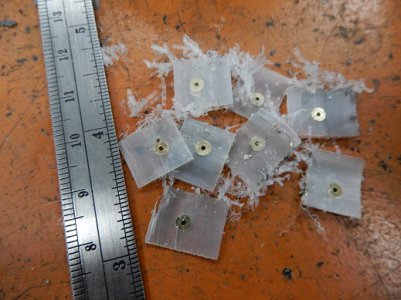
Had a need for a bunch of tiny brass washers, 3mmOD, 0.012 in thick. Tried holding brass tubing vertical, bring in .032" thick slitting saw. Every time one is sawed off, it flips up, leaving a nasty burr on bottom side, pain inna tail to remove nicely. Got the grey matter churning, found a good solution...imbed the tube in soft plastic (cheapo cutting board, maybe polyethylene), then saw through the plastic and brass. Raised the knee 0.0470 in/each washer. Tube is .118 in dia (3mm), drilled a .116 in hole in side of plastic, then easily shoved the tube (end rounded ever so slightly) down a few inches with the mill quill.
 

Attachments

  • DSCN4416.JPG
    DSCN4416.JPG
    82.7 KB · Views: 31
  • DSCN4418.JPG
    DSCN4418.JPG
    106.2 KB · Views: 31
IIRC Joe Pie makes tiny washers from solid rod, facing, turning, drilling & parting in the lathe. Once I can get down to the office (so I can properly search YT) I’ll add the video I’m thinking of.


Larger diameter, but 0.015" thick and the process would be the same for your washers.
 
Last edited:
I made some precise washers for clocking recently. Followed Joe Pie's method, as closely as I could. Biggest thing I found was the parting blade needs to be indicated to be truly perpendicular to the spindle axis. Second thing is to touch up your parting blade so it's a hair longer towards the tail stock, so the washer parts off with no ring attached. It doesn't take much of an angle, really the tail stock side only needs to be a few thousandths longer than the head stock side.

I made a brass washer, really more of a trim ring to cover up an oops. It had an OD of 0.4375" and an ID of roughly 0.420" and was only 0.030" long. Used some 1/2" brass rod and formed the OD and ID just long enough be able to part it off. Used the touched up parting blade to get a clean cut. A brief touch up on the ring for length and was all set. Made it look like I meant it.;)
 
touch up your parting blade so it's a hair longer towards the tail stock

@WobblyHand

Basically, you are saying grind a right-handed lead to the cutting tool edge to avoid the "ring" you get with a straight cut-off tool?

Funny, I recently sourced some right-hand-lead (right-handed) cut-off inserts to avoid that very situation.
 
@WobblyHand

Basically, you are saying grind a right-handed lead to the cutting tool edge to avoid the "ring" you get with a straight cut-off tool?

Funny, I recently sourced some right-hand-lead (right-handed) cut-off inserts to avoid that very situation.
Yes.

It takes a fraction of a second on a CBN grinding wheel to make it center/left or right cut off. I can alter any blade I want. I don't have any carbide parting tools, never required them yet. HSS has worked out fine with rare exceptions. I started out with a mini-lathe and at the time, there were no carbide inserts for OXA tool holders. When I got my 10x22 using AXA holders, I never thought to look for carbide parting tooling, since I've managed to live without them. If I dull the tool, (rare) a touch to the blade fixes it right up. Only parting tool that I've ever broke was one that I dropped blade first onto the floor. Snapped the blade. I've kept the pieces, because, hmm, maybe I can use it for some special purpose.
 
Those M3 washers won't fit this!

Well, I was close on the OD - things get foggy after four years. P17, converted to 0.22. Machined the barrel a wee bit too much, needed to patch the gap with this spacer. Also machined the piston, but don't have any pictures of it.
IMG_20200114_172733.jpgIMG_20200114_172937.jpgIMG_20200114_174433.jpgIMG_20200115_143758.jpg
 
Back
Top