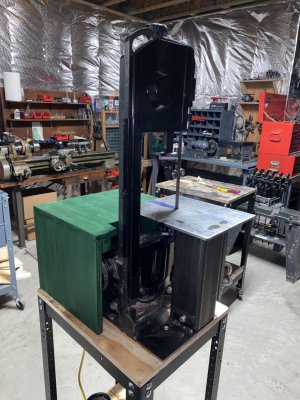
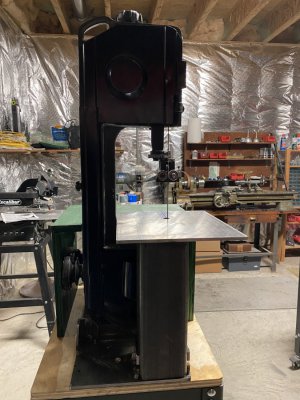
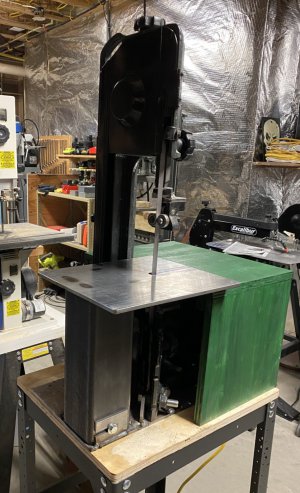
Mad a table for vertical cutting on my 4 x 6 bandsaw

Tmate

H-M Supporter - Diamond Member
H-M Lifetime Diamond Member
Joined
Jul 15, 2020
Messages
422
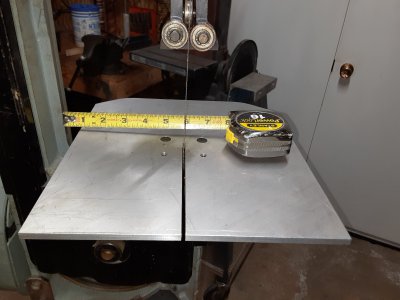
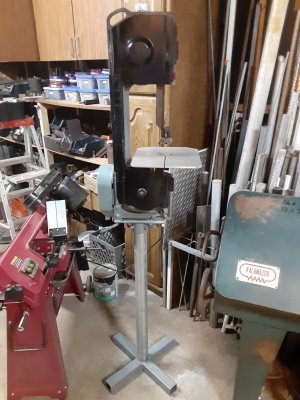
Since I bought my 7" x 12" Jet horizontal bandsaw, my little 4 x 6 has been sitting idle. I decided to make a sturdy table for it so I could do some vertical sawing.

I decided that the simplest approach was to use some 1/4" mild steel plate for a base and a table, and some 4" x 4" x 1/4" thick angle iron for a column. I drilled two 3/8" diameter holes in the saw frame to bolt the base down. The result is an extremely rigid table that could be removed for horizontal sawing (or blade changes) in seconds by removing the two bolts. I plan to use it pretty much for vertical sawing however.
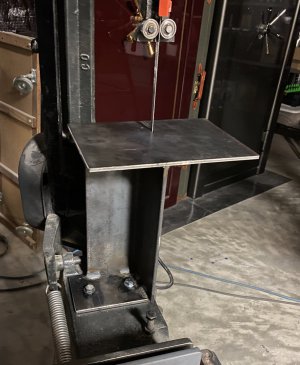
Table 1.jpg
 
Last edited:
I am in the same boat with two saws. I like the idea of setting one up as a verticle saw. Your setup looks quite useful.
 
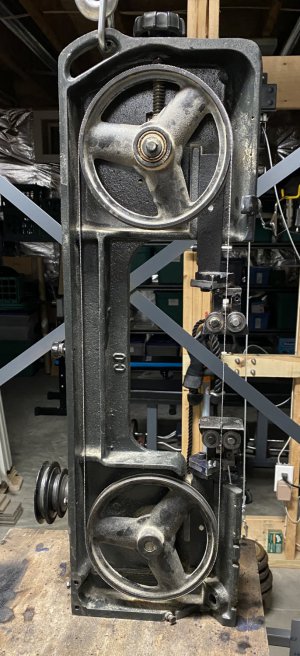
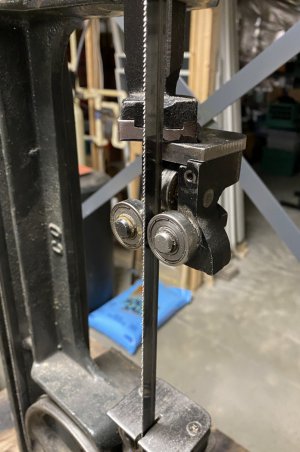
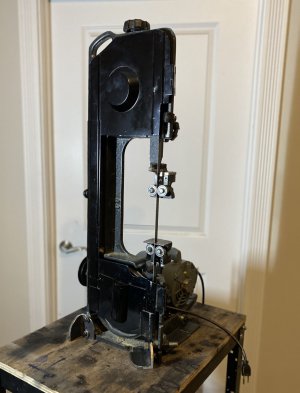
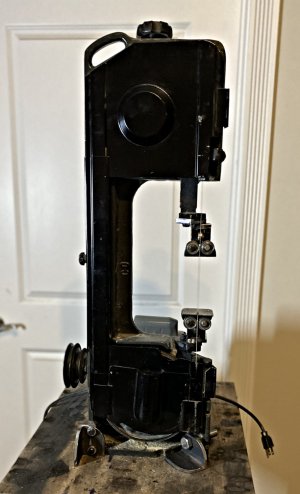
I had two 4x6 saws and did the same, but took it further. By making new blade guide supports I eliminated the twist from the blade and modified the frame, increasing the throat from 2 in. to 6 in. It is now one of the most used tools in my shop.


20210729_230742.jpg

20210813_111515.jpg
 
Since I bought my 7" x 12" Jet horizontal bandsaw, my little 4 x 6 has been sitting idle. I decided to make a sturdy table for it so I could do some vertical sawing.

I decided that the simplest approach was to use some 1/4" mild steel plate for a base and a table, and some 4" x 4" x 1/4" thick angle iron for a column. I drilled two 3/8" diameter holes in the saw frame to bolt the base down. The result is an extremely rigid table that could be removed for horizontal sawing (or blade changes) in seconds by removing the two bolts. I plan to use it pretty much for vertical sawing however.

View attachment 437701
Nice build!
 
I had two 4x6 saws and did the same, but took it further. By making new blade guide supports I eliminated the twist from the blade and modified the frame, increasing the throat from 2 in. to 6 in. It is now one of the most used tools in my shop.


View attachment 437814

View attachment 437815

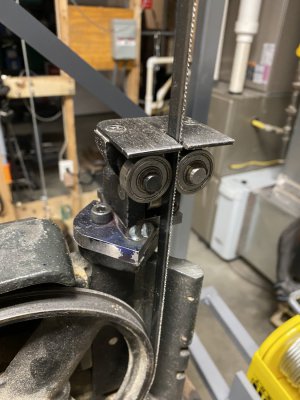
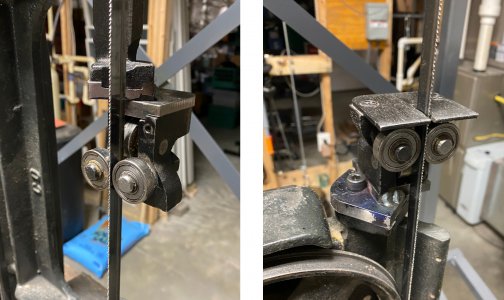
Since I plan to use my 4 x 6 saw (Dayton/Taiwan version) strictly for vertical use, I hope you don't mind my utilizing one of your ideas. I'm scrapping the base and using only the upper part of the saw as you did. The modification to the guides was a pretty easy task. I kept all the upper and lower guide components and fabricated a couple of adapters to rotate the guides. The photo has an unfortunate background, but the 5" plus throat clearance can still be seen.

I started the saw with the new guide configuration, and the blade tracks perfectly. It likes not having to go through that twisting. The stock cover still fits too. I will probably have to make some modifications to my new table shown above. If I can't get it to work, I'll just make another one that will.

That's about as far as I have gotten so far, but I will post additional photos as the project progresses.

guide relocation 1.jpg upper guide.jpg lower guide.jpg
 
Since I plan to use my 4 x 6 saw (Dayton/Taiwan version) strictly for vertical use, I hope you don't mind my utilizing one of your ideas.
Mind!? I'm flattered when someone finds my ideas worth copying.
 
I finished all the mounting brackets and bolted them to the saw. Next steps are to weld the brackets to a 10" x 20" x 1/4" thick steel support plate, and fabricate a table.

4 x 6 conv a.jpg 4 x 6 conv b.jpg
 
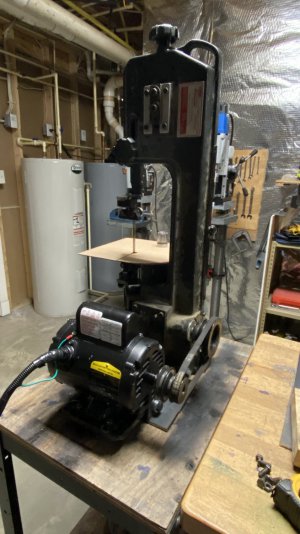
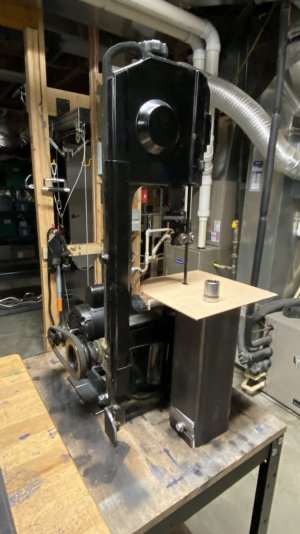
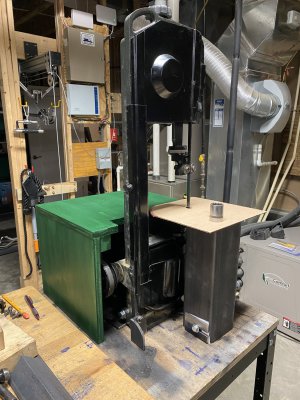
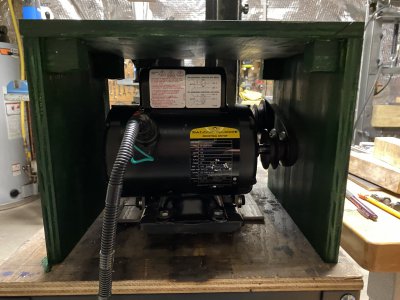
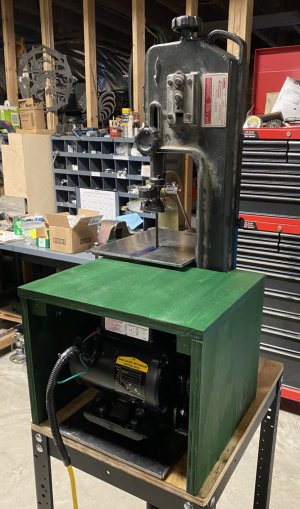
Replaced the 1/3 hp Dayton motor with a 3/4 hp Baldor, and made an enclosure to keep the chips away from it. Still plenty of circulation around it. Motor fit the existing 4x6 motor mount perfectly and uses the same belt. The table support tube & table slide out for blade access. Photo shows a cardboard template for the table.

Adaptors for the roller blade guides were fabricated that permit the blade to be straight, increasing the throat depth to 5". The adaptors can be removed to keep the original blade twist without having to readjust the blade tension.

Next, all this gets mounted on a 1/4" steel plate, and the brackets welded in place. Got an on/off foot switch, although I may swap it out for a stand mounted version (or I may use both).

IMG_4694.JPG IMG_4698.JPG IMG_4708.JPG IMG_4709.JPG Guide adaptors.jpg
 
Last edited:
Back
Top