Subwayrocket

Registered
Registered
Joined
Jun 20, 2016
Messages
346
Question about how far down I can lower the knee. I'm using a chuck on my rotary table and a boring head.
I have barely enough room left to get tooling in. Had to use a short 3" boring bar. I can see another 2 inches of shiny ways below where the knee is stopped by the limit switch.
Is there any harm in moving the limit switches down farther ???
I can use the boring head, but I could really use that extra 2 inches of Z travel for more versatility.
Would anything get stuck if I lowered the knee nearer the bottom of the ways ?
To me it looks like I could still lower it another 2 inches , or at least 1.75" and stop 1/4" below the end of the ways, still have 1/4" of ways showing.
Thanks in advance, I appreciate it !
~Steve
--------------------------------------------------------------------------------
IMG_20161023_105655.jpg
 
If this is a manual mill, move the limit switch out of the way and hand crank the knee down as far as it will go. Then when you finish the job, raise the knee back up and place the limit switch back in place. If this is a CNC mill, don't move it! Don't even remove to lower the knee more. May destroy a ball screw or something else. Ken
 
It's manual. Could I lower the move the position of the limit switch down lower ? If I crank it down by hand, would I feel a "hard ending" then move the switch something like a quarter inch above that ?
Not doing anything until I know for sure . Would be nice if I could. Thanks for commenting
 
On a manual mill you can _gently_ crank the knee all the way down until it stops. Do not power feed it to the bottom of the travel. It is not a good idea on many mills to crank the knee all the way to the top, because there is no stop. The lead screw can come all the way out of the nut, and the weight of the table, work, and knee will fall down the distance of one thread, and dings the thread. Then the screw does not go back into the nut , and you have to remove enough parts as required to get to the end of the lead screw to dress the end of the lead screw thread. Guess how I know about this... 8-( I now have a mark on the knee to column ways that I do not go beyond while raising the knee. Note, the ways go farther up than the lead screw does on the knee of my mill, and I expect that is common...
 
So I can crank it down until I feel resistance ? Could I then crank back up about a quarter to half inch and put the stop there ? As for "all the way up" , I don't forsee doing that, but it is good to know. Thanks Bob !
On my turret, when I was cleaning it, I cranked the ram all the way to the rear... and, with no resistance, it went beyond a point I should have gone. Had to have a friend help jiggle it a bit and luckily it went forward again.
This is the kind of thing I was concerned about. I too have a mark there now. No one tells you this kind of thing. If I had a good manual I could avoid all this ...lol
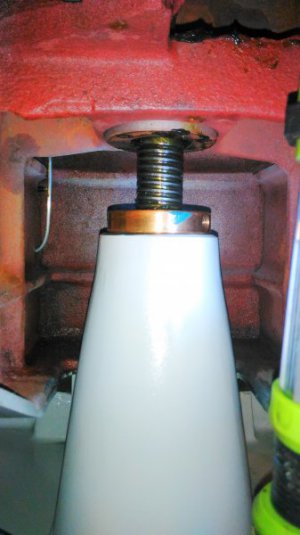
Your pic in your first post shows what I assume is a lead screw (or a ball screw?), a limit switch, and a lock down for the vertical axis. I am not familiar with that machine or arrangement. If it is not an Acme thread, then it may be a ball screw which has semi-spherical "threads".) If it is a ball screw, follow 4gsr's advice. If it is a basic Acme lead screw, then you can probably lower it all the way, but make sure you are not going to overextend something else like a DRO or something. There may be a good reason why the limit switch is set where it is, or perhaps not.
 
On a manual mill you can _gently_ crank the knee all the way down until it stops. Do not power feed it to the bottom of the travel. It is not a good idea on many mills to crank the knee all the way to the top, because there is no stop. The lead screw can come all the way out of the nut, and the weight of the table, work, and knee will fall down the distance of one thread, and dings the thread. Then the screw does not go back into the nut , and you have to remove enough parts as required to get to the end of the lead screw to dress the end of the lead screw thread. Guess how I know about this... 8-( I now have a mark on the knee to column ways that I do not go beyond while raising the knee. Note, the ways go farther up than the lead screw does on the knee of my mill, and I expect that is common...
I went as high as I could when I was trying to figure out what size glass scales I needed and the screw was still engaged, BUT when I when to lower it the table was binding and cause some damage to the base when pulling up on the screw with the table binding, I had to take a rubber mallet and tap the table as I tried to lower the table and it move down, something I will not do again.
 
Your pic in your first post shows what I assume is a lead screw (or a ball screw?), a limit switch, and a lock down for the vertical axis. I am not familiar with that machine or arrangement. If it is not an Acme thread, then it may be a ball screw which has semi-spherical "threads".) If it is a ball screw, follow 4gsr's advice. If it is a basic Acme lead screw, then you can probably lower it all the way, but make sure you are not going to overextend something else like a DRO or something. There may be a good reason why the limit switch is set where it is, or perhaps not.
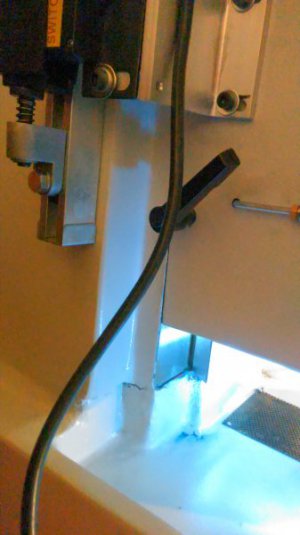
That is a spring that goes over the limit switch push pin . I've looked at DRO and anything else that might hit. Due to the mobile base I built, I have about 5 inches extra below the mill if it were sitting on the ground.
---------------------
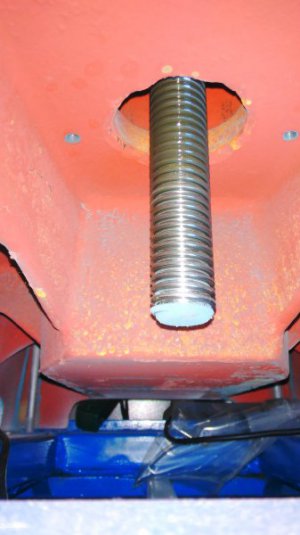
This left pic is looking up under the knee from below, with the knee in same position as the above pic .
The pic on the right is looking up from under the mill base, the blue parts are my mobile mill base I made .
IMG_20161023_160023.jpg IMG_20161023_160137.jpg
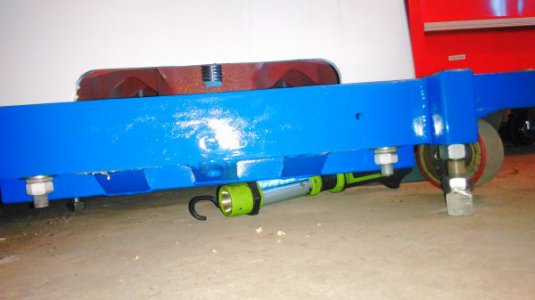
This pic below is the same as the pic in the above right, except that i've backed away so you can see the mill base, the screw protruding down with the green flashlight illuminating it, and the mobile base .
IMG_20161023_160236.jpg
 
Last edited:
That is a spring that goes over the limit switch push pin . I've looked at DRO and anything else that might hit. Due to the mobile base I built, I have about 5 inches extra below the mill if it were sitting on the ground.
---------------------
This left pic is looking up under the knee from below, with the knee in same position as the above pic .
The pic on the right is looking up from under the mill base, the blue parts are my mobile mill base I made .

This pic below is the same as the pic in the above right, except that i've backed away so you can see the mill base, the screw protruding down with the green flashlight illuminating it, and the mobile base .
OK, that looks totally straightforward. My mill does not even have stops on the vertical axis. If nothing is interfering, go ahead and lower it slowly. If it starts to bind, stop and regroup. It also might be worth putting some fresh oil in the bottom of the lead screw and the bottom of the ways, since there is no history of using that portion of the ways and lead screw.
 
Thanks Bob , I appreciate it. I put a glove on and smeared in Bel Ray motocross bearing grease on that screw last week. I'll get the bottom now that it's exposed.
 
Back
Top