- Joined
- Oct 30, 2019
- Messages
- 225
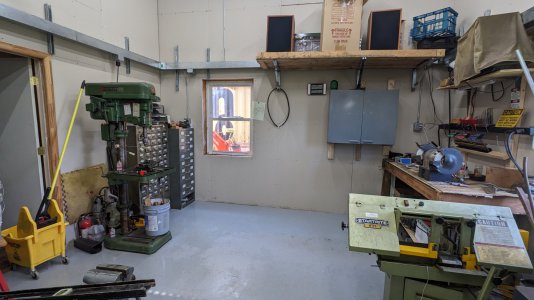
In preparation for hauling in a bridgeport knee mill, I needed to make floor space in the metal shop at home. In doing so, my main realization was that too much valuable floor space is being consumed by storage -- two shelves, a lateral file, and various crap spilling out onto the floor in front of them.
Here's the storage stuff, on a clean day.
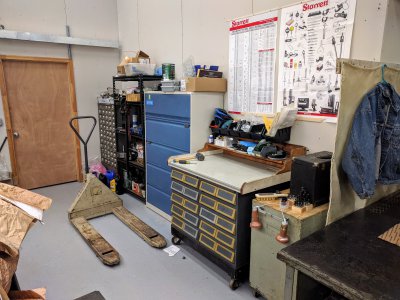
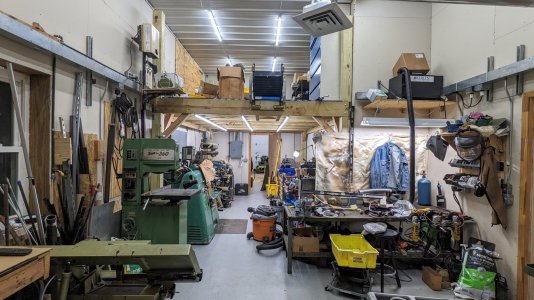
Since moving here, my gut has told me that it would be worth doing something to use the vertical space.... so the solution seemed to be to build a loft/mezzanine overhead, move most of the storage up there (the card catalog with all the hardware would move elsewhere at ground level). Move the workbench along the back wall to where this storage used to be, then put the new Bridgeport where the workbench was.
The plan was to make this a freestanding platform, 10x14'. I had some large pieces of PT lumber from a neighbor, 2x 2x10x10 -- acting as rim joists across the narrow end. And also 2x 2x12x16' that I would cut down to act as rim joist/beams for the longer 14' dimension. Lastly, I had a few 2x8x10 on hand for joists, reducing how many I needed to buy.
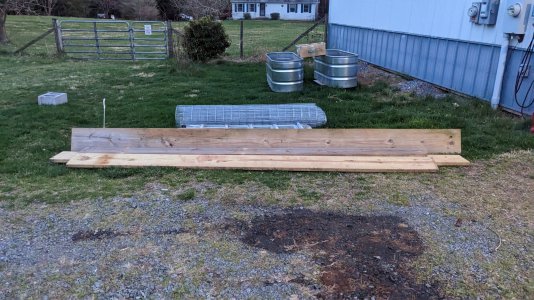
At the lumber yard I bought:
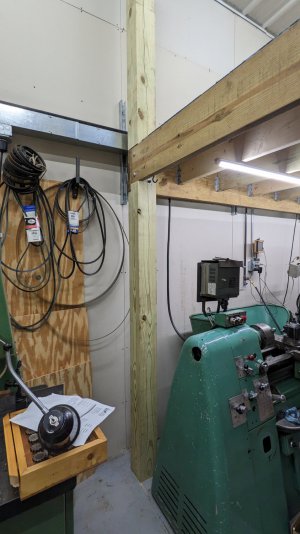
- 4x 6x6x12 (I wanted the support posts to extend above the platform for a railing, shelving, or other structural purposes
- 5x 2x8x10 for joists
- 6 sheets of OSB T&G subflooring
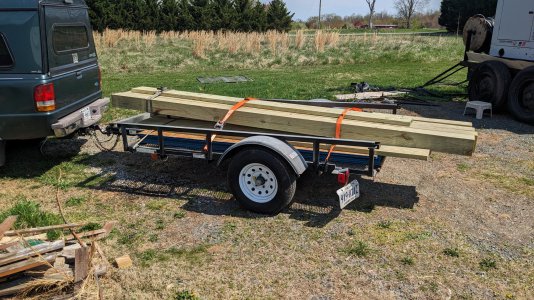
I used a handful of online resources for span lengths and figured that all of this was the right lumber to get a few thousand pounds of distributed static load overhead. I still expect to prioritize putting any heavier items in corners or at one end where a pair of joists would be closer together (plus all the outer joists are larger lumber).
The corner posts' notches s were cross-cut and cleaned up with a chisel, aiming to get a snug fit on all of the rim joist ends. These came out surprisingly clean given that I have never done it before, and for the most part were pretty snug on the lumber.
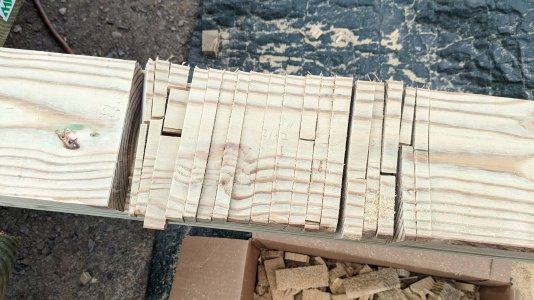
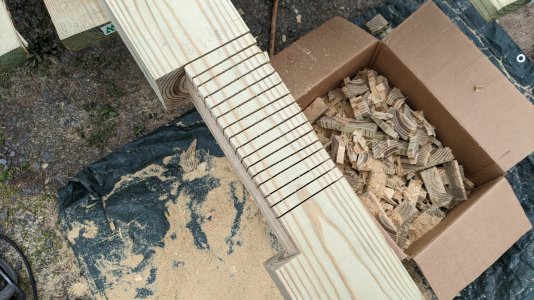
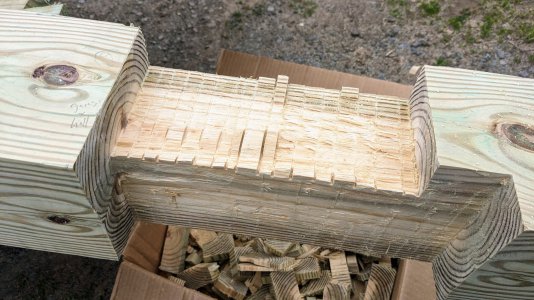
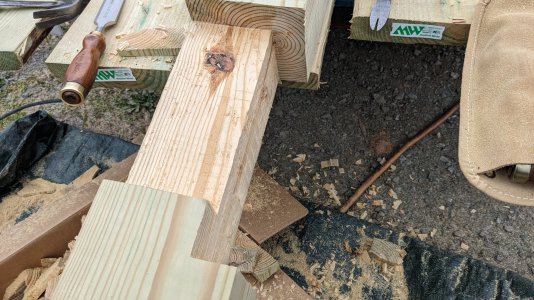
We dry fit the rim joist ends in the yard and cross-drilled for the 1/2" carriage bolts that would clamp everything together. All the posts and ends were labeled so that the holes would be aligned when assembling in situ.
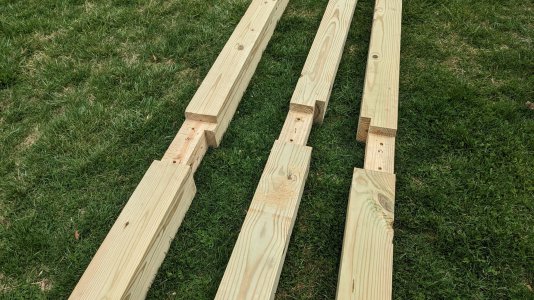
In the shop, assembly was ... tedious. We called over a neighbor for another set of hands because the pieces were awkward and the space wasn't large enough to assemble the framing on the floor before standing it up (even if the machines and storage weren't there)
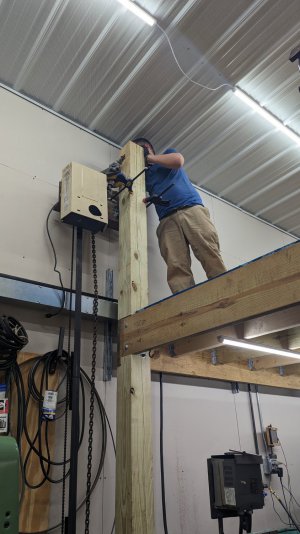
With 3 people we were able to walk these against the wall, and put up the other pair of joists to connect across (in the final notches) and hold them in place.
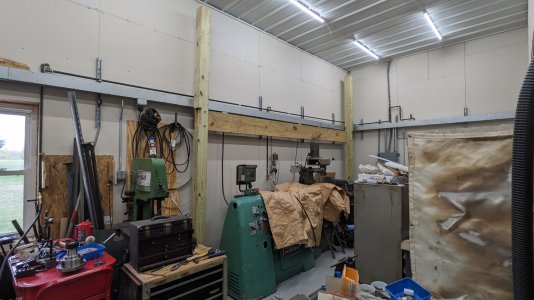
And started adding the other joists in with joist hangers and a mix of screws+nails
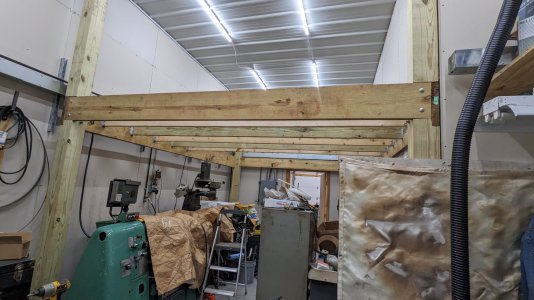
Then the flooring, notched for the posts, cut to size, and slid into place
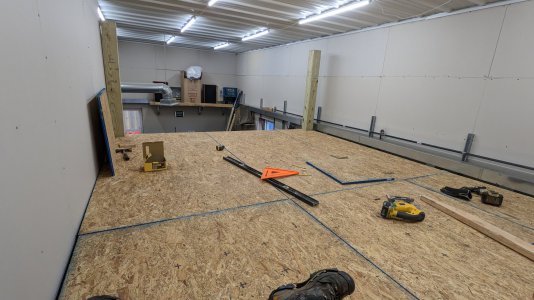
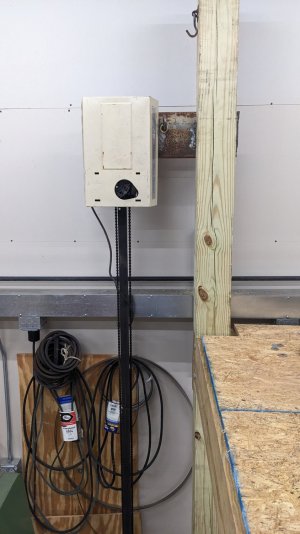
We previously had task lighting suspended off the wall over the machines, which now was re-hung under the storage. More lights to be added once they were delivered.
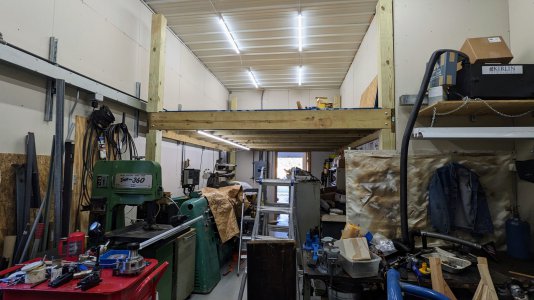
In the meantime, we needed to start getting shelves and material up top. The ground and every horizontal surface was exceedingly cluttered with everything pulled out to make room for the posts, leaving no room for the actual room reorganization that was needed.
Some of the shelves could be broken down into half-height units to fit up top (~64 inches of height). The lateral file would be nice to put up there.... but was too tight a fit to heave up, and then stand in place. It would need to be lifted up exactly vertically, and "slid" into place.
This posed a challenge, because even with 3-4 people there was no good way to lift something that large and bulky and heavy, while keeping it vertical.
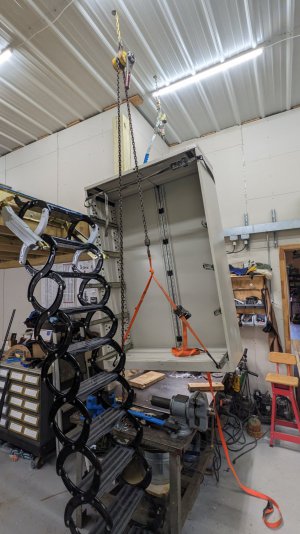
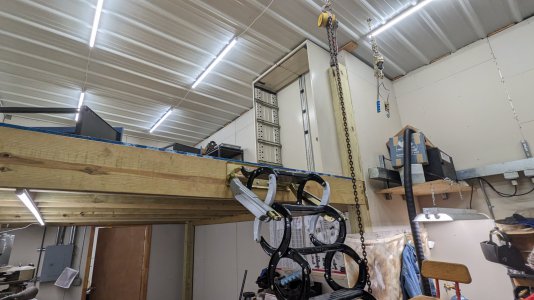
What we ended up doing was going into the attic, screwing a 2x6 across a bunch of rafters, and hanging some pieces of chain down through the sheet metal ceiling. To that we attached two come-alongs. To attach the come alongs to the file, we drilled holes in the front and back of the base of the filing cabinet, and were then able to hook into it with straps to balance the load and tie to the come alongs.
This worked really well, and let us lift the file straight to the ceiling before pulling it onto the elevated platform.
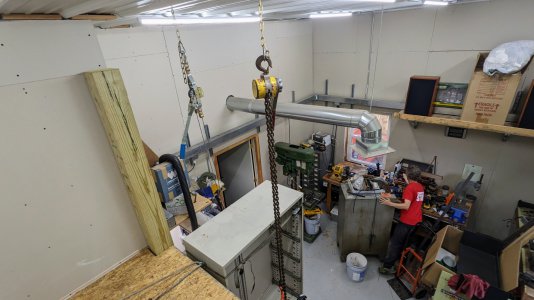
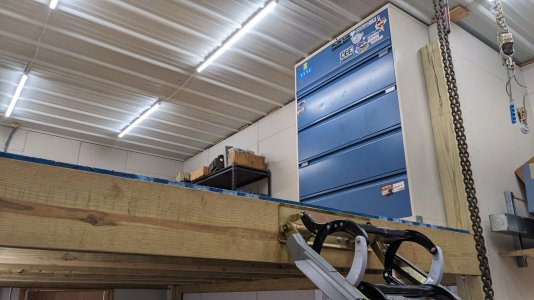
This was ultimately minor but also a big win, to not have to sell/give away this file only to replace it with more open shelves.
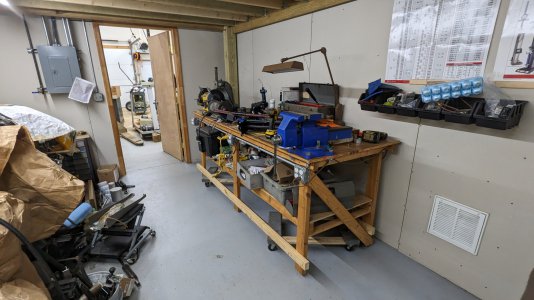
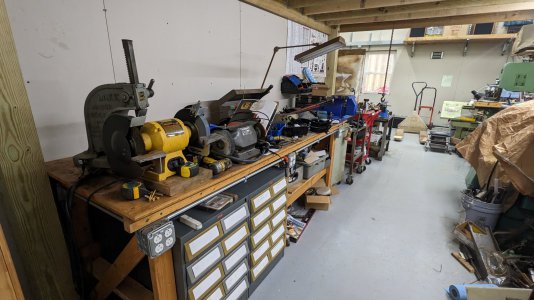
With that and some shelves up there, we were able to start getting stuff off the floor and move the workbench to the floorspace where the shelves used to be
Continuing to another message in this thread for more attachments...
Here's the storage stuff, on a clean day.

Since moving here, my gut has told me that it would be worth doing something to use the vertical space.... so the solution seemed to be to build a loft/mezzanine overhead, move most of the storage up there (the card catalog with all the hardware would move elsewhere at ground level). Move the workbench along the back wall to where this storage used to be, then put the new Bridgeport where the workbench was.
The plan was to make this a freestanding platform, 10x14'. I had some large pieces of PT lumber from a neighbor, 2x 2x10x10 -- acting as rim joists across the narrow end. And also 2x 2x12x16' that I would cut down to act as rim joist/beams for the longer 14' dimension. Lastly, I had a few 2x8x10 on hand for joists, reducing how many I needed to buy.

At the lumber yard I bought:
- 4x 6x6x12 (I wanted the support posts to extend above the platform for a railing, shelving, or other structural purposes
- 5x 2x8x10 for joists
- 6 sheets of OSB T&G subflooring

I used a handful of online resources for span lengths and figured that all of this was the right lumber to get a few thousand pounds of distributed static load overhead. I still expect to prioritize putting any heavier items in corners or at one end where a pair of joists would be closer together (plus all the outer joists are larger lumber).
The corner posts' notches s were cross-cut and cleaned up with a chisel, aiming to get a snug fit on all of the rim joist ends. These came out surprisingly clean given that I have never done it before, and for the most part were pretty snug on the lumber.


We dry fit the rim joist ends in the yard and cross-drilled for the 1/2" carriage bolts that would clamp everything together. All the posts and ends were labeled so that the holes would be aligned when assembling in situ.

In the shop, assembly was ... tedious. We called over a neighbor for another set of hands because the pieces were awkward and the space wasn't large enough to assemble the framing on the floor before standing it up (even if the machines and storage weren't there)
With 3 people we were able to walk these against the wall, and put up the other pair of joists to connect across (in the final notches) and hold them in place.

And started adding the other joists in with joist hangers and a mix of screws+nails

Then the flooring, notched for the posts, cut to size, and slid into place

We previously had task lighting suspended off the wall over the machines, which now was re-hung under the storage. More lights to be added once they were delivered.

In the meantime, we needed to start getting shelves and material up top. The ground and every horizontal surface was exceedingly cluttered with everything pulled out to make room for the posts, leaving no room for the actual room reorganization that was needed.
Some of the shelves could be broken down into half-height units to fit up top (~64 inches of height). The lateral file would be nice to put up there.... but was too tight a fit to heave up, and then stand in place. It would need to be lifted up exactly vertically, and "slid" into place.
This posed a challenge, because even with 3-4 people there was no good way to lift something that large and bulky and heavy, while keeping it vertical.
What we ended up doing was going into the attic, screwing a 2x6 across a bunch of rafters, and hanging some pieces of chain down through the sheet metal ceiling. To that we attached two come-alongs. To attach the come alongs to the file, we drilled holes in the front and back of the base of the filing cabinet, and were then able to hook into it with straps to balance the load and tie to the come alongs.
This worked really well, and let us lift the file straight to the ceiling before pulling it onto the elevated platform.


This was ultimately minor but also a big win, to not have to sell/give away this file only to replace it with more open shelves.
With that and some shelves up there, we were able to start getting stuff off the floor and move the workbench to the floorspace where the shelves used to be


Continuing to another message in this thread for more attachments...

