Hey there everyone
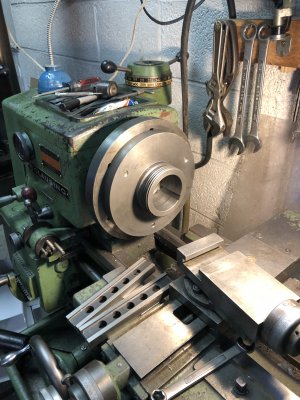
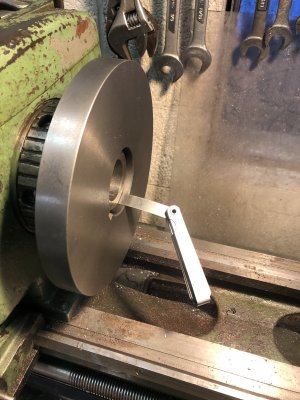
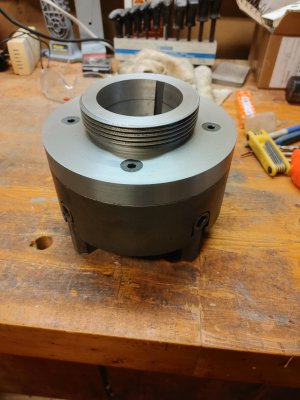
Now, posting this in the "What did you do in your shop today" wouldn't be entirely accurate, as this project took a few months to complete due to overtime at work and other issues arising during daily life. But here she is! This backplate started out as a 8" piece of hot rolled steel, and now holds my 7 3/4" SCA 4 jaw chuck on the lathe.
The first operation in order was to drill and tap four holes to hold the work piece on my faceplate, because my 3 jaw chuck does not have reversible jaws, and i did not want to drill a hole in the center and try to hold by the ID. My little benchtop mill was only able to reach two holes at a time on the X axis, so i had to turn the work 90°, make sure the two holes were lined up straight with the Y axis and drill and tap the other two.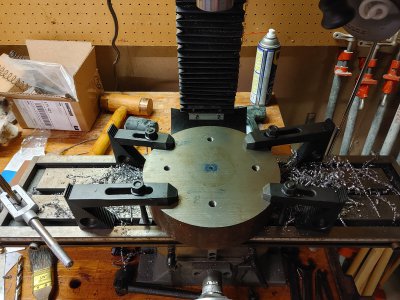
The piece was mounted on the faceplate with bolts and some sleeves made up to eliminate as much play as possible. Took a facing cut to clean up the one face, then started making piles of smoking, blue chips to turn the thread tenon.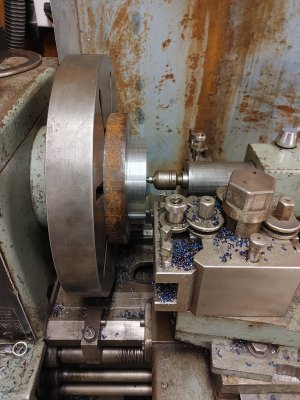
But, before the threads are turned, i needed to drill and bore the internal taper that mates with the spindle nose, because prior to setup, i got the compound lined up with the angle of the nose. I made sure to read Mikey's thread "A Boring Primer" before attempting this as i had never tried a boring operation that requires precise tolerances. I could safely turn my compound now that i was done with that angle and turn the threads on the OD. As you can see, the threads did not finish very nicely, but that is because i made an error in my infeed math, and didnt have any room to take another cut to try to clean it up. The threads feel ok when turning the collar-nut that draws the backplate onto the spindle, so i didnt worry about it too much.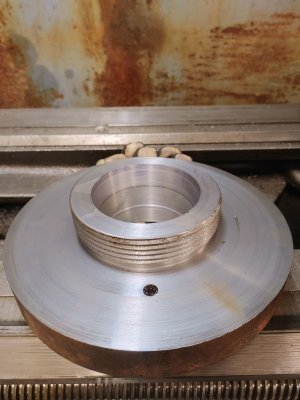
I had to broach the internal keyway at a friends shop, as i dont have a press yet, and this required a broach plug that matched the profile of the L0 spindle nose. I made that back before i even started working on the backplate itself.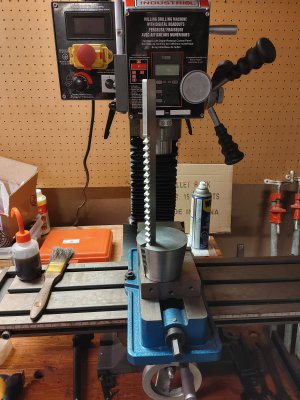
The backplate was now mounted on the spindle with the keyway installed and faced to the required length, the OD was turned down to match the OD of the chuck, and then the chuck register was turned to mate with the recess in the back of the chuck body. This was turned as to require some tapping to fully seat.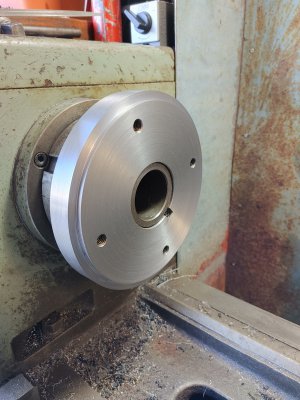
Lastly, i put the backplate on the mill once again to drill out the mounting holes so that the flat socket screws would pass through and thread into the body of the chuck. The holes were countersunk to have the screws sitting just below the surface.
Some people might ask, why not just buy a backplate blank from CMETools? The problem is, i live in canada, and with the border closed due to the covid situation, shipping would cost $99 usd, when the blank itself was around $65 usd. I also learned a number of things during this undertaking, and i have the know-how the next time i find a work holding device that needs a backplate.
Thanks for reading!
Now, posting this in the "What did you do in your shop today" wouldn't be entirely accurate, as this project took a few months to complete due to overtime at work and other issues arising during daily life. But here she is! This backplate started out as a 8" piece of hot rolled steel, and now holds my 7 3/4" SCA 4 jaw chuck on the lathe.
The first operation in order was to drill and tap four holes to hold the work piece on my faceplate, because my 3 jaw chuck does not have reversible jaws, and i did not want to drill a hole in the center and try to hold by the ID. My little benchtop mill was only able to reach two holes at a time on the X axis, so i had to turn the work 90°, make sure the two holes were lined up straight with the Y axis and drill and tap the other two.

The piece was mounted on the faceplate with bolts and some sleeves made up to eliminate as much play as possible. Took a facing cut to clean up the one face, then started making piles of smoking, blue chips to turn the thread tenon.

But, before the threads are turned, i needed to drill and bore the internal taper that mates with the spindle nose, because prior to setup, i got the compound lined up with the angle of the nose. I made sure to read Mikey's thread "A Boring Primer" before attempting this as i had never tried a boring operation that requires precise tolerances. I could safely turn my compound now that i was done with that angle and turn the threads on the OD. As you can see, the threads did not finish very nicely, but that is because i made an error in my infeed math, and didnt have any room to take another cut to try to clean it up. The threads feel ok when turning the collar-nut that draws the backplate onto the spindle, so i didnt worry about it too much.

I had to broach the internal keyway at a friends shop, as i dont have a press yet, and this required a broach plug that matched the profile of the L0 spindle nose. I made that back before i even started working on the backplate itself.

The backplate was now mounted on the spindle with the keyway installed and faced to the required length, the OD was turned down to match the OD of the chuck, and then the chuck register was turned to mate with the recess in the back of the chuck body. This was turned as to require some tapping to fully seat.

Lastly, i put the backplate on the mill once again to drill out the mounting holes so that the flat socket screws would pass through and thread into the body of the chuck. The holes were countersunk to have the screws sitting just below the surface.

Some people might ask, why not just buy a backplate blank from CMETools? The problem is, i live in canada, and with the border closed due to the covid situation, shipping would cost $99 usd, when the blank itself was around $65 usd. I also learned a number of things during this undertaking, and i have the know-how the next time i find a work holding device that needs a backplate.
Thanks for reading!

