It's the Little Things

MrWhoopee

H-M Supporter - Gold Member
H-M Supporter Gold Member
Joined
Jan 20, 2018
Messages
5,921
Since I got my mill 3 years ago, I've been using this table stop. It works fine, but it's inconvenient to position and always seems to be in the way.
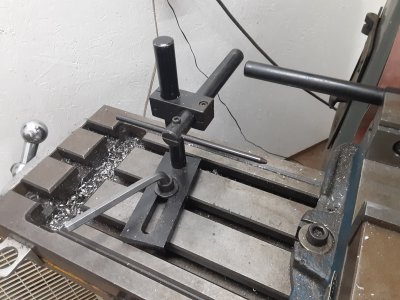
20210704_115456.jpg

I finally decided it was time to make the vise mount.
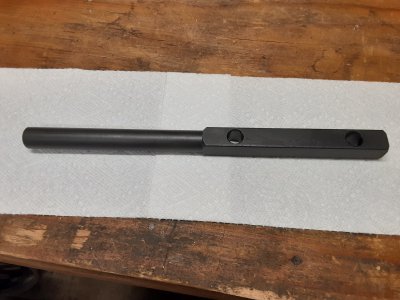
20210704_113421.jpg

I would have preferred 7/8 CR square, but all I had was 3/4 HR. So be it.
1.5 hours machining, overnight soak in vinegar to remove the HR scale and 3 hours to black oxide.
I really have to improve the black oxide process, but the results are getting much better.
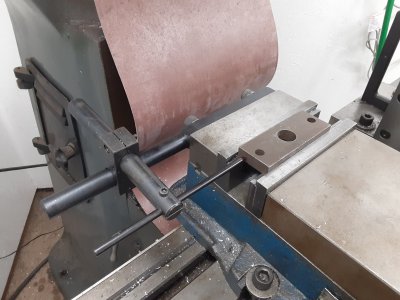
20210704_115802.jpg

Easy to adjust and flips out of the way when not needed.
 
I must have copied your original. Yes I would agree it can be inconvenient at times.
I like your new method! Simple and easy.
Well done sir.
 
Nice job on the vise stop. I'd like to know more about your process for the black oxide.

Ted
I've been using the hydrogen peroxide/salt method.


This last time, I simplified it some.
1. Clean/degrease part (I didn't bother)
2. Immerse part in peroxide/salt solution and leave until the reaction ceases. Discard the spent solution.
3. Immerse part in boiling water. After 5-10 minutes brush with soft brush (old toothbrush) to remove soft red oxide while still in immersed in water.
4. Repeat steps 2 & 3 until the finish is satisfactory or you run out of peroxide solution.
5. Rinse and wipe dry, then apply oil to prevent any further rusting. I use way oil

The part will look horrible after step 2, don't freak out, just keep going. The finish will look mottled and uneven at first but will get better with each repetition. I've been using just enough peroxide solution to cover the part. I believe that if I used a larger volume that it would take fewer repetitions to complete the process. Repeating step 2 while the part is still hot from step 3 accelerates the reaction.

I have not tried it, but it is my suspicion that with enough repetitions of steps 2&3 the reaction in step 2 would slow and possibly cease when there is no more iron available for oxidation. If so, this would provide the best protection from further rusting.
 
Thanks for the detailed instruction. I've been slowly building a scale model of a Civil War cannon and there are a lot of parts on the carriage that I would like to give the black oxide treatment, so this information will be very useful.
Thanks again
Ted
 
I believe I have 10 or so table mounted stops and vise stops here . If anyone is in the market for 1 or 5 I'll put them up on here . :big grin:
 
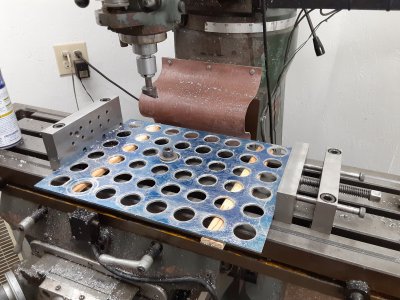
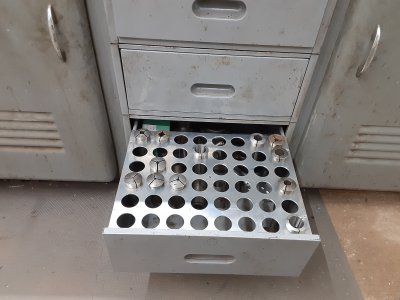
Yet another "little thing". I've been storing my excess 5c collets in a rack made from a piece of 2x6, which was less than satisfactory. I was recently SUI (shopping under the influence) and ordered half a dozen collets off Aliexpress. Time for some upgraded storage.

20210718_122327.jpg

20210719_104351.jpg
 
I've been using the hydrogen peroxide/salt method.


This last time, I simplified it some.
1. Clean/degrease part (I didn't bother)
2. Immerse part in peroxide/salt solution and leave until the reaction ceases. Discard the spent solution.
3. Immerse part in boiling water. After 5-10 minutes brush with soft brush (old toothbrush) to remove soft red oxide while still in immersed in water.
4. Repeat steps 2 & 3 until the finish is satisfactory or you run out of peroxide solution.
5. Rinse and wipe dry, then apply oil to prevent any further rusting. I use way oil

I have not tried it, but it is my suspicion that with enough repetitions of steps 2&3 the reaction in step 2 would slow and possibly cease when there is no more iron available for oxidation. If so, this would provide the best protection from further rusting.
You are correct sir. If all the available surface is rusted, the surface becomes nearly inert. I rust blued the rifles I built until they just stoped reacting and they have never rusted in the field. Nice work on the stop!
 
Rather than order a replacement for the wrong faucet aerator I just received, I decided just to make an adapter. No big deal, 15/16-27 threads on the OD, 13/16-27 threads on the ID. The OD was the challenge because I had to remove it from the lathe to test. Thread wires are a pain, especially that small. Perfect fit OD and ID. Glad my old Heavy 10 will cut 27 tpi. It's these little things that make me giggle.
 

Attachments

  • 20210807_173706[1].jpg
    20210807_173706[1].jpg
    503.7 KB · Views: 26
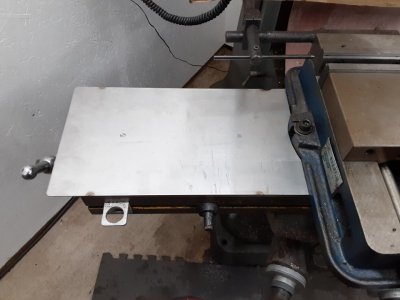
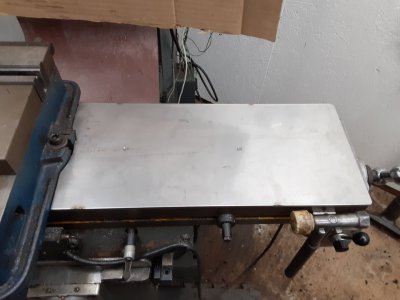
Today's little thing was table covers for the mill. After scavenging thru my stock, I found a piece of 11 ga. S/S sheared exactly 9" x 36". Pretty substantial for table covers, but it's the right size. Aluminum buttons on the underside keep them from sliding around.

20220315_144615.jpg 20220315_144609.jpg
 
Back
Top