- Joined
- Nov 23, 2014
- Messages
- 2,634
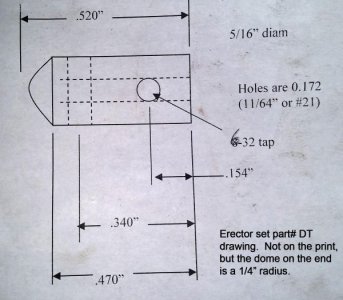
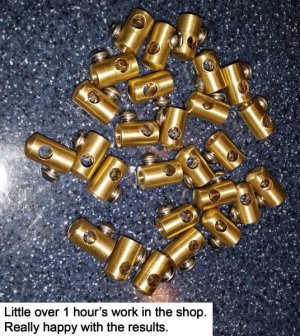
Yup, yet another reproduction Erector set part thread . . . This one is Erector part number DT, one-hole coupling. The part is made from 5/16” diameter brass with an 11/64” hole up the center, 11/64” hole through the side and a 6-32 tapped hole on the side 90 deg. from the side through hole. The top of the part has a ½” diameter “dome”.
They were used in a number of Erector set models as a railing support around the perimeter of the featured model. Erector sets primarily used 8-32 screws and axles made from 5/32” CRS round stock. A screw or short axle was run into the central hole, an axle serving as a railing ran through the side through hole. Pulleys, wheels and gears generally used 6-32 set screws for securing to axles.
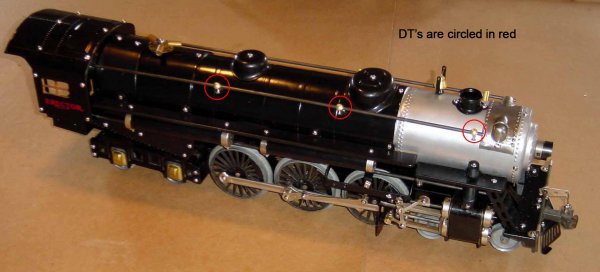
They were also used in the Erector Hudson locomotive model to hold a simulated steam line. Frankly, that’s my target market as a complete Hudson locomotive model sells for about $1000. So collectors are always looking for the small parts which get lost. The DT’s usually bring $5 - $7 each on eBay auctions or at toy shows.
One thing I enjoy about making these parts is trying to come up with better/quicker ways to turn them over. In the past, I made the DT’s by center drilling, then drilling the central hole on the lathe, parted, then went to the drill press for the cross holes. Then back to the lathe for turning the dome with a flat file. I’d make 4 or 5 per hour with that process.
Improved things a few years ago with a hardened drill bushing for putting in the cross holes. The end of the bushing was stepped for scribing a line to mark the overall length of the part and the start of the dome. I’d chuck up the brass and use a drill bushing to put in the central hole. Set the 2nd drill bushing over the brass, mark the step in the bushing for where the dome end started, set the parting tool at the end of the bushing for the overall length. Then drilled the cross holes and power tapped the 6-32 screw hole with a cordless drill. Parted, flipped the part and filed in the dome using the scribed line as a guide. Worked pretty well, could turn out around 13-14 parts per hour.
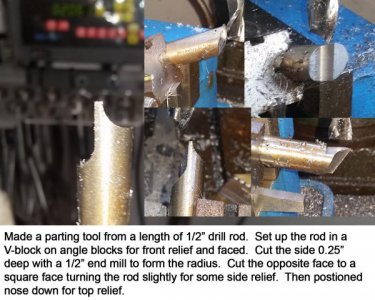
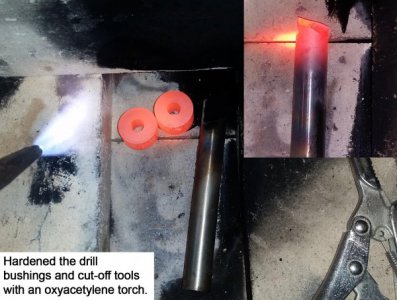
Improvement here was in the parting tool. I took a piece of ½” drill rod to the mill and cut the ½” dome profile into the rod with a ½” end mill. Put a flat on the opposite side to make a tool that’s flat on the chuck side, radiused on the other. Repositioned the drill rod to cut a rake into the nose. Did some bench grinding to get a slight relief on the straight side, then hardened the drill rod with an oxyacetylene torch. Tempered on a Thermolyne hot plate and stoned the edges to razor sharp.
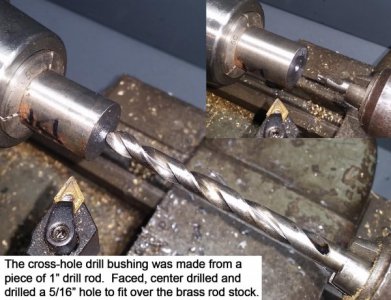
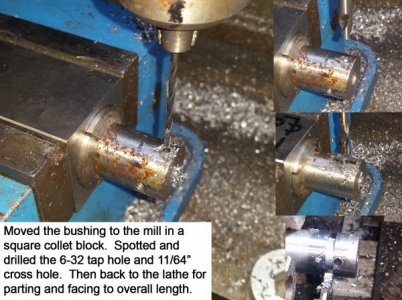
Remade the drill bushing for the lathe work. Used a 1” drill rod for the bushing. Chucked in a collet, drilled a 5/16” center hole. Then to the mill with the collet in a square collet block. Spotted and drilled the 6-32 tap hole and 11/64” through holes. Back to the lathe for parting to slightly over the overall length and faced to size. Hardened the bushings (made two) with an oxyacetylene torch.
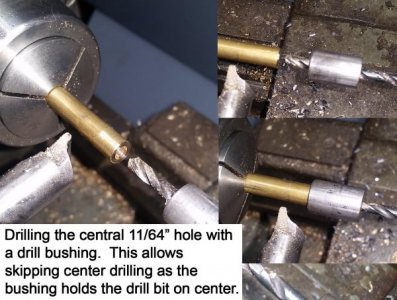
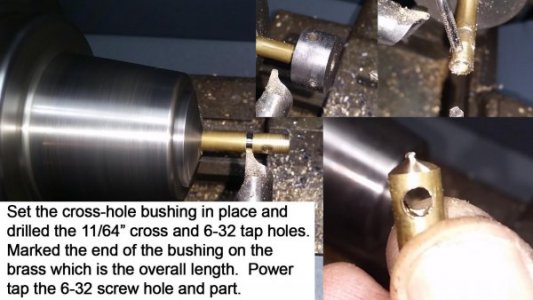
On to making parts. Chuck up the 5/16” brass rod and drill the center hole using a drill bushing to hold the drill on center. This lets me skip first center drilling, then changing to the 11/64” central hole drill bit. Next, set the 2nd drill bushing in place, scribe the end for the overall length and drill the 11/64” cross through hole. Pin the bushing in place with a drill bit and rotate the chuck to the 6-32 tap hole and hand drill. Remove the bushing and power tap the 6-32 hole. Set the parting tool to the scribed line and part.
The radiused parting tool works absolutely FANTASTIC! Big grin on my face as I started parting and saw that radius form on the end. The parts have a little nib on the end that is dusted off with a Scotchbrite wheel on a bench grinder. As an aside, the Scotchbrite wheels work GREAT! I don’t think I’ll ever polish with a buffing wheel and buffing compound again.
End result, now crank out around 20 parts per hour. Thanks for looking.
Bruce


