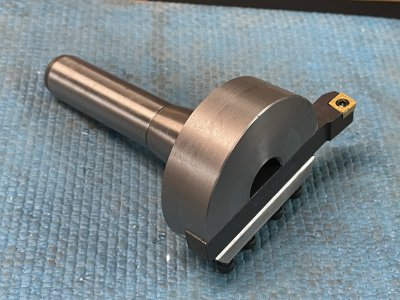
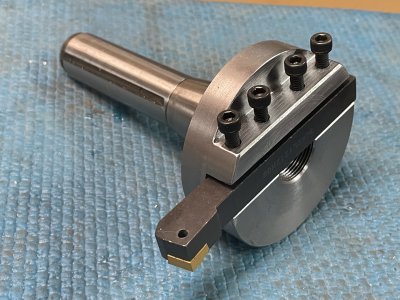
I always wanted to use the obtuse angle of rhombus lathe inserts (I primarily have C-shape inserts, with an 80° primary corner, leaving 100° corners unused). It seemed to me that the obtuse angle might work well for a fly cutter. I had a hard time finding holders for some reason, ending up with one for the CCxT 09T3_ (ANSI 31.5_) size, rather than the 0602_ (ANSI 21.5_) size inserts I had. The holder I got is a SCKCL1212H09. I've had it sitting there for quite a while. So last night I felt like doing something, and made a fly cutter using a piece of rusty unknown steel (seems like 1018) 3" diameter x 1" long, attached to an R8 arbor with 7/8"-20 threads.
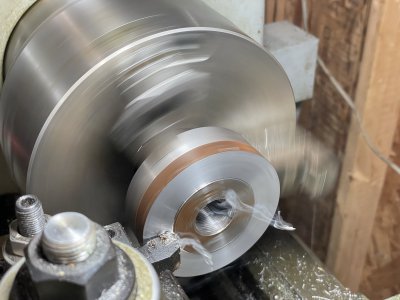
This was my first time cutting internal threads (second time cutting threads at all). It worked out well and was kind of fun. I threaded all the way through so I didn't have to worry about where to stop so much, or chip buildup in the hole. The arbor threads stop short of where the tool holder slot starts.
cleaning up the second face after threading:

the tool:


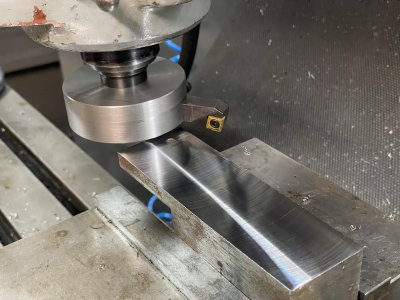
I tested it quickly on a piece of unknown steel (also 1018 I'm guessing). I was running at about 1500 rpm, with the insert at a 5" diameter, so pretty fast (1950 sfm); the insert did not show gross damage. There was minimal vibration (I think the fairly heavy holder body helps), but you can see a little bit of ripple on the surface as the tool enters the work. The cut surface was okay but not super smooth; I didn't try playing with parameters and I apparently need to tram the mill again, as it only cut on one side.

I'll have to play with it some more, including using some of the much-sharper aluminum (CCGT) inserts. It may be handy some time to be able to cut a pretty wide surface, as the cutter can extend a good bit more than it did for my test.
-jason
This was my first time cutting internal threads (second time cutting threads at all). It worked out well and was kind of fun. I threaded all the way through so I didn't have to worry about where to stop so much, or chip buildup in the hole. The arbor threads stop short of where the tool holder slot starts.
cleaning up the second face after threading:

the tool:


I tested it quickly on a piece of unknown steel (also 1018 I'm guessing). I was running at about 1500 rpm, with the insert at a 5" diameter, so pretty fast (1950 sfm); the insert did not show gross damage. There was minimal vibration (I think the fairly heavy holder body helps), but you can see a little bit of ripple on the surface as the tool enters the work. The cut surface was okay but not super smooth; I didn't try playing with parameters and I apparently need to tram the mill again, as it only cut on one side.

I'll have to play with it some more, including using some of the much-sharper aluminum (CCGT) inserts. It may be handy some time to be able to cut a pretty wide surface, as the cutter can extend a good bit more than it did for my test.
-jason
