Fixing up my new Lagun mill; X-axis lead-screw nuts on the cheap(ish).

jimmcw

Registered
Registered
Joined
Jan 23, 2024
Messages
39
I posted an earlier introductory post about my recent acquisition of a Langun FT-2 mill (here), where I explained that to move the mill into my space I had to remove the x-axis table. After doing that I decided to remove the y-axis as well, just to check things out.

This investigation revealed two issues - one was that the lubrication pump was non-functional (I'll post separately), and the other was the discovery that the x-axis lead screw nuts (it is a split-nut pair, not a single nut) were seriously worn. The lead screw itself looked reasonable - I did a semi-quantitative inspection using an acme thread-pitch guage and I could barely notice a difference in wear comparing middle of the screw to the ends. But the leadscrews themselves were seriously worn. I didn't even bother measruing, they rattled around by hand, and the acme threads were worn pretty thin.

So I called Lagun to get a quote. 1st off they wanted to suggest I replace the screw as well as the nuts, which I understand but honestly felt the screw was servicable. But I said sure - send me a quote: $1,600. Uh - no. Send me a quote for just the nuts: $689.78. And it is a single nut - I was told that they moved from the split nut design in later years (which is interseting becasue seems to me others have gone in oposite diredtion).

Nearly $700 for a bronze acme-thread nut? Ok - it has a keway too. But that's not going to happen. I could not find much info on this online, so I'm posting my journey on how I resolved this in case it can help others.
 
My first approach was "Hey - it is a Bridgeport copy, right?" And boy is it - I used instructions for Bridgeport x-table disassembly when I removed my Lagun table, and it was accurate to the nut, bolt, washer, spacer, etc. So I measured my lead screw: 1.25" Dia 5TPI ACME thread. And guess what - Bridgeport is 1.25" Dia 5TPI ACME thread. Clone! And you can buy nuts (a split pair, just like I have) for the Bridgeport for around $100.

But after some more research: no joy - the OD for the Bridgeport nuts is smaller than the Lagun. I measured my original nuts and came up with these dimensions:

Nut OD: 1.574"
Nut length: 1.375" (each)
Kewway slot is for a 6mm wide key, depth 0.115" measured form the top of the slot to it's bottom (which is not on the circumferance - slight detail).

Using a telescoping gauge, I measured the ID of the nut housing to be 1.577", and the 3 thou clearance that makes for my nut OD is consistent with a LC4 locating clearance (or a RC4 running fit - depends on unkown design tolerance). They were a tight fit, but LC4 seemed reasoanble so I latuer stuck with 1.574" as my target, though afterwards I realized that right in the Lagun quote it says 1.572", so maybe I could have made it easier on myself.

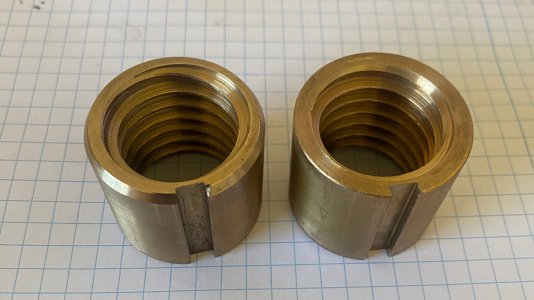
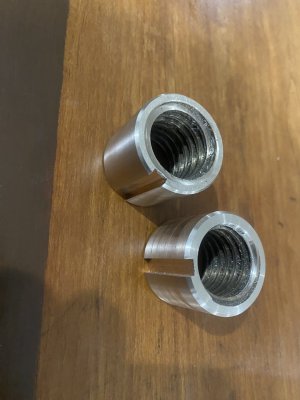
These are my origina nuts, removed from leadscrew and cleaned up.
Original nuts.JPG

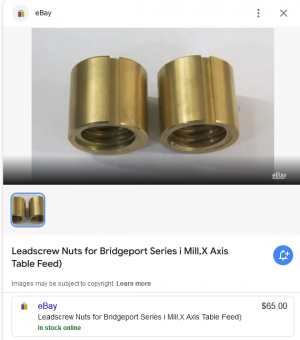
Hey -they look just like these! Only qualitatively, unfortnunately. These are cheap brass nuts, not bronze, but even bearing-bronze nuts for the Bridgeport can be found for ~$100. I love the Lagun, but I'm learning that the aftermarket for parts is not a strength.

1712870375575.png

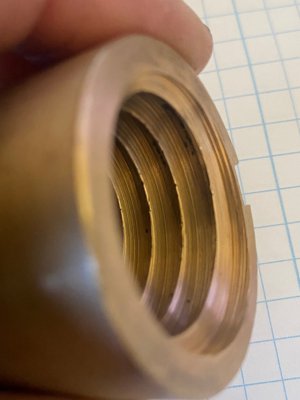
Here is the ugly shot -take a look at the threads on my original leadscrew nuts. Really (!) worn down.

IMG_4650.JPG
 
Last edited:
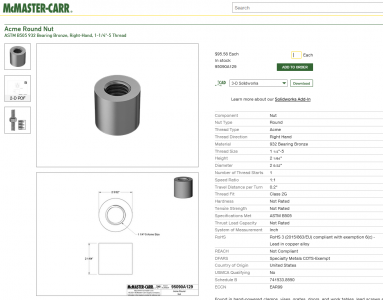
After realizing that my Bridgeport "clone" isn't a complete clone (hey - the Lagun nuts are beefier, so there), I thought I'd just make them. I have a lathe, I can turn threads. I decided that given the importance of these threads, I'd buy an internal acme cutting insert to cut the threads (rather than grind my own), and started sourcing that and an appropriately sized hunk of bearing bronze. Then I came across this, in McMaster Carr: They are the right thread, bearing bronze, larger in length and OD so I can cut them down to size ... and even though at nearly $100 ea they are expensive, I was coming up with close to that cost to buy the bronze stock and acme thread insert. And one day delivery! I decided to got his route. There was a hiccup on the delivery and it took two days instead of one. Still happy.


1712870878599.png
 
Last edited:
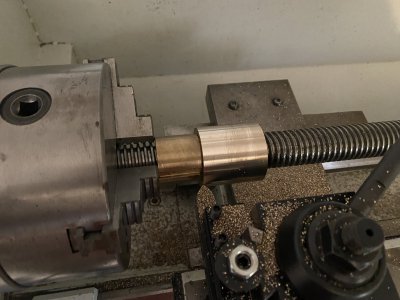
One issue was how was I going to turn them down from 2 5/32" to my target 1.574 diameter, since the length of 2-1/64 did not give much purchase for chucking given my required 1.375" length for the finished product. My solution: I put the lead-screw in the lathe using the 3-jaw chuck. I pushed it through as far as I could to minimize amount of stick-out behind the chuck, and supported the other end with a live-center.
Then I threaded one of the original lead-screws on and ran it right up to the chuck, then the new McMaster Carr screw on up against that. Then with the normal rotation of the chuck, as I turned the new nut, the forces were pushing the nut up tight against the old nut and hence the the chuck face. And the McMaster Carr nuts threaded on tight and smooth - looking promising!

Like this:
IMG_4251.JPG
IMG_4250.JPG
 
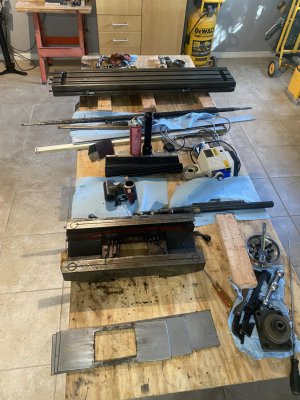
After turning down the OD, I put the new nuts in the lathe and parted them to length, easy. Next issue was the keway slot. If only I had a milling machine - it would be simmple. But my milling machine at this point looks like this:
IMG_4187.JPG

I had some suggestions on this in my other thread, suggesting ways I could do it on the lathe. And it certainnly could be done, but I was certain that I could re-ssemble my mill (using original nuts) in much less time than it would take me to make a broaching setup on the lathe, or any of the other recommendations. So that's what I did - I put it all back together with the old, worn nuts so I could cut the keway slots in the new nuts.
 
"But not so quick", I (thankfully) realized: There is a single key locking bot nuts in place, and the two nuts are supposed to be spaced apart 0.25". So the key-slots in the two nut-halves need to be properly oriented so that when they thread on and lock into the slot, there is the appropriate gap between them.

So before re-assembling the x-axis table, I first put the new nuts onto the lead screw, threaded them on until I had the 0.25" gap, and then using a machinist square I scribed an alignment mark arcoss them. I came so close to forgeting this and would have had to have pulled the whole thing apart again if I hadn't thought of it. Keep in mind if this is you in the future.

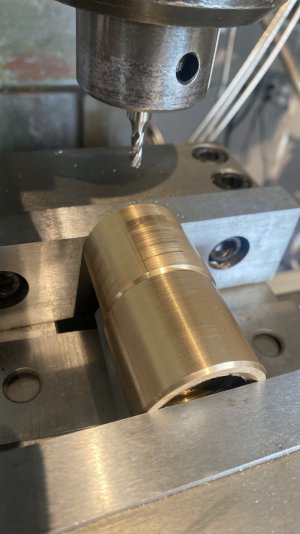
Then I re-assembled, and made some slots, using multiple passes with a 3/16" endmill to make the 6mm wide slot. You can see the alignment marks on the nuts.

IMG_4270.JPG
 
And here are my new Lagun x-axis lead-screw nuts, for $200 and some fun. I'm just getting back into metal working after 30 years, and I was pleased I was able to do this with no major screw-ups. Pun there somewhere.

(The colors is off somehow in this picture - they don't look bronze. They are. )
IMG_4272.JPG
 
I then tore apart the mill to remove the leadscrew and install the new nuts. Once you have done this it is really quick to do again - and just follow the H&W Machine Repair & Rebuilding video on YouTube the first time. I used an engine hoist the first time, to remove the (heavy!) table, but following times I used a rolling tool chest and adjusted mill knee to pace the table at same height as the top of the tool chest, and just pushed it on/off form there - easy.

Here is a picture with the leascrew installed with table off - the nuts are inside the housing in the middle. Getting both nuts aligned and pushed into the housing is a bit tricky, but with some patience. If had used a 1.572" OD on the nuts, as the Lagun quote specified, it would have been easier.
 

Attachments

  • IMG_4274.JPG
    IMG_4274.JPG
    392.2 KB · Views: 8
The final step was to adjust the backlash, and then compare the backlash at the middle and both ends of travel for the screw. I was quite pleased - I used the DRO to measure backlash, and adjusted for 10 thou at the center of the table. Then I moved to the ends - and sure enough, it was tighter - 8 thou. I ran this test 3 times, checking in the center, left and right and came up with same result of ~2-3 thou difference in backlash between the center of travel and ends of travel. I am fine with that.

After using the mill a couple of times I checked to see if there had been any "break-in" as seen in back-lash, and there was; it had increased to 18 thou. I adjusted that back to around 12 thou, and it has been steady there since.

I wish there was an aftermarket for Lagun parts like there is for Bridgeport, but I'm happy with my $200 solution for new lead-screw nuts. Hope this helps someone else down the road.
 
Very nice- you might have been able to cut the slots on the lathe, but you would have had a time figuring out a way
to mount the pieces on the carriage
 
Back
Top