- Joined
- May 7, 2014
- Messages
- 776
Love the site, Posting away in other places as a Newb is sometimes a "duck and wait" scnario on those "other sites". This place is far and above any other zone you may find ;-)
For me, as a newbie w/ 2D plasma and Zero in 3D milling! I think I've come a long way with my Son and I having a few projects to learn together. If you watch the Hoss CNC videos' w/ his X2 and G0704 videos he is really knowledgeable. HE left me w/ some impressions most of all as a new guy. Learn your machine. Understand the settings you have. Patience and careful work fosters a measure 2x and cut 1x (ok maybe cut 2 also -smile)
For myself, I needed to understand just how you use CAD to CAM to Milled metal w/ accuracy and most of all repeat-ability! (w/ backlash, w/ gauges, w/ alignments and calibrations done in advance. So that's part of this post here, What do you do for exercises to check and understand your table. And what I do as a new person. My machine was used. Not new. And in the end, had so many little things wrong that I literally can tear down anything on it and feel comfortable putting it back better than I found it.
Not sure who this may help, but I'll put this out there in the learning section.
I did the following processes as a new guy trying to get a repeatable table and basic characteristics. I.e. backlash, settings for BL. speeds and feeds, Steps per Inch, etc.
Part 1
- Get the gauges! I could not bank that our DRO was accurate? (in the end it was not!). I bought the .001 (thous) 1" deflection and a '0005' sideway's guages w/ about .25 total deflection. (sorry if some of the names are off... still learning).
- Measure to standards if you have them. Move the table .5" and then up to 1" with no backlash. From there I was able to dial in Mach3 x & Y steps values as dead on and repeatable as I could manage. I put in the backlash settings later once I had measure the BL (backlash) with my .0005 gauge. I was in X=.007 Y=.004
- W/ Mach 3 moving the table 1" and the Guages reading 1" I located my DRO guides and used the "calibration" routines to then DIAL IN the DRO.
-After these three items were done I checked the table over a few days time. I am able to keep Mach 3, DRO, and steps on X & Y w/i a few thousands. Sure it's 2-4 and even as close as 1 thousand at times. I'll assume there are so many factors i that final slop that for this Mill I will not get much more until I pull the Saddle and table off and really get in there. Besides, I really do not need anything more.
Part 2
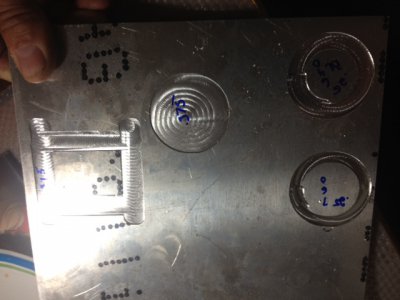
-From CAM to CAD (I use the freebie "draftsight") and setup a 2" circle. Pushed that to DolphinCAM and made so many 2" circles in Aluminum that I can whip this out in about 5mins. I keep those test/cal gcode files on the box for quick recall as well. I did this w/ Backlash ON and backlash OFF. confirmed the BL is helping. Even fine-tuned them by a small amount doing those circles.
- From CAD I made a hash type outline. Or a cross-hatch pattern area clear with a resulting island- (square) in the middle. I had been checking this for proper width, squareness, and overall consistency. Pushed that to CAM and sent it to the Metal.
Part 2.5 (added after on edit) - the CAM process and how you approach the setup and cuts on the table also requires some practice with review and expertise. The DolphinCAM product can do area clears and pockets w/ many styles. From contour, to uni direcitonal to Bi direcitonal. w/ climb milling or conventional. It was fun learning how all these worked in making my circles and cross-hatches. I will say that making a part and then telling CAM how to "cut" that part are two different animals. I'm still really not sure what's proper or best at times, but will learn and read as I do.
Part 3-
- Being new I'm not really sure what's next to play with? I have a few parts to make soon. nothing tolerant at all. But is pretty hard 1045 stuff so I'll be testing how the Mill holds tolerance after those.
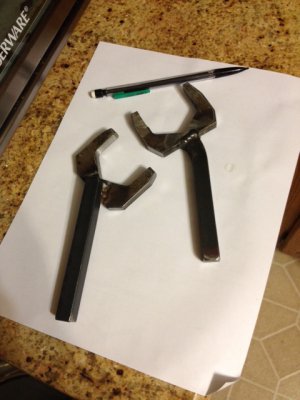
-I am looking around for some real Mill projects w/ something I really need. That said I am very happy to hear suggestions about Milling your own Tools. Would be fun to make something I need and would use. Just thinking aloud here.
PIC -of what I use to test....
Overall and in Summery - The last few months have been all about tear down, clean up/repair, and then configure/calibrate with repeatability/predictability on what will come off the table.
Time to get into a real project.
Thanks everyone and enjoy the site!
CG.

For me, as a newbie w/ 2D plasma and Zero in 3D milling! I think I've come a long way with my Son and I having a few projects to learn together. If you watch the Hoss CNC videos' w/ his X2 and G0704 videos he is really knowledgeable. HE left me w/ some impressions most of all as a new guy. Learn your machine. Understand the settings you have. Patience and careful work fosters a measure 2x and cut 1x (ok maybe cut 2 also -smile)
For myself, I needed to understand just how you use CAD to CAM to Milled metal w/ accuracy and most of all repeat-ability! (w/ backlash, w/ gauges, w/ alignments and calibrations done in advance. So that's part of this post here, What do you do for exercises to check and understand your table. And what I do as a new person. My machine was used. Not new. And in the end, had so many little things wrong that I literally can tear down anything on it and feel comfortable putting it back better than I found it.
Not sure who this may help, but I'll put this out there in the learning section.
I did the following processes as a new guy trying to get a repeatable table and basic characteristics. I.e. backlash, settings for BL. speeds and feeds, Steps per Inch, etc.
Part 1
- Get the gauges! I could not bank that our DRO was accurate? (in the end it was not!). I bought the .001 (thous) 1" deflection and a '0005' sideway's guages w/ about .25 total deflection. (sorry if some of the names are off... still learning).
- Measure to standards if you have them. Move the table .5" and then up to 1" with no backlash. From there I was able to dial in Mach3 x & Y steps values as dead on and repeatable as I could manage. I put in the backlash settings later once I had measure the BL (backlash) with my .0005 gauge. I was in X=.007 Y=.004
- W/ Mach 3 moving the table 1" and the Guages reading 1" I located my DRO guides and used the "calibration" routines to then DIAL IN the DRO.
-After these three items were done I checked the table over a few days time. I am able to keep Mach 3, DRO, and steps on X & Y w/i a few thousands. Sure it's 2-4 and even as close as 1 thousand at times. I'll assume there are so many factors i that final slop that for this Mill I will not get much more until I pull the Saddle and table off and really get in there. Besides, I really do not need anything more.
Part 2
-From CAM to CAD (I use the freebie "draftsight") and setup a 2" circle. Pushed that to DolphinCAM and made so many 2" circles in Aluminum that I can whip this out in about 5mins. I keep those test/cal gcode files on the box for quick recall as well. I did this w/ Backlash ON and backlash OFF. confirmed the BL is helping. Even fine-tuned them by a small amount doing those circles.
- From CAD I made a hash type outline. Or a cross-hatch pattern area clear with a resulting island- (square) in the middle. I had been checking this for proper width, squareness, and overall consistency. Pushed that to CAM and sent it to the Metal.
Part 2.5 (added after on edit) - the CAM process and how you approach the setup and cuts on the table also requires some practice with review and expertise. The DolphinCAM product can do area clears and pockets w/ many styles. From contour, to uni direcitonal to Bi direcitonal. w/ climb milling or conventional. It was fun learning how all these worked in making my circles and cross-hatches. I will say that making a part and then telling CAM how to "cut" that part are two different animals. I'm still really not sure what's proper or best at times, but will learn and read as I do.
Part 3-
- Being new I'm not really sure what's next to play with? I have a few parts to make soon. nothing tolerant at all. But is pretty hard 1045 stuff so I'll be testing how the Mill holds tolerance after those.
-I am looking around for some real Mill projects w/ something I really need. That said I am very happy to hear suggestions about Milling your own Tools. Would be fun to make something I need and would use. Just thinking aloud here.
PIC -of what I use to test....

Overall and in Summery - The last few months have been all about tear down, clean up/repair, and then configure/calibrate with repeatability/predictability on what will come off the table.
Time to get into a real project.
Thanks everyone and enjoy the site!
CG.

Last edited:

