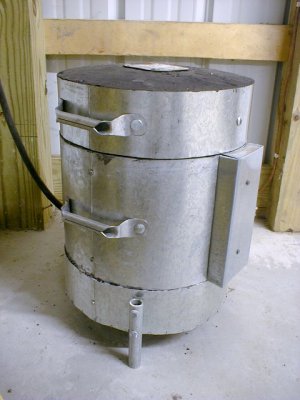
I made an electric furnace about 10 years ago.
Sorry, no build pics, you will need to visualize.
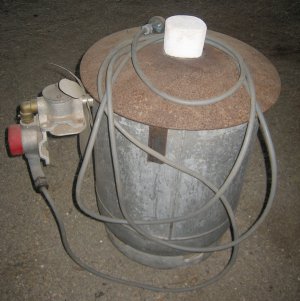
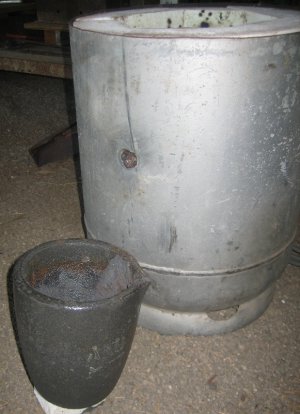
I started with a 45kg propane cylinder and cut it down to suit.
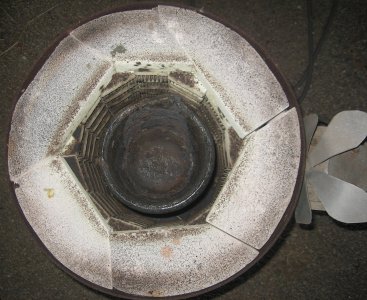
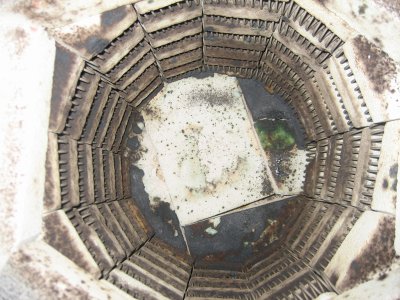
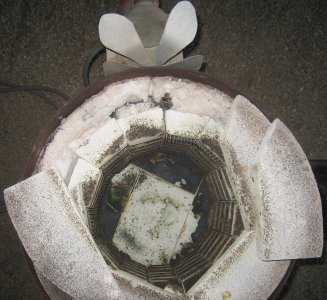
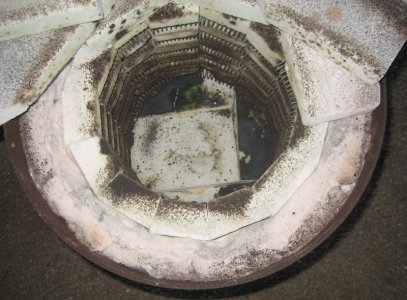
There is a steel grate in the bottom giving about a 100mm air gap, then 50mm of kaowool, and two 35mm layers of alumina fire brick.
All the bricks were full size, (115 x 230 x 75mm) and I split them with a carpenters’ saw to get the thickness I wanted.
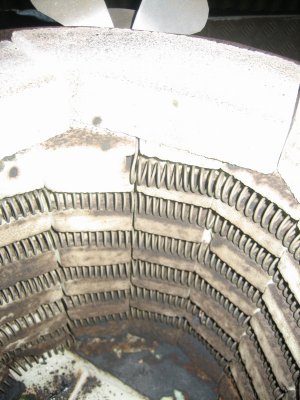
I built the lining with 13 bricks standing vertically and mitred all the edges to fit them together. I then drew a pencil line spiralling my way up from the bottom to the top, and numbered the bricks to facilitate replacing them.
After I took it apart I used a coarse round file to carve a groove for the element. I think it took about a day of filing. The bricks are easy to cut and file to any shape but they wear the tools badly.
Then 2 more layers of kaowool were placed in between the brick and the side of the tank. A layer of bricks on their flat to cover the top edges, and the kaowool.
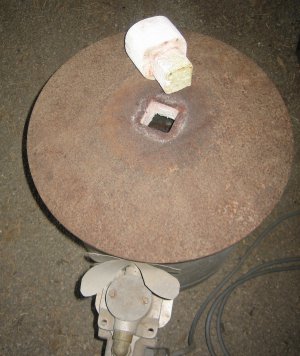
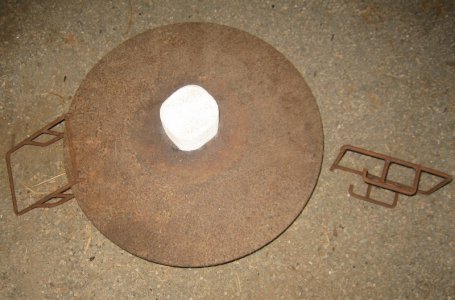
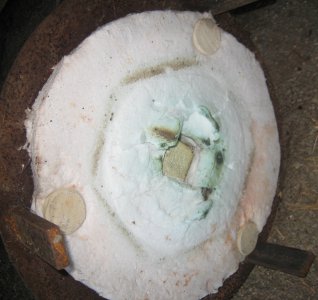
The lid is a plough disc, with a couple of clay buttons and stainless wire to tie the kaowool to it. The centre hole made a handy inspection port so I just cut a brick to suit. I made removable handles so they are never too hot to touch. The 3 legs help locate the lid on the top and also keep it off the ground when it is removed.
I got the alumina bricks from a bulk supplier who had an open box that he couldn’t sell so I was the lucky duck on the spot and got them for a song. I bought a whole box of kaowool blanket and still have most of that left over.
The junction box is aluminium and stands off on a brass threaded pipe. The element wire is insulated in clay beads, (normally found on thermocouples) and joins to the mains flex at a ceramic terminal block. The flappy thing is just a heat shield/heat sink to keep the heat out of the jbox as much as possible.
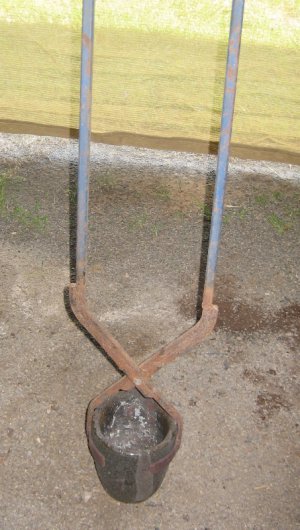
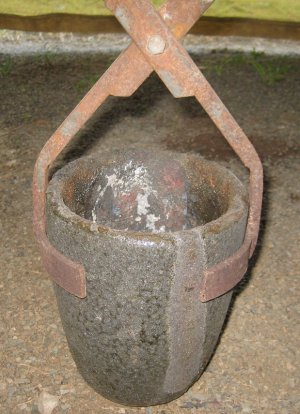
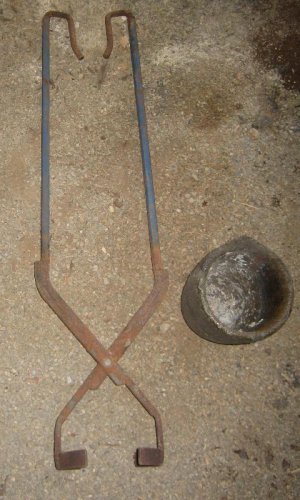
The tongs fit neatly inside and grip the crucible gently but securely.
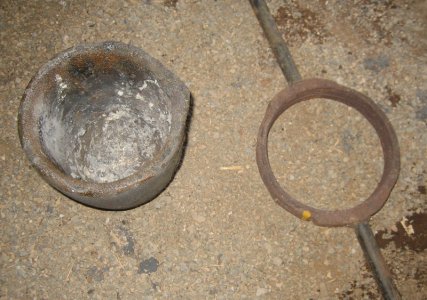
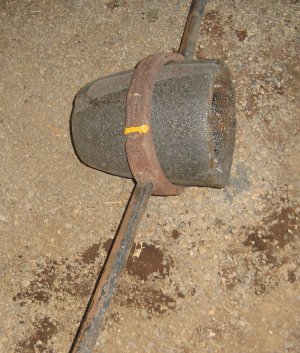
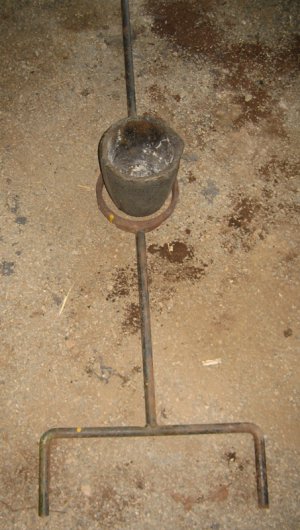
I made the shank from 6mm rod and crafted loops of slightly different diameters, (to suit the taper of the crucible), before welding them together. I just sit the pivoting end on a block of wood to suit the pouring height and tip it with the crank handle.
On the plus side, it is clean operating, BUT, I would still never run it inside, the fumes from molten metals need to be well vented. Temperature control is simple. Start up and shut down by 1 switch. Easily portable.
On the minus side, yes they can be a bit slow to heat, the elements are fragile, and difficult to repair, expensive to replace, although I am only on my 2nd after 10 years of intermittent use. And possibly more costly to run than a gas unit.
I melt mainly bronze, so I am operating in the 1000°C range. It takes about 5 hours to reach a pour temperature for about 5kg of bronze. I just switch it on, and go and have breakfast. I use a graphite crucible. You should preheat the crucible to glowing red, (takes about 1 hour), before adding metal in small amounts. As the melt gets deeper you can add larger pieces to the pot. As I am waiting for the metal to heat I use this time to ram up my mold and get everything ready. Usually end up having lunch while the metal has a last soak before pouring. I wouldn’t say the waiting time is a drag as there is always something to do in the shed. I have never melted ally so I don’t know how long it would take but I think the 1 hour preheat wouldn’t need to be quite so long at the lower working temp and certainly the actual melting time of ally would be much faster.
Cheers Phil
