- Joined
- Feb 17, 2014
- Messages
- 97
Howdy Folks,
Sorry for the length of this post… I wanted to share the rebuild of my little Dumore Series 37 sensitive drill press. I bought it from a fellow HM’er in Kansas. It arrived in good mechanical condition, though needed new bearings and a lot of rust removal.
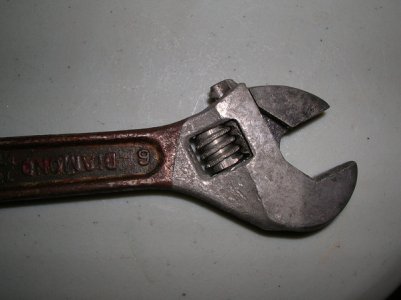
I did some research on rust removal and decided to try Evapo-Rust, especially since it was available locally (which is a miracle). I’ve not done much de-rusting, as I live in the desert, where it’s dry. Things just don’t rust much here. I can say that I was very impressed with the Evapo-Rust. It’s reusable until exhausted, water soluble and cleans up easily. I tested it first on an old rusted wrench that was left outside for many years. It stripped the rust very quickly and thoroughly.
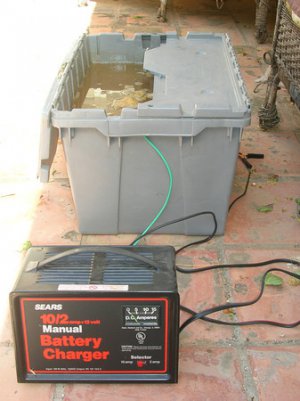
I proceeded to disassemble the drill. I ordered and installed replacement bearings. I cleaned the rust from all the small parts with Evapo-Rust. But due to the size, I removed the rust from the base, by electrolysis. Although it was my first time with this process, it also worked very well, though was a lot messier.
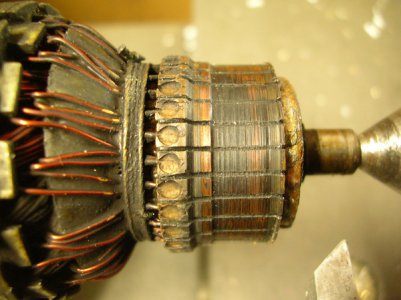
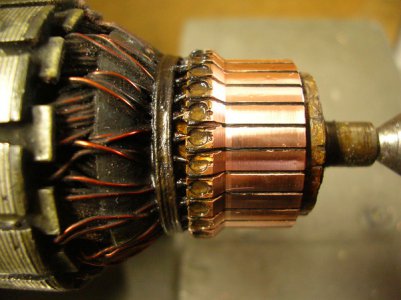
I had contacted Dumore to see if they had parts or manuals for the drill. They do not support this drill any longer, but emailed me a manual for it. While going through the manual, it recommends turning the motor commutator, if it’s worn, which mine was. I chucked it in a 3-jaw and center in the tail stock of my lathe. I checked the concentricity of the commutator, and other motor parts, with respect to the shaft. Everything was within 0.005” so I machined thin cuts off the cummutator, until fresh copper was exposed, and the ruts were gone. I also polished it with fine carbide paper (400, 600 and 1500 grit). I also cut the insulator from between the copper. This also helped clean the edges of the copper. I was nervous about doing this, but it turned out to be pretty straightforward.
Before
After
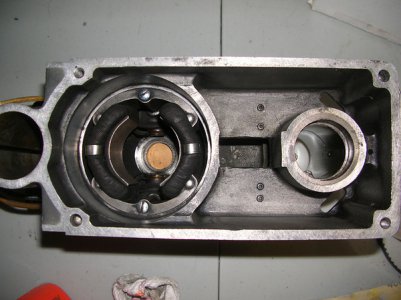
I cleaned up the inside of the unit from old carbon brush material.
Before:
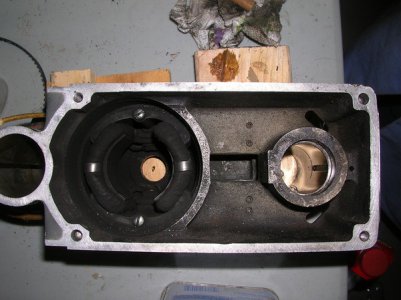
After:
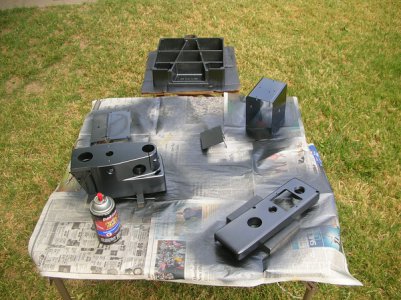
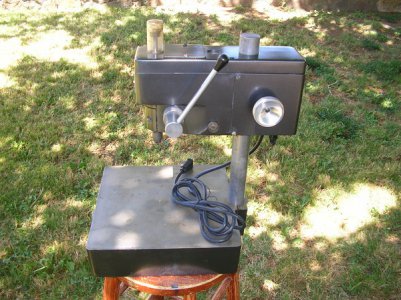
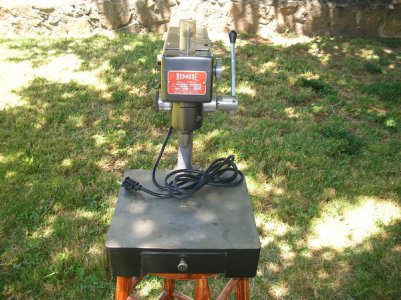
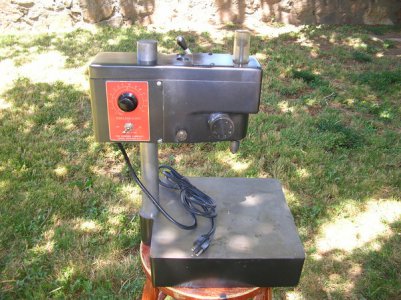
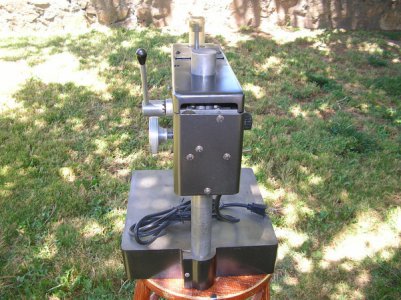
I then proceeded to wet-sand the parts in preparation for new paint. Prior to painting I hit everything with a rag, damp with Acetone. It’s difficult to tell from the photos, but the drill’s original paint has a metal flake paint finish. We drive Toyotas, and I noticed that it was very similar in color to my wife’s 4-Runner. So I checked at Pepboys for a Dupli-color paint for this Toyota. To my surprise, it was a near perfect match.
Overall, this was a very cool project and a great little drill. I love the adjustable tension knob (opposite the handle), that allows the retraction pressure of the quill to be adjusted. Very nice!
Before:
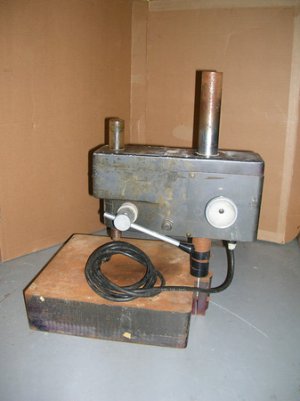
After:
I have lots of photos posted here, for those that are interested in seeing more:
http://www.ericchesak.com/Galleries/DIY/Dumore-Drill-Rebuild/
I'm still missing a couple screws. I wanted to replace a few of the slotted screws with button head socket head screws. So next order from McMaster will include these. The unit runs really well, had adjustable speed from low, to about 16k RPM. I already mentioned the adjustable tension. It also had adjustable depth stop and a cool little drawer on the front for the chuck key and other goodies. It is also missing a spring that fits on the column, which helps prevent the chuck from crashing into the base when the head is moved. It's on its way from the seller and I'll clean it up and get it installed after arrival.
The depth stop is housed underneath the small acrylic tube on the top of the drill head. It looks like it was installed wrong one time and the depth stops rubbed against the inside. So I may try machining a new one from lexan or acrylic rod. But it would be only for appearance.
The machine runs true and is smooth. Should work well for what I need it for.
Thanks for looking. Hopefully this is helpful for others. If there are any questions, please let me know.
Eric
Sorry for the length of this post… I wanted to share the rebuild of my little Dumore Series 37 sensitive drill press. I bought it from a fellow HM’er in Kansas. It arrived in good mechanical condition, though needed new bearings and a lot of rust removal.
I did some research on rust removal and decided to try Evapo-Rust, especially since it was available locally (which is a miracle). I’ve not done much de-rusting, as I live in the desert, where it’s dry. Things just don’t rust much here. I can say that I was very impressed with the Evapo-Rust. It’s reusable until exhausted, water soluble and cleans up easily. I tested it first on an old rusted wrench that was left outside for many years. It stripped the rust very quickly and thoroughly.

I proceeded to disassemble the drill. I ordered and installed replacement bearings. I cleaned the rust from all the small parts with Evapo-Rust. But due to the size, I removed the rust from the base, by electrolysis. Although it was my first time with this process, it also worked very well, though was a lot messier.

I had contacted Dumore to see if they had parts or manuals for the drill. They do not support this drill any longer, but emailed me a manual for it. While going through the manual, it recommends turning the motor commutator, if it’s worn, which mine was. I chucked it in a 3-jaw and center in the tail stock of my lathe. I checked the concentricity of the commutator, and other motor parts, with respect to the shaft. Everything was within 0.005” so I machined thin cuts off the cummutator, until fresh copper was exposed, and the ruts were gone. I also polished it with fine carbide paper (400, 600 and 1500 grit). I also cut the insulator from between the copper. This also helped clean the edges of the copper. I was nervous about doing this, but it turned out to be pretty straightforward.
Before

After

I cleaned up the inside of the unit from old carbon brush material.
Before:

After:

I then proceeded to wet-sand the parts in preparation for new paint. Prior to painting I hit everything with a rag, damp with Acetone. It’s difficult to tell from the photos, but the drill’s original paint has a metal flake paint finish. We drive Toyotas, and I noticed that it was very similar in color to my wife’s 4-Runner. So I checked at Pepboys for a Dupli-color paint for this Toyota. To my surprise, it was a near perfect match.

Overall, this was a very cool project and a great little drill. I love the adjustable tension knob (opposite the handle), that allows the retraction pressure of the quill to be adjusted. Very nice!
Before:

After:


I have lots of photos posted here, for those that are interested in seeing more:
http://www.ericchesak.com/Galleries/DIY/Dumore-Drill-Rebuild/
I'm still missing a couple screws. I wanted to replace a few of the slotted screws with button head socket head screws. So next order from McMaster will include these. The unit runs really well, had adjustable speed from low, to about 16k RPM. I already mentioned the adjustable tension. It also had adjustable depth stop and a cool little drawer on the front for the chuck key and other goodies. It is also missing a spring that fits on the column, which helps prevent the chuck from crashing into the base when the head is moved. It's on its way from the seller and I'll clean it up and get it installed after arrival.
The depth stop is housed underneath the small acrylic tube on the top of the drill head. It looks like it was installed wrong one time and the depth stops rubbed against the inside. So I may try machining a new one from lexan or acrylic rod. But it would be only for appearance.
The machine runs true and is smooth. Should work well for what I need it for.
Thanks for looking. Hopefully this is helpful for others. If there are any questions, please let me know.
Eric
