Dial test indicator calibration question

craigsoutdoorsports

H-M Supporter - Silver Member
Joined
May 1, 2022
Messages
15
Had an attempted setup in my mill crash today. Luckily it was just while trying to zero things out setting up to cut. But…… the piece crashed into my mityotuo dial test indicator.

Everything seems to move and work, but how can I check to make sure it doesn’t need calibration?
 
Set it up with the tip against the side of your vise or something similar, zero the indicator, then move the table a known dimension and see if the indicator moves the same amount.

You will need to have the indicator square to whatever you have the tip against... and the tip needs to be at a 15 degree angle...

It's likely fine if it still operates smoothly.

-Bear
Thanks. I was thinking of different ways with what I have on hand. Will test it in the morning when I get back to the shop
 
I occasionally check the calibration of my instruments, just on "general principles". They never actually have needed adjustments. I use a surface plate, well my version of a surface plate. A flat piece of clean steel would do as well, I'm sure. Using an adjustable clamp, I set the instrument some arbitrary height above the plate and then check with guage blocks every 0.01 inch, or so. Not very accurate in the absolute calibration, but close enough to test the instrument. A guage block might be a little much, a piece of metal scrap and a micrometer would serve.

.
 
Calibration for a DTI can be a relative thing; we do not use them for measurement for the most part, only for squaring things up and indicating circular features to be on center; bottom line, it does not much matter.
I agree with John here . I've never used a DTI for measurement purposes . Setting up as stated above . I use drop indicators on surface plates etc .
 
DTI and other gear-driven dial indicators are what I might call floating zero/locked rate mechanisms, which really can't be out of calibration if the movement is working. It might be possible to break teeth off the gears, but that is kind of freaky.

For instruments with a first-order response (linear measurement, mass, etc.), the minimum you need to perform a calibration is adjustment of both the slope and the intercept. Anything less is a calibration verification.
 
I know the old Starrett back plunger indicators could only be calibrated for repeatability NOT linearity. Not sure about the indicators with the movable leg but would guess the same.
 
Being a totally mechanical thing with the movement of the probe and the needle linked by gears and levers, I can't imagine how DTI's can be calibrated. The mechanical components can get damaged but it cannot be made accurate again by calibration.

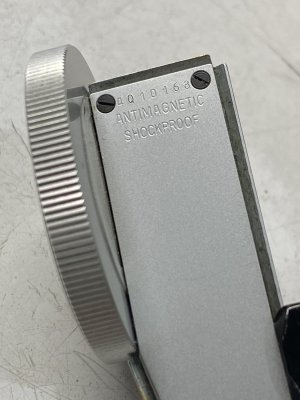
I dropped my swiss-made DTI onto the floor the other day after using it for 20 years and thought that was the end of it but much to my amazement, there was zero damage. The maker really meant it when they printed the little word "shockproof" on the body of the DTI.

IMG_7115.jpg
 
Last edited:
Back
Top