- Joined
- Mar 10, 2012
- Messages
- 125
Finally completed the 3 axis install and got the display formatted. I got the X axis finished first and since it was a pretty straight forward mount, I didn't include pics here. Next I made a carrier for the Y axis that bolted to 3 existing 1/4-20 tapped holes in the knee, and cut and drilled a hanger for the reader that would line up with 2 existing holes inthe saddle. With everything lined up on the scales and readers, I cut and drilled a mounting bracket for the display arm and mounted it to the turret:
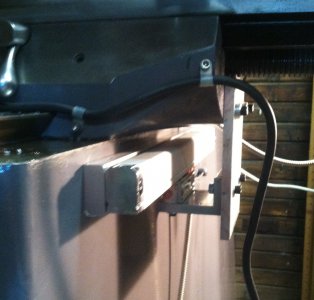
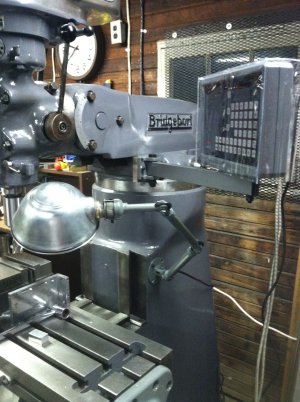
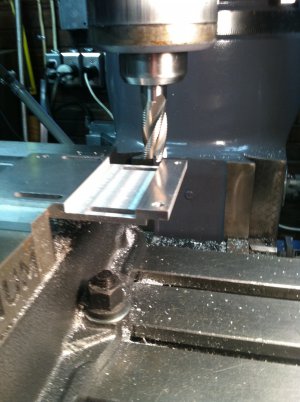
Next I decided to mount the Z axis scale to the turret a little differently than the examples I found online. First I made a couple mounting brackets that would set the carrier out from the turret by 5/8"to allow me to run the reader carrier bracket behind it instead of around it.Then I mounted and trammed the carrier so that it was perpendicular to the knee, and machined one of the supplied brackets to slide behind the carrier:
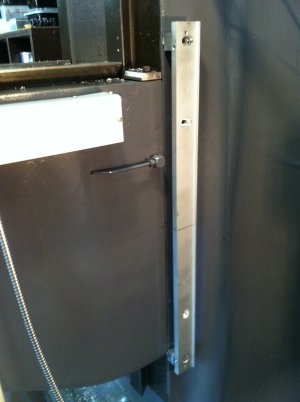
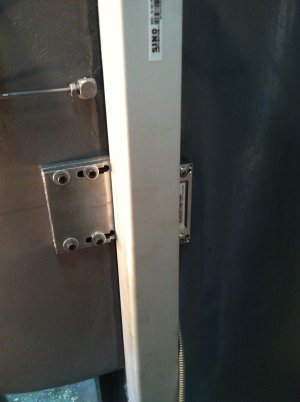
Next, I mounted the scale to the carrier, and drilled and tapped four 10-32 holes in the knee and mounted the bracket to it. I lined it up with the reader and fastened it up with 2 #10-32 screws and bolted on thescale cover:
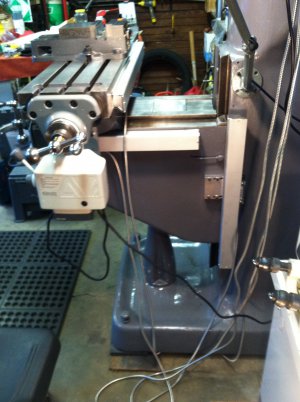
The scales and readout are functioning as well as I expected (I'd used the SINO 2 axis unit on my Grizzly for a couple years with no problem). I'm very happy with the results. I'm still considering getting a quill scale and looking into an A-B box setup to switch back and forth between it and the knee on the readout.


Next I decided to mount the Z axis scale to the turret a little differently than the examples I found online. First I made a couple mounting brackets that would set the carrier out from the turret by 5/8"to allow me to run the reader carrier bracket behind it instead of around it.Then I mounted and trammed the carrier so that it was perpendicular to the knee, and machined one of the supplied brackets to slide behind the carrier:


Next, I mounted the scale to the carrier, and drilled and tapped four 10-32 holes in the knee and mounted the bracket to it. I lined it up with the reader and fastened it up with 2 #10-32 screws and bolted on thescale cover:


The scales and readout are functioning as well as I expected (I'd used the SINO 2 axis unit on my Grizzly for a couple years with no problem). I'm very happy with the results. I'm still considering getting a quill scale and looking into an A-B box setup to switch back and forth between it and the knee on the readout.


