Clamping A Round Part On The Mill Table?

RVJimD

Active User
Registered
Joined
Dec 30, 2014
Messages
259
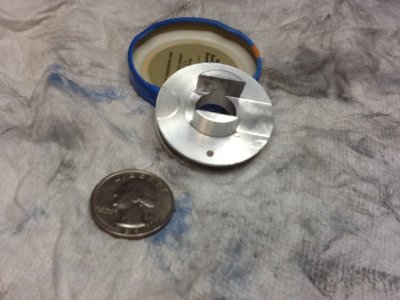
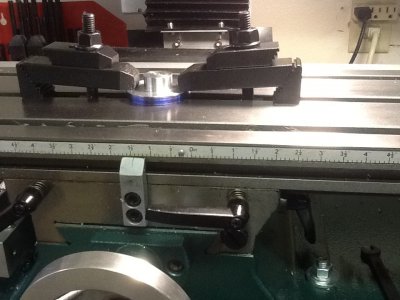
image.jpg image.jpg I wanted to check and see if I'm headed down the correct path.

I am about to cut a 1/2" slot across the center of this brake rotor. This is version 2 of the rotor, we decided to make the hub 7/8" instead of 3/4" to allow some more material remaining for the dog ears. Also, on this one I decided to cut the 1/2" slot on the mill now, before I make the O ring groove so that the clamps don't try to crush the groove.

I'm just starting out with the mill so I'm looking for confirmation or tips on better ways to set this up and cut the slot.

The "completed" rotor is the version 1, smaller one.
 
I think you are doing just fine. If you wanted to fine tune your set-up. Maybe make the straps more flat (not so much an angle) with the part surface. And have the studs as close to the part as possible. And maybe put a piece of aluminum beer can or similar under each strap at the part to prevent marring….Good Luck, Dave.
 
Last edited:
I have always made the toes level with the work piece not angled. With it angled it grips at the point only. If it's level it applies that force over a wider area which gives better grip. If this were a CNC operation I would be suggesting a lower profile mounting option, but as for manual it should be fine.
 
Great tips, thanks. I wondered about the angle...

Jim
 
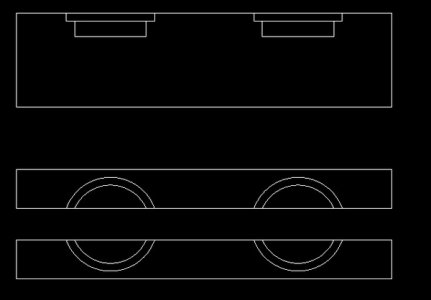
If you do a lot of them buy some aluminum flat stock the same or taller height and thicker then your vice hard jaws. drill and tap for mounting and install in vice then place a spacer between them and tighten vice, mill 1 or more round pockets in place at correct diameter and depth, remove spacer place parts in pockets tighten vice and mill multiple parts.
Like so
o7sexe.jpg
 
Guys,

Thanks for the tips, really helps and nice to know I have a community of machinists who are friendly and willing to read my "new guy" posts and offer your experience!

Nels, thank you for the site!

Now, on with the brake project...

I learned a few more things yesterday after and during the slotting operation.

First, I thought it was a great idea to mill the slot for the landing gear leg before the slot in the rotor for the O ring. Well the milled slot made it much harder to hold the part in the lathe chuck. What I should have done was finished the slot for the O ring as before and then use shim stock to support the flange when clamping to the milling table or hold it as described in the post above, or use my 3 jaw on the mill table to hold the part.

I got one side just about finished. But, I decided the wall thickness of the drums look excessive so I thinned it down so it looked good. Got the slot made with a little bit removed to fit the boss for the trailing link. I think there will be clearance and anti rotation should work ok. But, I forgot that the O ring determines the size of the drum and rotor.
So unless I can find an O ring to fit the bigger drum I'm going to basically start over, again.

One of those moments when I do my Homer Simpson impersonation, Doh! No problem really, I feel like I am learning so many things during the process and I don't mind making another set. Still having a blast!

The O.D. of the new, bigger, hard to find an O ring that size is 1.576"

Jim
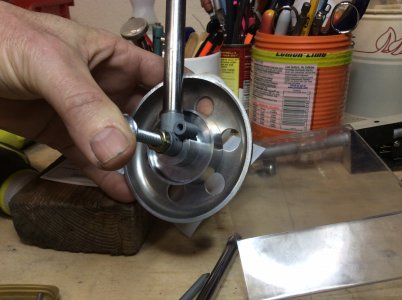
image.jpg
 
View attachment 98405 View attachment 98406 I wanted to check and see if I'm headed down the correct path.
I am about to cut a 1/2" slot across the center of this brake rotor. This is version 2 of the rotor, we decided to make the hub 7/8" instead of 3/4" to allow some more material remaining for the dog ears. Also, on this one I decided to cut the 1/2" slot on the mill now, before I make the O ring groove so that the clamps don't try to crush the groove.

I'm just starting out with the mill so I'm looking for confirmation or tips on better ways to set this up and cut the slot.

The "completed" rotor is the version 1, smaller one.

Nice job
 
View attachment 98405 View attachment 98406 I wanted to check and see if I'm headed down the correct path.

I am about to cut a 1/2" slot across the center of this brake rotor. This is version 2 of the rotor, we decided to make the hub 7/8" instead of 3/4" to allow some more material remaining for the dog ears. Also, on this one I decided to cut the 1/2" slot on the mill now, before I make the O ring groove so that the clamps don't try to crush the groove.

I'm just starting out with the mill so I'm looking for confirmation or tips on better ways to set this up and cut the slot.

The "completed" rotor is the version 1, smaller one.

Nice job
 
John,

Thanks! The guy that owns the airplane is out shopping for metric O rings as I write this.

We found some standard O rings with the ID size but they were a tiny bit too big, so maybe the metric ones will fit.

Jim
 
Back
Top