Bushing install

mf294-4

Active User
Registered
Joined
Apr 22, 2012
Messages
82
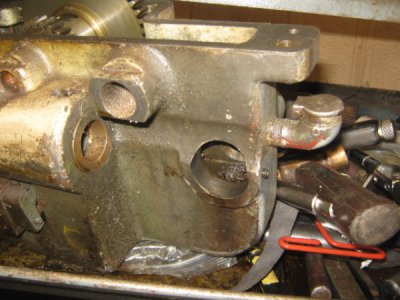
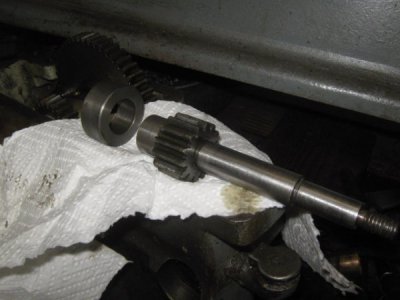
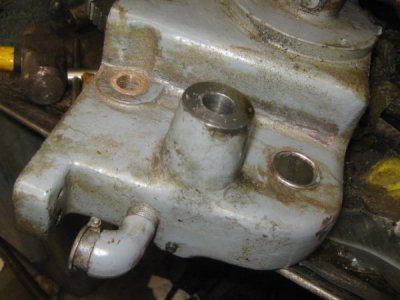
Trying to tighten up the hand wheel on the carriage on my lathe. Shaft is .625 so I got some .625 x .750 bronz bearings. Back side has a 1.5 steel collar with a .875 id. Housing to be drilled is approx. 2.5". Thought I would make a temp collar for the back side with a .625 id and put a .625 rod in to try and line it up on the mill table by lining it up with a collett. Will be hard to secure it to the table. Do I drill, bore or use a end mill or do I just drill it . Started this project 2 weeks ago then had back surgery. Not to smart. Now I am going to have to get help lifting the gear box. Any other ideas on lining it up?IMG_0092.JPGIMG_0093.JPGIMG_0094.JPG
 
I have to do the same thing for my 11 in Rockwell lathe
 
It's the same as any other bore. Your gonna have to block the piece so it's perfectly in line with spindle horizontal and vertical. How you achieve that is up to you. You can use wood just make sure your piece won't move with the forces of the cutter you decide.
I would use indicators to align the bore. Or a turned rod a exact of the bore about six inches long sticking out. Then indicate the rod. That would need to be precisely made and fit. If it were me I would use a reamer for your finish cut or a boring bar if you have one small enough.
 
Does the milled surface where it bolts to the bottom of the carriage have dowel pin holes?
 
I’d just drill and ream. Boring it will make its own hole, so it must be dialed up perfect. A drill or reamer will follow an existing hole.
 
If wear is the reason for the sloppy fit, you will need to indicate the hole in with an indicator on the unworn part of the bore.
If you just drill and ream an egg shaped hole, the center of your hole will move and the center distances of the mating gears will be hosed up.
 
Boring it will make its own hole, so it must be dialed up perfect.

That is the point. You following the existing hole is not gonna be accurate. The centerline of the shaft is gonna dictate the engagement of your gear mess. In reality you should be measuring off a machined surface as a reference. You only get one time to cut this don't wanna make a mistake!
 
Does the milled surface where it bolts to the bottom of the carriage have dowel pin holes?
The dowel pins stayed with the carriage. The gear box has a couple of gears coming out of the top of it. May be a major project to get them out.
 
As I had suspected, the dowels serve more then one purpose. Often they are used for locating the casting during machining, as you have noticed there are no easily held surfaces as cast. One begins by roughly positioning the raw casting and facing one surface establishing a reference in one axis and dowel pin holes establish the second axis position. All subsequent work is done from these positions which allows one to move the parts between machines and maintain position.

Producing parts from as cast shapes is not terribly difficult IF you do it from start to finish, if indeed one is required to machine a finished cast part you will need to determine the reference points from which all other features are related.

This is as clear a mud I imagine.
 
Back
Top