- Joined
- Oct 30, 2019
- Messages
- 225
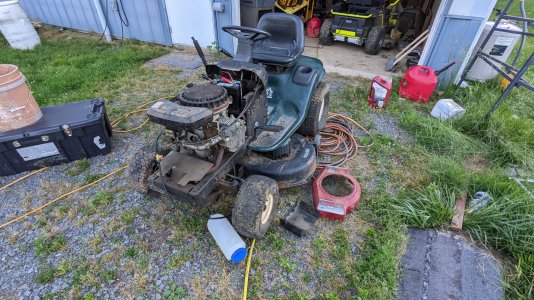
A neighbor has borrowed my beater riding mower, that we use for garden/utility abuse and seasonal purposes (leaf bagging, plowing our gravel driveway, etc). That neighbor has expressed interest in buying it to maintain some grass around the entertainment pavillion they hold some events at. I'm fine with this, since I got it for free a few years ago, repaired and been using it- and I have another one parked behind the shop that has a better engine and transmission. I just need to get it running before I can commit to selling the other one.
The person I bought this from parked it due to starter issues. The (plastic) starter gear was totally torn to bits, but after replacing that it was cranking very slow even with a healthy battery. I did notice a bit of lateral play in the output shaft of the starter, and started to wonder if it had some bearing wear. I pulled the starter again to investigate further.
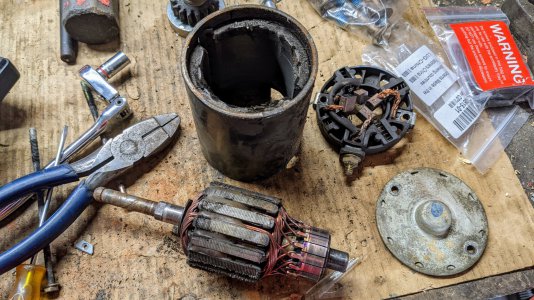
After disassembly, I saw that the bearing journal on the output side of the rotor was galled, and the laminations of the armature showed signs that it was making contact with the field magnets.
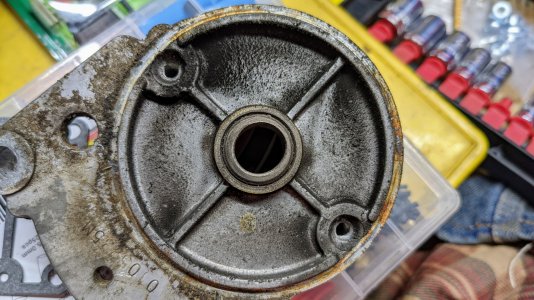
Unsurprisingly, the front bushing had indeed been egged out exactly in the direction that forces are generated from the gear meshing with the flywheel. I wouldn't be surprised if this contributed to the previous owner's worn out starter gear, since the starter gear's rotating axis would not be parallel to the crankshaft, possibly encouraging more wear as the teeth go in and out of mesh.
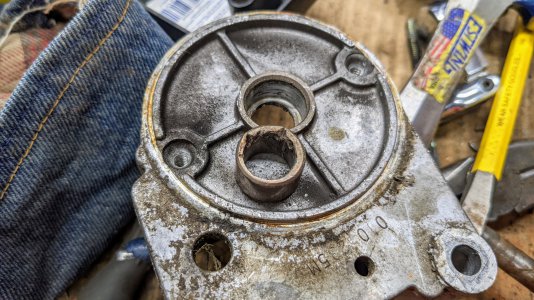
I drove this bushing out with a chisel, it seems to just be a mild steel bushing instead of being hardened; or a softer bearing material. I suppose this makes sense, if the goal is to be on the harder end of the spectrum without damaging the motor shaft itself.
I took a piece of brass off the shelf, for ease of machining and faster repair for now. I can always make another one out of steel later if this wears out too quickly.
Cleaned up the OD quickly, got within .010 of finish dimension. Then center and pilot drilled the ID. the motor shaft measured as .4935", and no letter drill comes particularly close enough to that. 12.5mm is .4921 -- this seems like it should be very close, especially once I clean up the motor shaft's bearing journal with some emery.
Unsurprisingly with this being a brand new drill bit, it was trying to self-feed into the brass quite a bit, but I did get the drilling done. I was hoping the drill bit would drill a bit oversize to get .493 or 4935, however it did measure at 492 or 4925 after drilling. I'll take it...
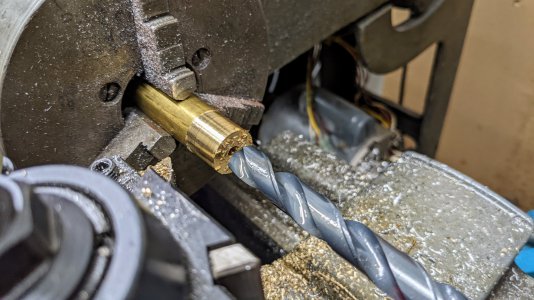
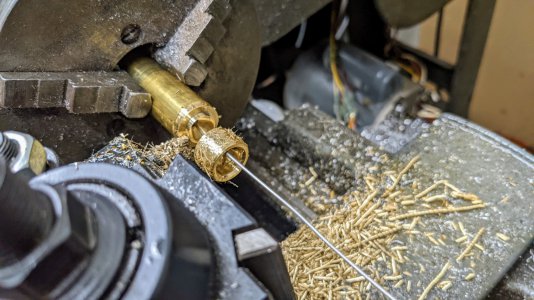
Took the OD to final dimension (.717 +/0 .0005) for a light press fit into the front cap of the starter. Chamfered and parted off.
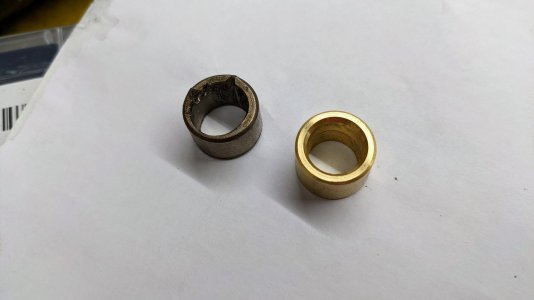
New and old side by side, this picture does make the nearer side of the old bushing look worn pretty good.
Pressed into the end cap, with a drop or two of green locktite just to be safe that it doesn't spin during the first few uses. I did test fit the bushing on the shaft before installing it, and it was a bit tighter on the shaft than I wanted -- which made sense with the measurements mentioned above.
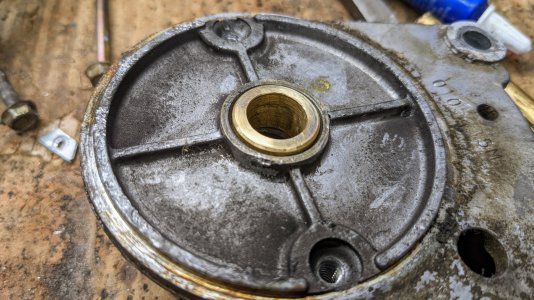
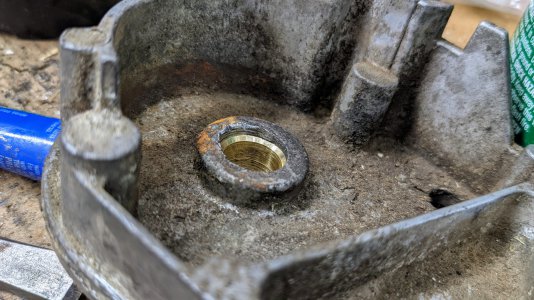
Installed, you can see the interior surface finish isn't pristine for a couple reasons. One is the drill self-feeding too aggressively at the lathe; the other is during dry fitting and finding it to be a tight fit -- there was a bit of chewing/galling going on. This is fine, as it did help open the hole up a touch more. Being brass, the lack of surface clean surface finish inside really can't hurt; if anything it helps give a bit more features for grease to hold onto.
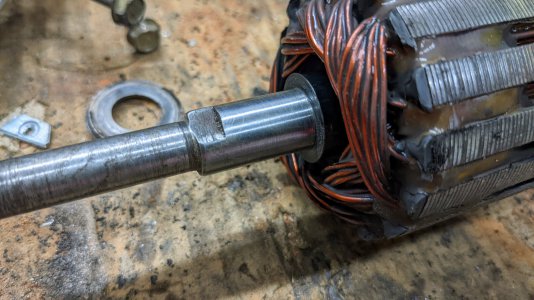
Cleaned the rotor up pretty aggressively with emery to get a polished finish and improve the fit. I think ideally it would have been a .001" running fit? Just spitballing, but I definitely would err on the sight of tighter-is-better when I know the surfaces are going to wear over time. If this was hardened-steel-on-hardened-steel with oil lubrication, then the proper fit would likely be more important to get the right contact patches and oil film characteristics.
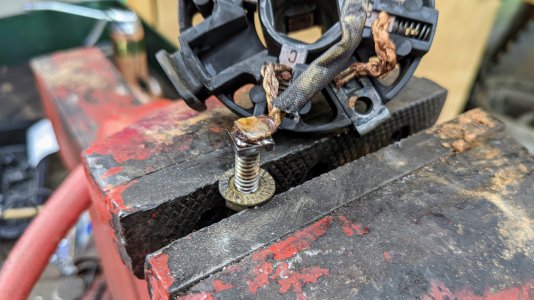
To finish reassembly, I did need to repair where the positive brushes connect to the positive stud. With no abuse, this broke loose during disassembly -- a quick solder job to put it back together. This shouldn't get hot enough that normal electronics solder should melt; and I had a good enough fitup/cross-sectional area for the solder joint that it should be a good low-resistance connection.
Reassembled with fresh grease on both bushings, and installed in the mower. Works great!
.... Well, after the second try. On the first try, the jesus clip that holds the bendix gear and spring on the shaft flew off, showering the gravel driveway in front of the shop with the 4-5 starter bits (retainer cap, c-clip, wave spring, coil spring, starter gear) . I found most of them, just not the C-clip itself. I made a new one out of some music wire.
Then reassembled, installed -- and now it works great.
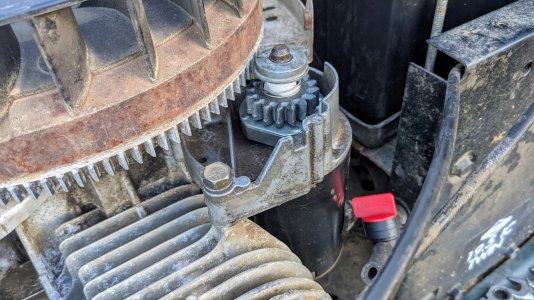
The mower looks to have good bones, a strong opposed twin Briggs 19.5hp engine. The usual carb cleaning/rebuild, rotted fuel lines, and I had to get a couple of cups of water out of the bottom of the fuel tank (the fuel was otherwise decent). The mower deck needs a rebuild, then she's ready for a second life.
As always, thanks for reading
The person I bought this from parked it due to starter issues. The (plastic) starter gear was totally torn to bits, but after replacing that it was cranking very slow even with a healthy battery. I did notice a bit of lateral play in the output shaft of the starter, and started to wonder if it had some bearing wear. I pulled the starter again to investigate further.

After disassembly, I saw that the bearing journal on the output side of the rotor was galled, and the laminations of the armature showed signs that it was making contact with the field magnets.

Unsurprisingly, the front bushing had indeed been egged out exactly in the direction that forces are generated from the gear meshing with the flywheel. I wouldn't be surprised if this contributed to the previous owner's worn out starter gear, since the starter gear's rotating axis would not be parallel to the crankshaft, possibly encouraging more wear as the teeth go in and out of mesh.

I drove this bushing out with a chisel, it seems to just be a mild steel bushing instead of being hardened; or a softer bearing material. I suppose this makes sense, if the goal is to be on the harder end of the spectrum without damaging the motor shaft itself.

I took a piece of brass off the shelf, for ease of machining and faster repair for now. I can always make another one out of steel later if this wears out too quickly.
Cleaned up the OD quickly, got within .010 of finish dimension. Then center and pilot drilled the ID. the motor shaft measured as .4935", and no letter drill comes particularly close enough to that. 12.5mm is .4921 -- this seems like it should be very close, especially once I clean up the motor shaft's bearing journal with some emery.
Unsurprisingly with this being a brand new drill bit, it was trying to self-feed into the brass quite a bit, but I did get the drilling done. I was hoping the drill bit would drill a bit oversize to get .493 or 4935, however it did measure at 492 or 4925 after drilling. I'll take it...

Took the OD to final dimension (.717 +/0 .0005) for a light press fit into the front cap of the starter. Chamfered and parted off.

New and old side by side, this picture does make the nearer side of the old bushing look worn pretty good.

Pressed into the end cap, with a drop or two of green locktite just to be safe that it doesn't spin during the first few uses. I did test fit the bushing on the shaft before installing it, and it was a bit tighter on the shaft than I wanted -- which made sense with the measurements mentioned above.

Installed, you can see the interior surface finish isn't pristine for a couple reasons. One is the drill self-feeding too aggressively at the lathe; the other is during dry fitting and finding it to be a tight fit -- there was a bit of chewing/galling going on. This is fine, as it did help open the hole up a touch more. Being brass, the lack of surface clean surface finish inside really can't hurt; if anything it helps give a bit more features for grease to hold onto.

Cleaned the rotor up pretty aggressively with emery to get a polished finish and improve the fit. I think ideally it would have been a .001" running fit? Just spitballing, but I definitely would err on the sight of tighter-is-better when I know the surfaces are going to wear over time. If this was hardened-steel-on-hardened-steel with oil lubrication, then the proper fit would likely be more important to get the right contact patches and oil film characteristics.

To finish reassembly, I did need to repair where the positive brushes connect to the positive stud. With no abuse, this broke loose during disassembly -- a quick solder job to put it back together. This shouldn't get hot enough that normal electronics solder should melt; and I had a good enough fitup/cross-sectional area for the solder joint that it should be a good low-resistance connection.

Reassembled with fresh grease on both bushings, and installed in the mower. Works great!
.... Well, after the second try. On the first try, the jesus clip that holds the bendix gear and spring on the shaft flew off, showering the gravel driveway in front of the shop with the 4-5 starter bits (retainer cap, c-clip, wave spring, coil spring, starter gear) . I found most of them, just not the C-clip itself. I made a new one out of some music wire.
Then reassembled, installed -- and now it works great.

The mower looks to have good bones, a strong opposed twin Briggs 19.5hp engine. The usual carb cleaning/rebuild, rotted fuel lines, and I had to get a couple of cups of water out of the bottom of the fuel tank (the fuel was otherwise decent). The mower deck needs a rebuild, then she's ready for a second life.
As always, thanks for reading

