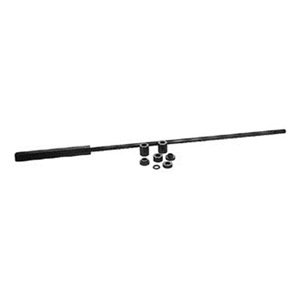
I have rebuild I would guess over a 100 heads over the years and the heads have 1 washer. It harder then the hex and top of the spindle spline. It has the same principle you use a flat washer under any other bolt. 2 soft metals that are tightened together will gall up. Many time I see the Hex is longer as short folks can reach it easier. Plus the more threads in the collet the better. Take a look at your collets and see how long the threads are. Spray the draw bar threads with Dykem bluing and screw it in and remove it and check how far it goes in. The more the better I always say.
One more issue is the setscrew key that fits in the the keyway in the collet. Many times they are squished, burred or broken off. They are easy to repair. Crank your knee down so you can feed your quill down a few inches. On the back of the quill you will find a 1/4 20 set screw, some have 2 screws, others are lock-tighted, dig out any chips in the hex hole and remove it. they should be snug and not tight. Then use a pin spanner if you have one or insert a hard dowell pin in one of the 2 holes on the bottom of the holes drilled in the bottom of the bottom spindle bearing retainer ring and hit it with a punch counter clockwise and remove it. Never use a punch directly in the holes as they are soft and will get damaged! Then with a flashlight look around the spindle for another set screw as this is the key.
These usually have 2 screws too, a thin one behind the key screw to lock it in so it doesn't turn. Some of the imports loc-tite them in. You can buy new one from High Quality Parts, Bridgeport or there a couple of others who sell Bridgeport parts. Or if you are careful you can make one, but I would buy one, less hassles. The whole time being careful to keep every thing clean. When it is out look at the threads on the cap and you will see a hole drilled into the threads, this is where the set screw goes in.
Check it for burrs and then screw the cap back in. and tighten it until you can see the hole and insert the set screw and only tighten it snug and put the lock screw in behind it and tighten it a little harder or loc-tite it with the blue easy to remove type. Many times you can tighten the retaining ring tighter when the bearings are worn. Be sure not to over tighten it with the spanner or dowel pin, but make it snug to tight, not biggest hammer you have tight.
If the set screw hole goes past the set screw more then a 1/4" then you cn use a # 8 drill to drill a new set screw hole, just deep enough for the set screw to go in past the threads. be careful not to drill to deep and drill it straight in, not angled. Also be careful not to tighten that set screw as it will warp the quill and make it egg shaped and the quill will get stuck about 1" from the top. Good luck and if you need more advice on Bridgeport or other brands of repair or rebuilding come over the the Machinery Rebuilding forum and ask me or PM me. I am a moderator on that forum as I am a Journeyman Machine Tool Rebuilder, by trade.

