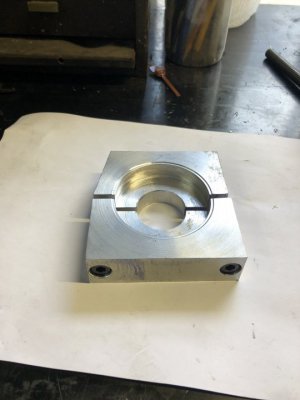
Boring head question

Aukai

H-M Supporter - Diamond Member
H-M Lifetime Diamond Member
Joined
Oct 4, 2016
Messages
7,164
I need to open up an aluminum bracket so that it clamps on to a 1 3/4" roll cage. It started out as a 1 5/8" clamp, and has multi faceted interior diameter for clamping on the pipe. I can bore it out round, but I don't know how much under to make it for crush holding, it will be for holding a weight bar to add weight to the chassis. I'm also trying to find the RPM to run the Criterion boring head at, online info looks like CNC RPM. The bracket is about 1" thick also. Thank you
 
I can't help you but I'm going to hang out and learn the answer myself.
 
I would make the bore about 0.002 less than the pipe, then take a cut on the face the parting line of about 0.010 or so for a bit more squish. Maybe run the boring head at about 100 RPM or so.
 
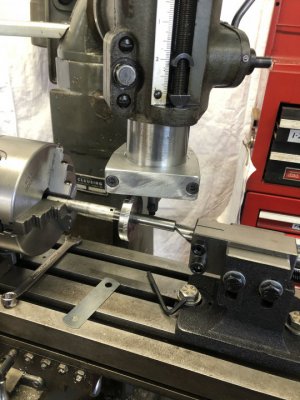
I made a clamp for my mill to lock the spindle so I could mark new lines on a lathe dial . I sandwiched a file card between the halves , made the bore to size . Fits very well
 

Attachments

  • C3A214FF-01B8-4511-A872-714FD91938B2.jpeg
    C3A214FF-01B8-4511-A872-714FD91938B2.jpeg
    45.8 KB · Views: 23
  • 9C23E19E-DDF4-4980-B354-F710404F3E08.jpeg
    9C23E19E-DDF4-4980-B354-F710404F3E08.jpeg
    89.5 KB · Views: 22
I would make the bore about 0.002 less than the pipe, then take a cut on the face the parting line of about 0.010 or so for a bit more squish. Maybe run the boring head at about 100 RPM or so.
I'm with Jim on this. .002 undersized hole with facing the parting line if necessary to gain a little more clamping force. I wouldn't exceed .002 undersized (.003 or more), because it will likely distort the clamp.
For aluminum, start with the 100 +/- rpm, but dont be afraid to adjust a bit if you need to improve finish. I say this because finish may come into play considering what you are asking the clamp to do.
 
I would put a .006 shim between the two sections then bore to size. Other option would be to bore to size then take about .003 off both faces.
 
My sample bar was 1.756, and we opened up the gap a little bit more trying to anticipate paint thickness. I hade no measurements from him to go on, I hope it works. We plunged with a 1.750 end mill at 385 rpm, my bar fit very well, I'll see how it goes on the car.
 
Aukai, blue the caps and check for the contact pattern on the bar. The more solid contact, the less the wear and distortion of the mounts. Adjust if needed for solid full contact with space between the blocks like your picture shows.
 
I checked each one with my stock tightened in the bracket, and there were no air gaps except at the parting line space. I'm waiting for the report on the car
 
Back
Top