Hi all,
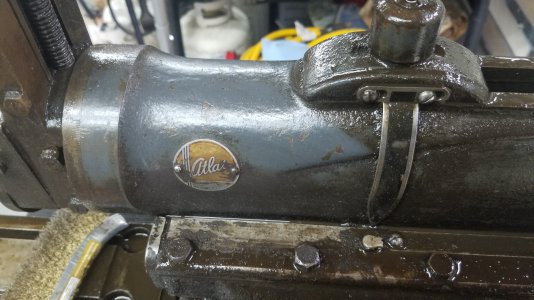
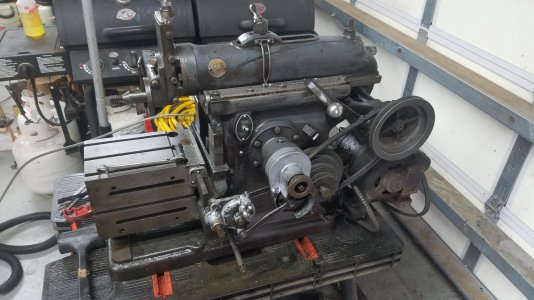
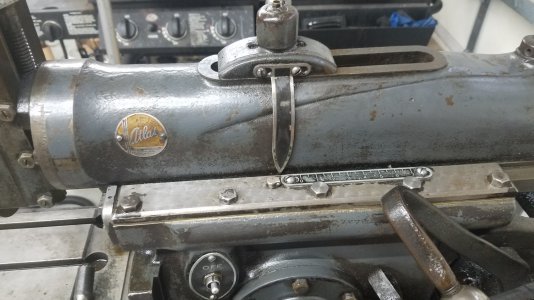
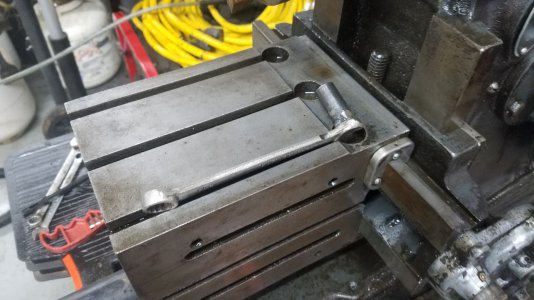
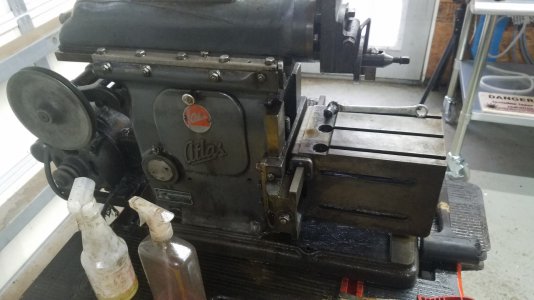
I just picked up an Atlas 7B metal shaper today. It's in pretty solid condition, but super nasty, and has been sitting unused for close to 10 years according to the previous owner. My intent is to do a fairly complete restoration and add it to my shop.
I'm certain I'll be needing lots of help along the way, but for now I have just a couple main questions if anyone can offer some advice:
1) What's the best and safest way to remove the grime from the machine without damaging the existing finish? I haven't decided if I'm going to repaint it or not, so I don't want to destroy whatever paint may exist. I'm not really planning to do a full teardown right away, so the old soap and water in a bucket method probably won't work for me. I'm looking for suggestions of cleaners or solvents that are effective, but not too harsh. I've heard good things about Castrol Super Clean. I also have used the "Totally Awesome" stuff from the dollar store with success on other projects in the past. Thoughts?
2) The power cord (and likely other internal wiring) is totally rotted. The outer sheathing is that black woven stuff, and it's nearly gone. What would be a suitable, nice looking replacement? I believe the motor to be a 1/2HP, 120V single phase. I will confirm that once I remove enough grime to read the plate.
3) What's the best way to remove/flush the old grease and oil, and what should I be replacing it with? I know modern lubricants are far superior to what was available 40yrs ago, so if I can re-lube it with something better, I'd like to.
4) The handle that fits every major adjustment on the machine is missing. Anyone know a source for a replacement? It has a 3/8" square drive, and is about 6" long. There's one for sale on eBay (can't post the link), but they want $100 for it!
5) The little balanced ball crank on the top vertical adjustment is broken. I have both parts. Is there any way to fix it, or do I need to find a replacement? If it must be replaced, anyone have a source? I can't seem to find any that small on eBay or my other common sources.
Thanks in advance for any advice. I'm super excited to dig into this machine. This will be my first restoration, and it's also my first American iron machine. I have a Jet 1236ps lathe that I love, but this thing is on a whole other level of craftsmanship. I've included a couple photos to begin documenting the journey...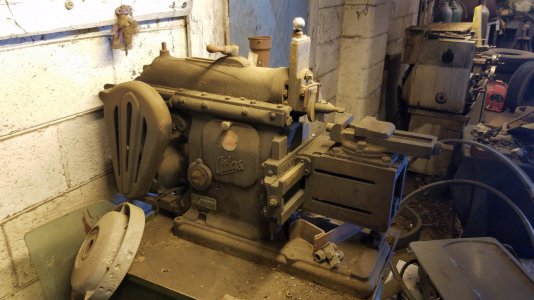
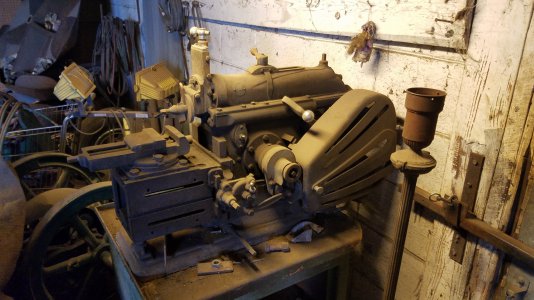
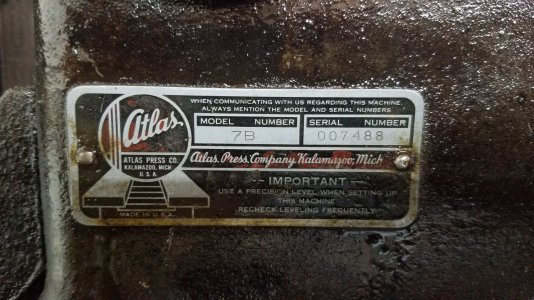
-Mike
I just picked up an Atlas 7B metal shaper today. It's in pretty solid condition, but super nasty, and has been sitting unused for close to 10 years according to the previous owner. My intent is to do a fairly complete restoration and add it to my shop.
I'm certain I'll be needing lots of help along the way, but for now I have just a couple main questions if anyone can offer some advice:
1) What's the best and safest way to remove the grime from the machine without damaging the existing finish? I haven't decided if I'm going to repaint it or not, so I don't want to destroy whatever paint may exist. I'm not really planning to do a full teardown right away, so the old soap and water in a bucket method probably won't work for me. I'm looking for suggestions of cleaners or solvents that are effective, but not too harsh. I've heard good things about Castrol Super Clean. I also have used the "Totally Awesome" stuff from the dollar store with success on other projects in the past. Thoughts?
2) The power cord (and likely other internal wiring) is totally rotted. The outer sheathing is that black woven stuff, and it's nearly gone. What would be a suitable, nice looking replacement? I believe the motor to be a 1/2HP, 120V single phase. I will confirm that once I remove enough grime to read the plate.
3) What's the best way to remove/flush the old grease and oil, and what should I be replacing it with? I know modern lubricants are far superior to what was available 40yrs ago, so if I can re-lube it with something better, I'd like to.
4) The handle that fits every major adjustment on the machine is missing. Anyone know a source for a replacement? It has a 3/8" square drive, and is about 6" long. There's one for sale on eBay (can't post the link), but they want $100 for it!
5) The little balanced ball crank on the top vertical adjustment is broken. I have both parts. Is there any way to fix it, or do I need to find a replacement? If it must be replaced, anyone have a source? I can't seem to find any that small on eBay or my other common sources.
Thanks in advance for any advice. I'm super excited to dig into this machine. This will be my first restoration, and it's also my first American iron machine. I have a Jet 1236ps lathe that I love, but this thing is on a whole other level of craftsmanship. I've included a couple photos to begin documenting the journey...


-Mike
Last edited:

